Why is there a bag of screws in the box with new skates?

Those brand new skates have finally been delivered! The box is opened excitedly, and as the skates are pulled out of their tissue paper cradle, a small plastic bag of screws falls out and hits the floor. What are they for, and should they be used? Somewhat remarkably, new skates seem to come with a distinct lack of clear instructions, so in this article let’s look at what those screws are for, because as it turns out they are important!

How Are The Blades Attached To The Boot?

There are two main ways in which blades are attached to figure skating boots (screwed or riveted), and four ways they’re most likely to be purchased (riveted, fully pre-mounted blade, partially pre-mounted blade, separate boot and blade).

Low Price Skates / Rivets

Boots towards the low end of each manufacturer’s product range may well have a blade which has been permanently riveted to the boot. The blade therefore can not be removed, but should also be pretty secure as a result.

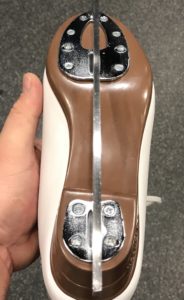
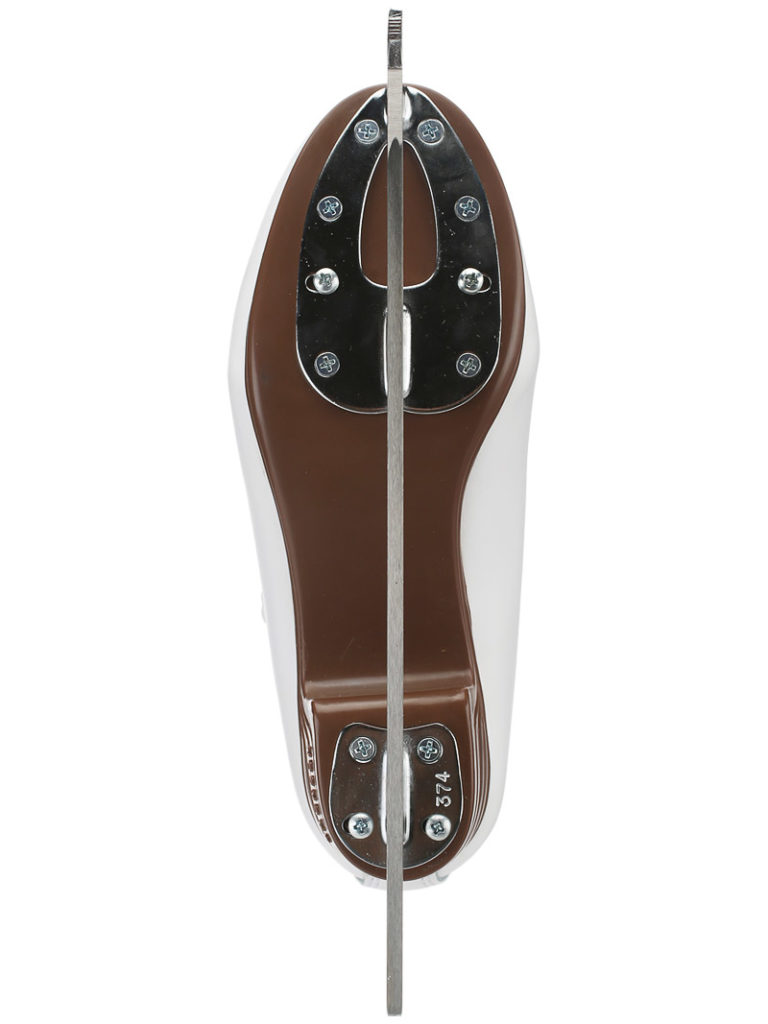
Jackson Softec Tri-Grip Sole (image from Ice Warehouse)

It is in theory possible on some boots to drill out the rivets and re-mount the blade if necessary, but that’s very much an “At Your Own Risk” kind of task. Beyond that, the good news is that if you bought skates with riveted blades, in all likelihood there’s nothing you need to do, and there would not have been a bag of screws in the box.

Low to Mid-Range Skates / Fully Screwed

Some skates are delivered with the blade fully attached using screws.

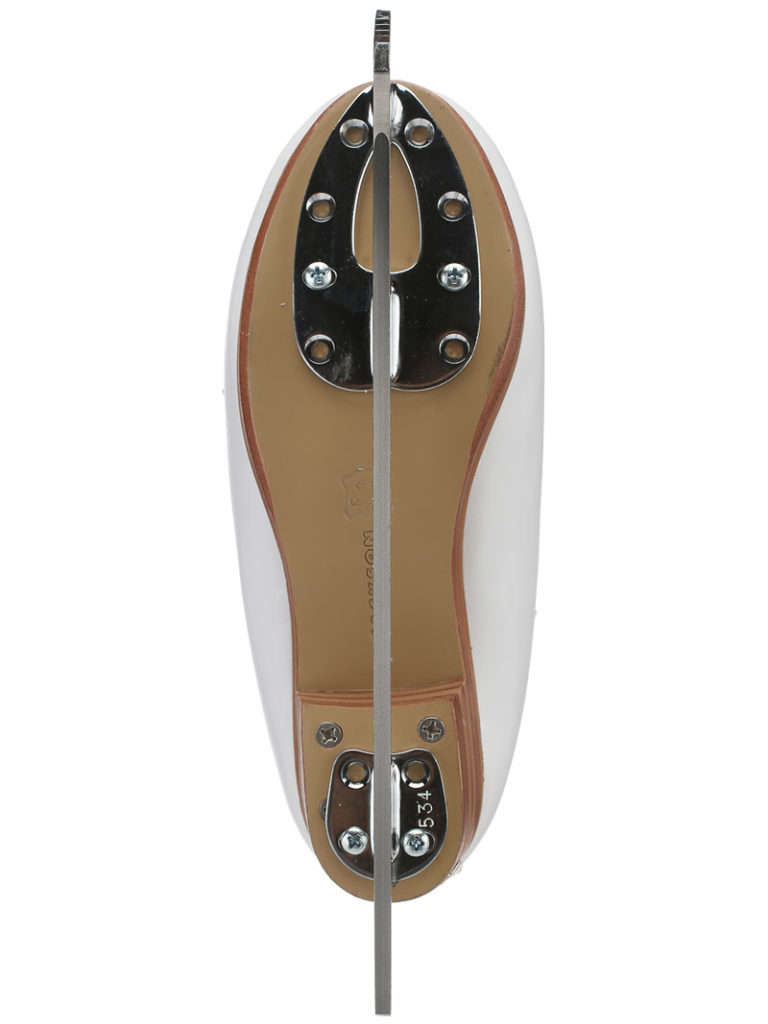
Jackson Classique Sole

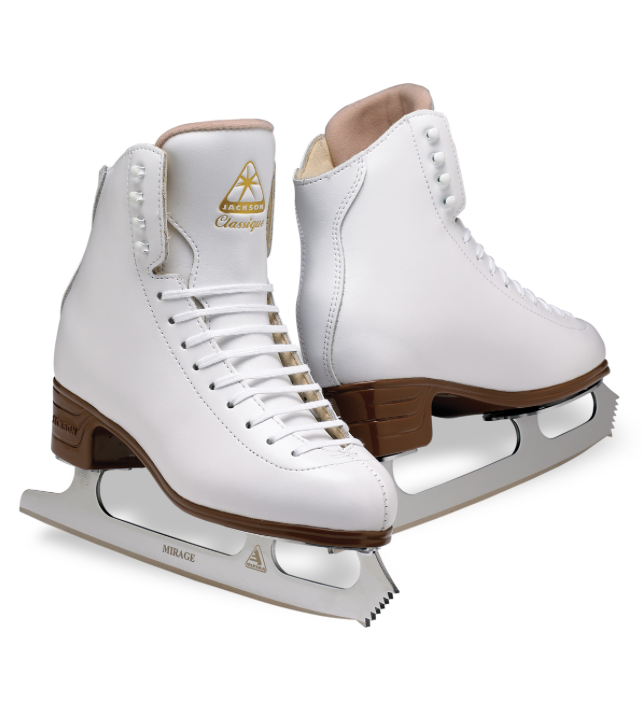
For example, the Jackson Ultima Classique skate (which my youngest child has) comes with a Jackson Mirage blade screwed to the sole. This may come as a surprise to anybody looking at this skate, because there are two types of screw on it (one is countersunk, and one is a flat head). However, the skate images on Ice Warehouse confirm that this is indeed how they come from the factory:

Jackson Classique (image from Ice Warehouse)

This skate model comes with no bag of screws because all the screws have been put in at the factory. As such there is only one task needed:

  1. Periodically check the screws; screws can come loose and eventually they can drop out. As somebody who has had a skate blade detach as I took a step, I can offer my assurance that even if the skate itself doesn’t sustain any additional damage, the fall for the skater isn’t pleasant. I ask the skate technician to double check the screws each time I get the blades sharpened.

Mid Range Skates / Partially Screwed

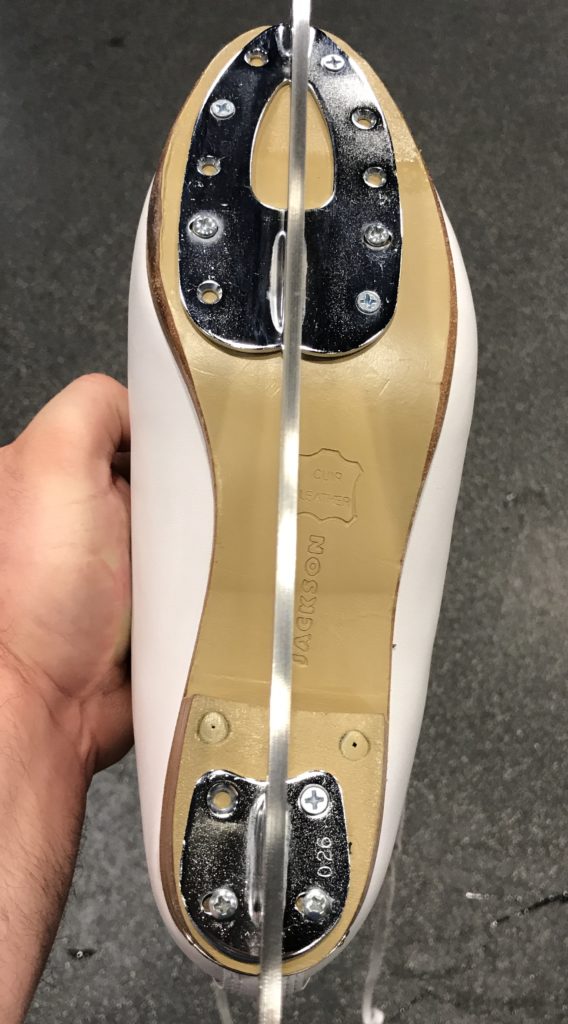
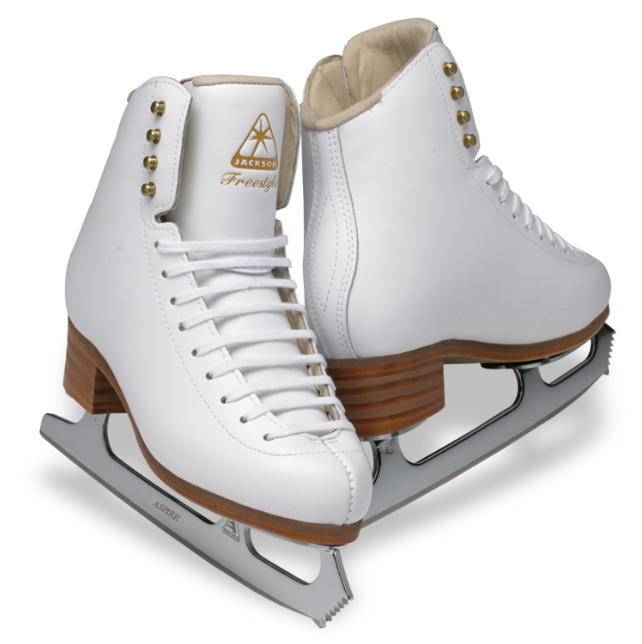
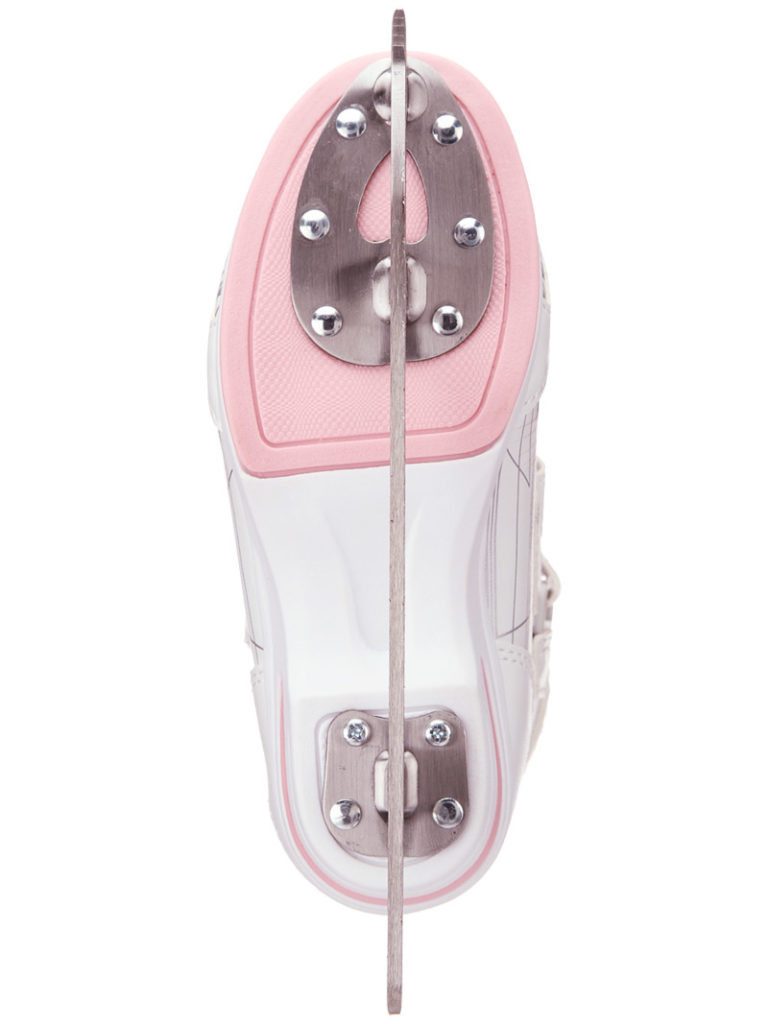
A mid-range figure skate such as the Jackson Ultima Freestyle (which my middle child had) is typically purchased as a bundle, with the blade coming pre-mounted and ready for use.  Or rather, mostly ready for use, as evidenced by the little baggy of screws that hides inside the box. Again, an image from Ice Warehouse confirms how the Freestyle would look on delivery:

Jackson Freestyle (image from Ice Warehouse)

The blade will be factory-mounted in the most common alignment (intended to work well for most people) with – in this case – just four screws, and there may be a further ten or so screw holes left empty and, coincidentally, there will be around ten screws in the plastic bag. The lack of direction with regard to the screws may be a little worrying, so here’s the deal:

    1. It’s ok to skate on the blades exactly as they come from the factory for a few weeks. However, the boots must not be used for jumps; jumps put a lot of pressure on the blade mount, and as delivered, the blade would likely rip out of the sole as the skater lands. Use this skating time to determine whether the blade mounting position works for the skater or if it needs to be realigned (something usually best determined in conjunction with a coach or a skate tech). Once ready to commit to the blade alignment, continue to step 2.


  1. Don’t grab a screwdriver and put all the screws in. This is really important, because the screws are being driven into (typically leather) soles. The screw threading can strip over time or the soles can rot if left damp, causing the screw to drop out and leaving behind a hole to which a new screw would not grip. The idea is to add about half the screws, leaving at least one unused screw hole at the back, and three to five at the front. That way, there will always be fresh leather to screw into should it be needed. As to which holes to use, and how much to tighten the screws,  I have left that decision to my skate technician. I am too scared of ruining an expensive pair of skates by not knowing what I am doing! I’m sure that there are other sites which offer guidance on this subject, but I’m going to play safe and leave it to a professional. Here are my middle child’s Freestyles after having the blade screwed on:

Jackson Freestyle Sole

  1. Periodically check the screws!

Boots Only / No Screws

If you’re (un?)fortunate enough to be buying skates at a level where they come without a blade attached (which usually means higher, or competitive, level skates), strangely enough there may be no screws in the box with the skates; instead the blades usually come with screws.

In terms of steps to take, my recommendation is to mount the blades (tip: get your skate tech to mount the blades) using just  four screws just as on the Freestyle boots above, then go and test the skates on the ice. At that point, follow the steps for Partially Screwed skates to complete the process.

Edea Boots

If you have Edea boots, please be aware that Edea sells special screws designed for the thinner soles on their boots, which means really only the Edea screws should be used. Edea also recommends that the screws are installed by an authorized dealer who will have their special mounting rig; some skate technicians may disagree, so that decision is going to be up to the individual.

Do It Yourself?

The obvious question, especially if one is impatient to get on the ice, is “can I do this myself?” Of course! It’s just a question of confidence and care. I know that plenty of people are happy aligning a blade, marking the hole locations, notching with an awl, then pre-drilling the hole before mounting the blade itself. Personally I’d rather leave that to people with more experience than me, but that’s my personal choice. 

Whether you choose to use a skate tech or attach the blades yourself, I hope this has been useful in explaining what to do with the screws and why.
Making Sense of Figure Skate Blade Profiles

Blade profiles is one of those subjects to which entire web sites could be dedicated and somebody would still find something that wasn’t covered adequately, or a case where something didn’t apply. Nonetheless, it’s useful to understand what’s being talked about when there’s a reference to blade profiles and rocker radius (sometimes written as Radius of Rocker, or RoR in a similar way to Radius of Hollow (ROH)). Hopefully I can make some sense of the topic without getting too dragged down into the many, many variables involved.

Figure Skate Blade Profiles

Blade Profiles

The phrase blade profile refers to the shape of the blade surface (that is, the bit that touches the ice) as viewed from the side. I’m only one sentence in, but I already have to add a caveat that some manufacturers have also created products which change the profile of the width of the blade along its length (for example, John Wilson Parabolic blades, or some of the tapered blades which are thicker at the front and narrower at the back). For the purposes of this page however, we will ignore this complication and concentrate on the side profile of the blade.

Unsurprisingly there is no “one size fits all” for blade shapes, and over the years manufacturers have experimented with different curves and toe pick designs with varying degrees of success. In the end, though, many current blades seem to try to emulate some classic John Wilson blade designs such as the Gold Seal and Pattern 99, which are ubiquitous competition-level blades.

Anatomy Of A Blade

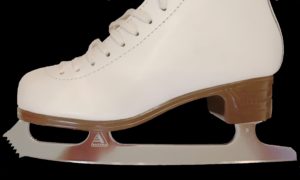
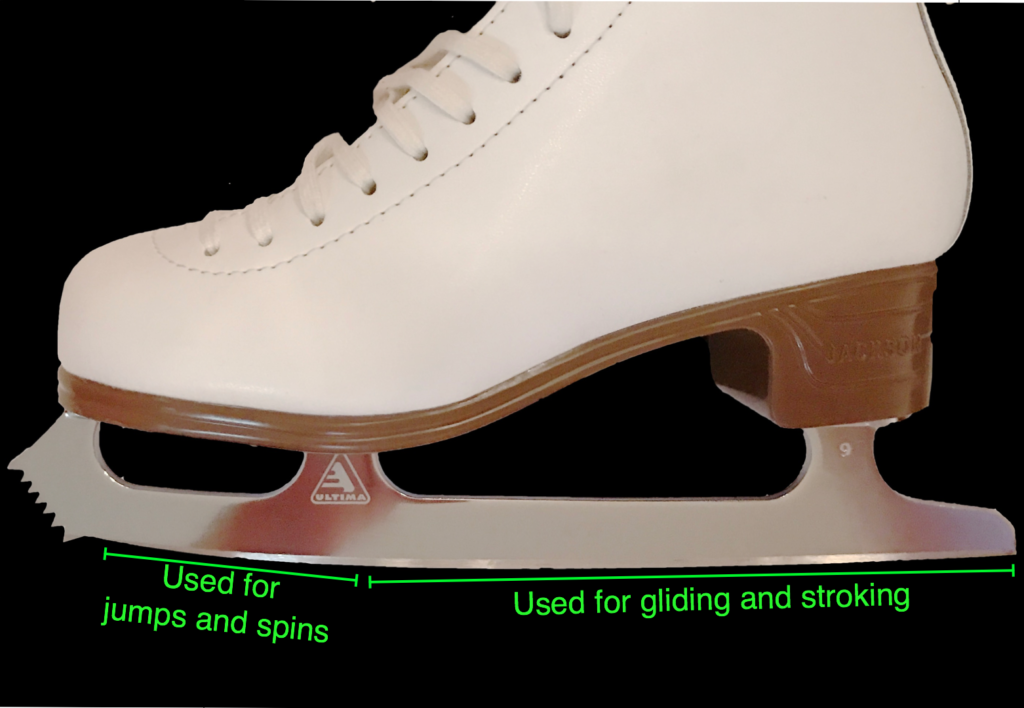
Figure skate blades are made up of three main functional sections, and understanding what each part of the blade does will help with the further explanations below.

Figure Skate Blade Areas

The diagram above shows the two parts of the blade which are used for movement; the third part are the toe picks on the front. I am, by the way, ignoring the lethal weapons (toe picks) on the front of the blade for the moment. While they—and their relationship to the blade—are important, they won’t help this discussion any.

It’s important to understand that the two labeled parts of the blade are used for different moves. When gliding or stroking on the ice, the skater uses the rear part of the skate (the rocker). When performing jumps and spins, however, the skater moves their weight forward to use the front part of the blade (sometimes called the “spin rocker”). This is why the tapered blades I mentioned above are thicker at the front; to support the jumps and spins.

Rocker Radius

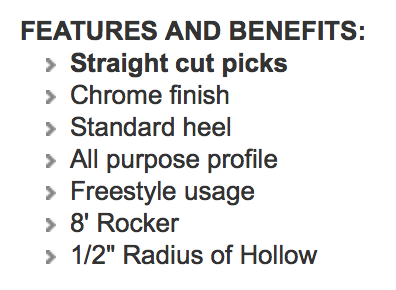
The shape of the blade profile for figure skates is usually quoted in feet, and as with Radius of Hollow, the idea is that if one were to draw a circle with that radius, the shape of the bottom of the blade would follow an arc of that circle. If that’s confusing—and it probably is—let’s make it clearer by using my daughter’s Jackson skates as an example. Her skates have the Mirage blade on them, and Jackson’s website has this specification:

Jackson Mirage Blade Specification

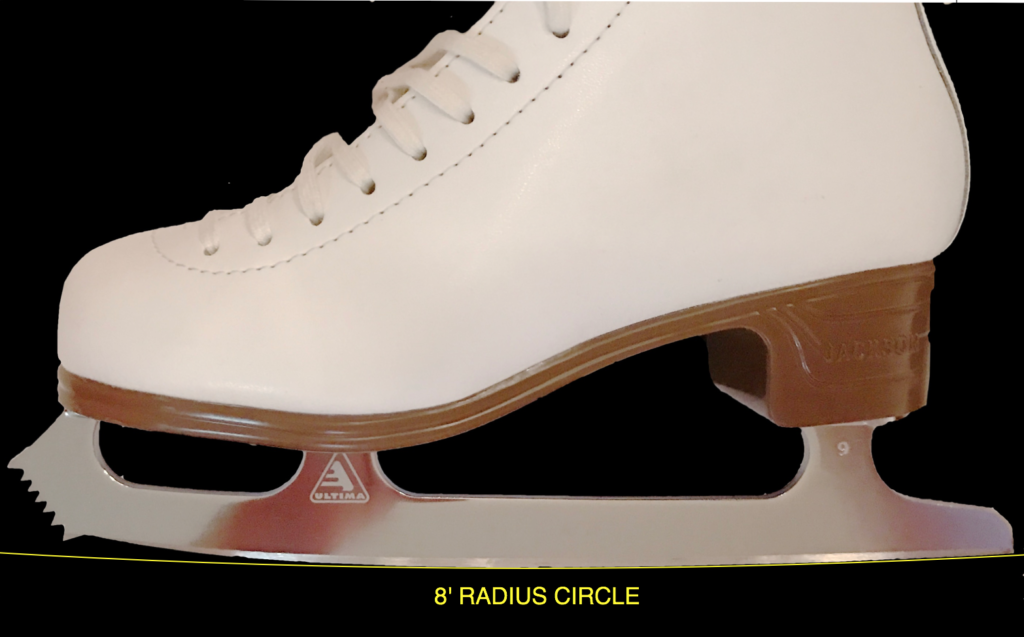
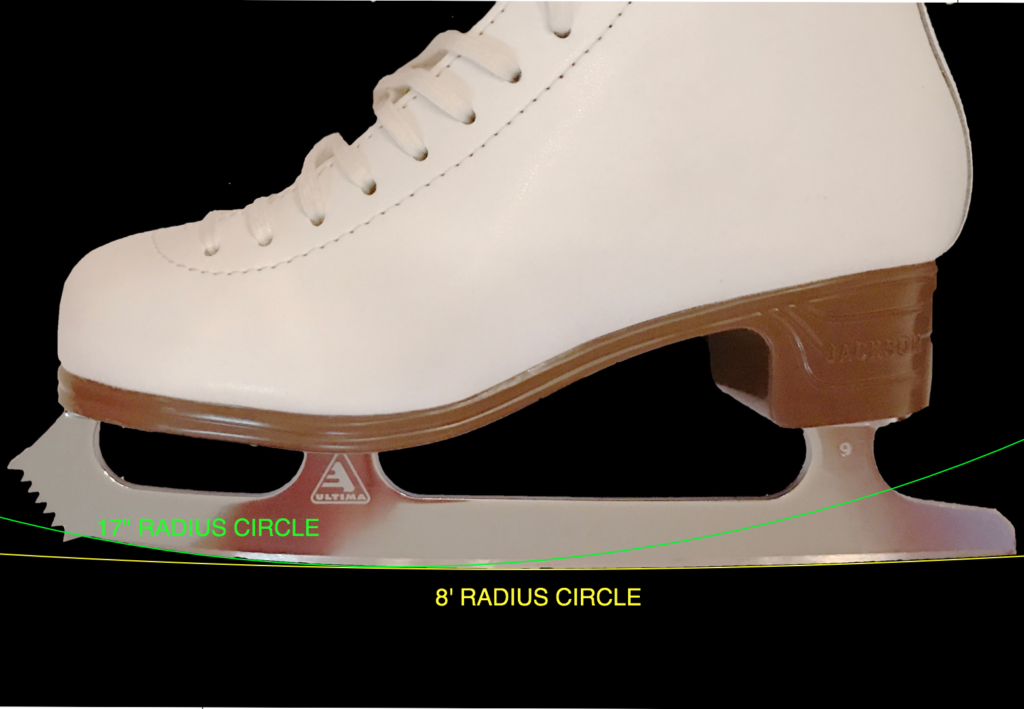
Based on the information above, the Mirage has an 8′ rocker radius. To illustrate this, I took the skate image into a drawing program and scaled it to represent its actual measured size. I then created an 8′ radius (16′ diameter) circle and overlaid it so that the circle’s arc could be matched against the blade. This is the result, and the thin yellow line is a small arc from that huge circle:

Blade showing 8' radius profile

What should be obvious here is that while much of the blade aligns with the stated rocker radius, not all of it does. The rocker radius really refers to the rear part of the blade that’s used for gliding and stroking. The section of the blade used for jumps and spins is clearly not using a circle of the same radius.

What difference does the rocker radius make? Well, a larger radius means a flatter blade, which means more of the blade will contact the ice at any one time. This may make the blades feel a little more stable, although they may be marginally less maneuverable on the ice. Conversely a smaller radius means a smaller contact area, and skaters seem to report more instability especially if they were used to a larger radius rocker previously. Choosing an appropriate rocker radius is definitely an area where talking to your skate tech and coach is important. However, as you’ll see below, the rocker radius alone does not define everything about the blade’s behavior.

Two and Three Radius Blades

Figure skating blades do not in fact use a single radius, despite that being what’s quoted on the literature; they typically use two or even three radiuses along the blade. The largest radius is reserved for the rear section, and the front jump/spin section will normally be cut either from one other radius, or split into cuts along two different radius arcs. Looking at the Jackson Mirage blade again, the front section appears to be cut using somewhere around a 17″ radius. I have overlaid a green circle on the previous image demonstrating this much sharper arc as seen at the front of the skate:

Two Radius Blade Profile

It’s interesting to me that the only radius quoted for almost every blade is the main rocker radius rather than the front radius (or radiuses), because it seems to me that for a figure skater the properties of the area on which they perform jumps and spins might be far more important to them, or at least might have more impact on the skating performance. Maybe I’m wrong. What do you think?

Accuracy of Sharpening

Given that the exact curvature of each make and model of blade are part of the blade’s characteristics, finding a skate tech / blade sharpener who can accurately and consistently grind the right profile on to the blades is really important. In fact, this will probably become a recurring theme on this blog when it comes to skate maintenance: find a great skate tech (word of mouth is usually a good way), make friends with them, grab hold of them and never let go! You need to be able to trust that when your skates are sharpened, they’re going to come back correctly sharpened, the same way, every time. The corollary to this is that taking your skates to be sharpened by a different person or at a different place each time is a bad idea.

Hopefully if this was previously a confusing topic, this helped shed some light on the subject.

Ice Skates in Transit Need Protection Too!

In a previous post, I explained how to prepare skates for transit after use (using soakers) so that the blades won’t get rusty. In another, I discussed the use of boot covers as an effective way of protecting the boot from damage while it’s on the ice. But once the skates go into a bag, how can we stop them from scratching each other up as they bang up against each other, and everything else kept in a typical skater’s bag? This post looks at ways to give ice skates protection while in the bag.

Towel

Protection For Ice Skates

Bag Choice

The first thing to consider is whether you have, or can select, a bag which isolates the skates from everything else and preferably from each other. I will discuss bags more in a separate post, but it’s something to consider when evaluating options.

However, assuming that you already have a bag or it’s not possible to find a bag which keeps the skates separate, what can be done?

Towels

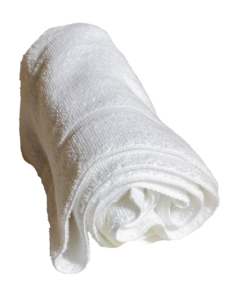
Cheap, cheerful, effective. Wrap your skates in towels when you’re done and you have a four-way win, even if, perhaps, it looks a little amateurish:

  1. The towel helps to keep the boot uppers dry;
  2. You can stuff some of the towel into the boot itself to help draw out the inevitable moisture left there by the sweaty feet which so recently inhabited the space;
  3. Wrapping the boots in towels gives protection them from rubbing against anything other than the towel in transit, thus helping to keep your skate boots in pristine condition;
  4. The towels act as padding against knocks and bangs, so offers some protection from external harm.

By the way: amateurish, smamateurish. I do not care if somebody thinks I look silly using a towel. If it works and doesn’t have any obvious down sides, why knock it? Sure, buy a towel with an ice skate embroidered into it if you like and if it feels more like something a serious skater might use, but otherwise I would look to grab a couple of plain white towels and put them to good use.

The one negative I can see for towels is that they are somewhat bulky, so will take up space in the skate bag which may be needed for something else. That’s a judgement call for each person.

As a side note, I live in constant fear of heavily colored items leaving dye stains on the lovely white skate boots, and in some cases if you believe the reviews on Amazon and elsewhere, I am right to worry about everything from boot covers to bags and more. Buying / using white towels avoids the whole issue.

Pillowcases

If you thought the towels looked silly, try using a couple of old pillowcases. Pillowcases are not as absorbent as towels, so don’t have as much benefit in terms of keeping the boots moisture free (or accelerating the drying process), but most people will be able to find a couple of old pillowcases, and once the skates have been dried off and have soakers on, it’s quick and easy to put each one in its own pillowcase before putting them into the bag.

One thing in favor of pillowcases is that they are very compact; they take up almost no space over and above the volume of the skates themselves.

Pillowcases primarily protect the boots from one another; since they are not as padded as towels, they offer less cushioning against impacts, but using pillowcases is definitely better than using nothing.

Special Skate Pouches / Bags

I’ve read somewhere (though I forget where now) that you can buy special soft lined pouches in which to put ice skates. When I looked for these online, however, I came up with nothing. Maybe there’s a particular name for them which, if I knew it, would magically generate results. Anyway, I mention them only because somebody said they existed. If you know about them and can point me to a link to some, I’d be delighted to update this post with the information you share!

Any Other Ideas?

If you do something different to protect your skates and are willing to share, could you please comment below so I can share it with others here too?

Conclusions

Towels are looking really good right now, aren’t they? With that said, I see many skaters who do not bag or wrap their skates up at all. Currently, the bags my children use have a section on the outside and they can put one skate in each pocket with nothing else in there. However, I’m seriously considering those towels…!

Stepping On To The Ice: Did You Know?

Stepping On To The Ice

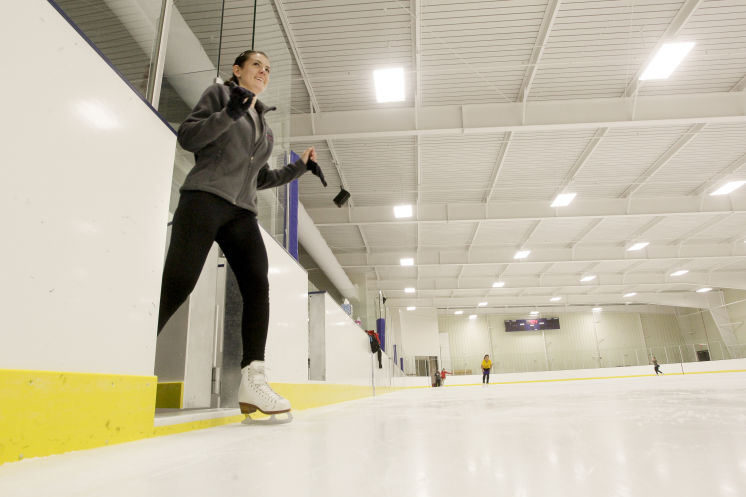
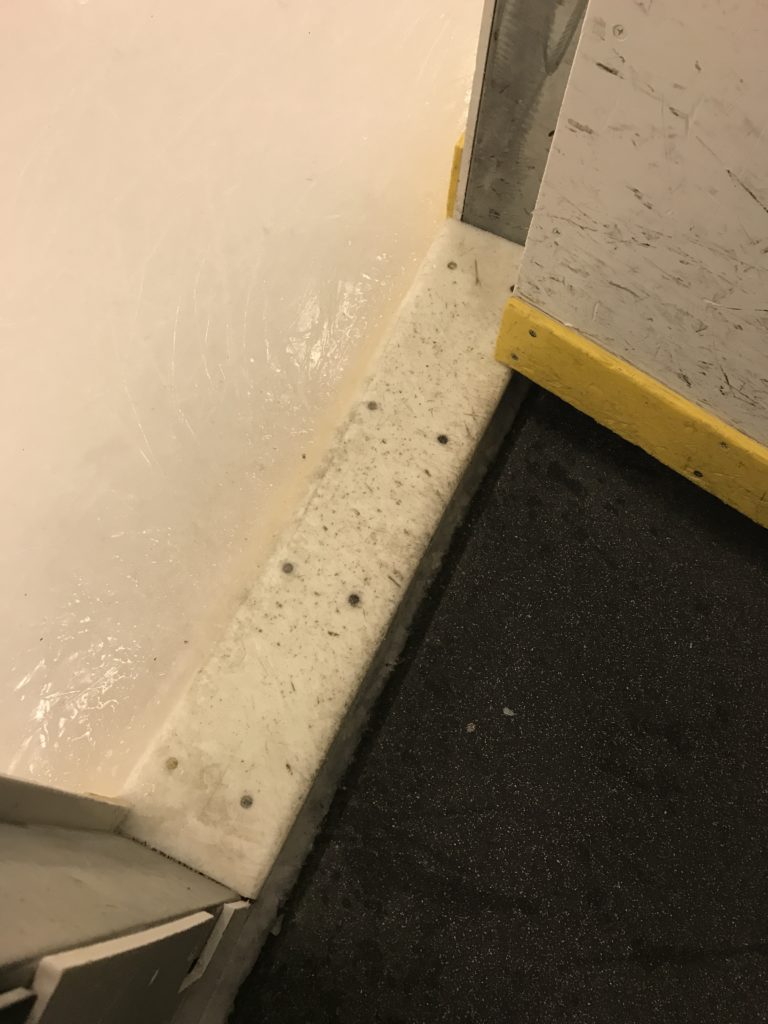
That little sill that sits in the doorway to the ice looks innocent enough. In my local rink it’s a white plastic bar. Most people use it to step up from the rubber floor surrounding the rink, then they step on to the ice. Makes sense, right?

Stepping On To The Ice

STOP RIGHT THERE

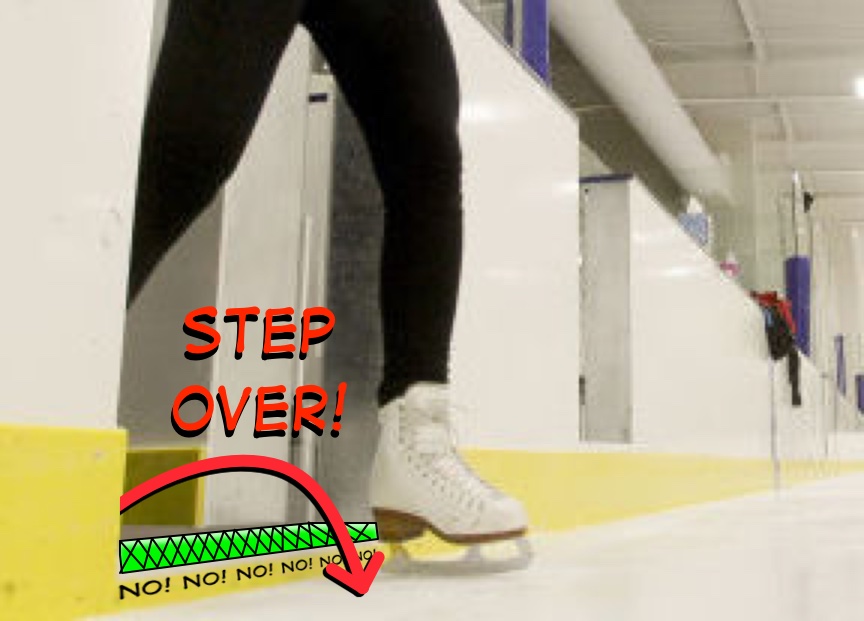
Do not step on the white plastic sill.

Door Sill

I know it looks like it’s there to help you. I know it feels like stepping up and over the step might make you slip when your skate goes on the ice. Or likewise when stepping off the ice it feels like a long way down to the rubber flooring. I hear you and I feel for you. However, that sill is an evil temptation just begging you to do the wrong thing.

If you aren’t sure why I’m shouting that you need to avoid stepping on that little white sill, take a moment to read the page about blade guards. In particular, that article highlights two surfaces on which skates can or should be worn without guards:

  • the ice
  • rubber flooring

That innocent-looking white sill is neither ice nor rubber; it’s hard plastic and it can do damage to your skate blades just as much as walking on other bad surfaces. You might also see in the picture above that the sill is screwed into place; I promise you, you do not want to ever have one of those screw heads touching your skate blades!

I don’t understand why there isn’t simply a sign next to each of the doors on to the ice saying do not step on the sill. Instead this is one of those useful pieces of information which seems to be passed down as local knowledge instead.

Let’s look more closely at the earlier picture of the skater (an ice dancer in this case) stepping on to the ice:

She knows what she’s doing. So next time you step on to or off the ice, for the sake of your blades, please step over that plastic sill.

Renting Skates versus Buying Skates

Rental Skate

Once of the questions I struggled with when my children started ice skating was when was right to consider buying skates. If you’re new to ice skating, you’re likely wondering the same thing too, so here are my thoughts on the matter.

Renting Skates

Renting Skates

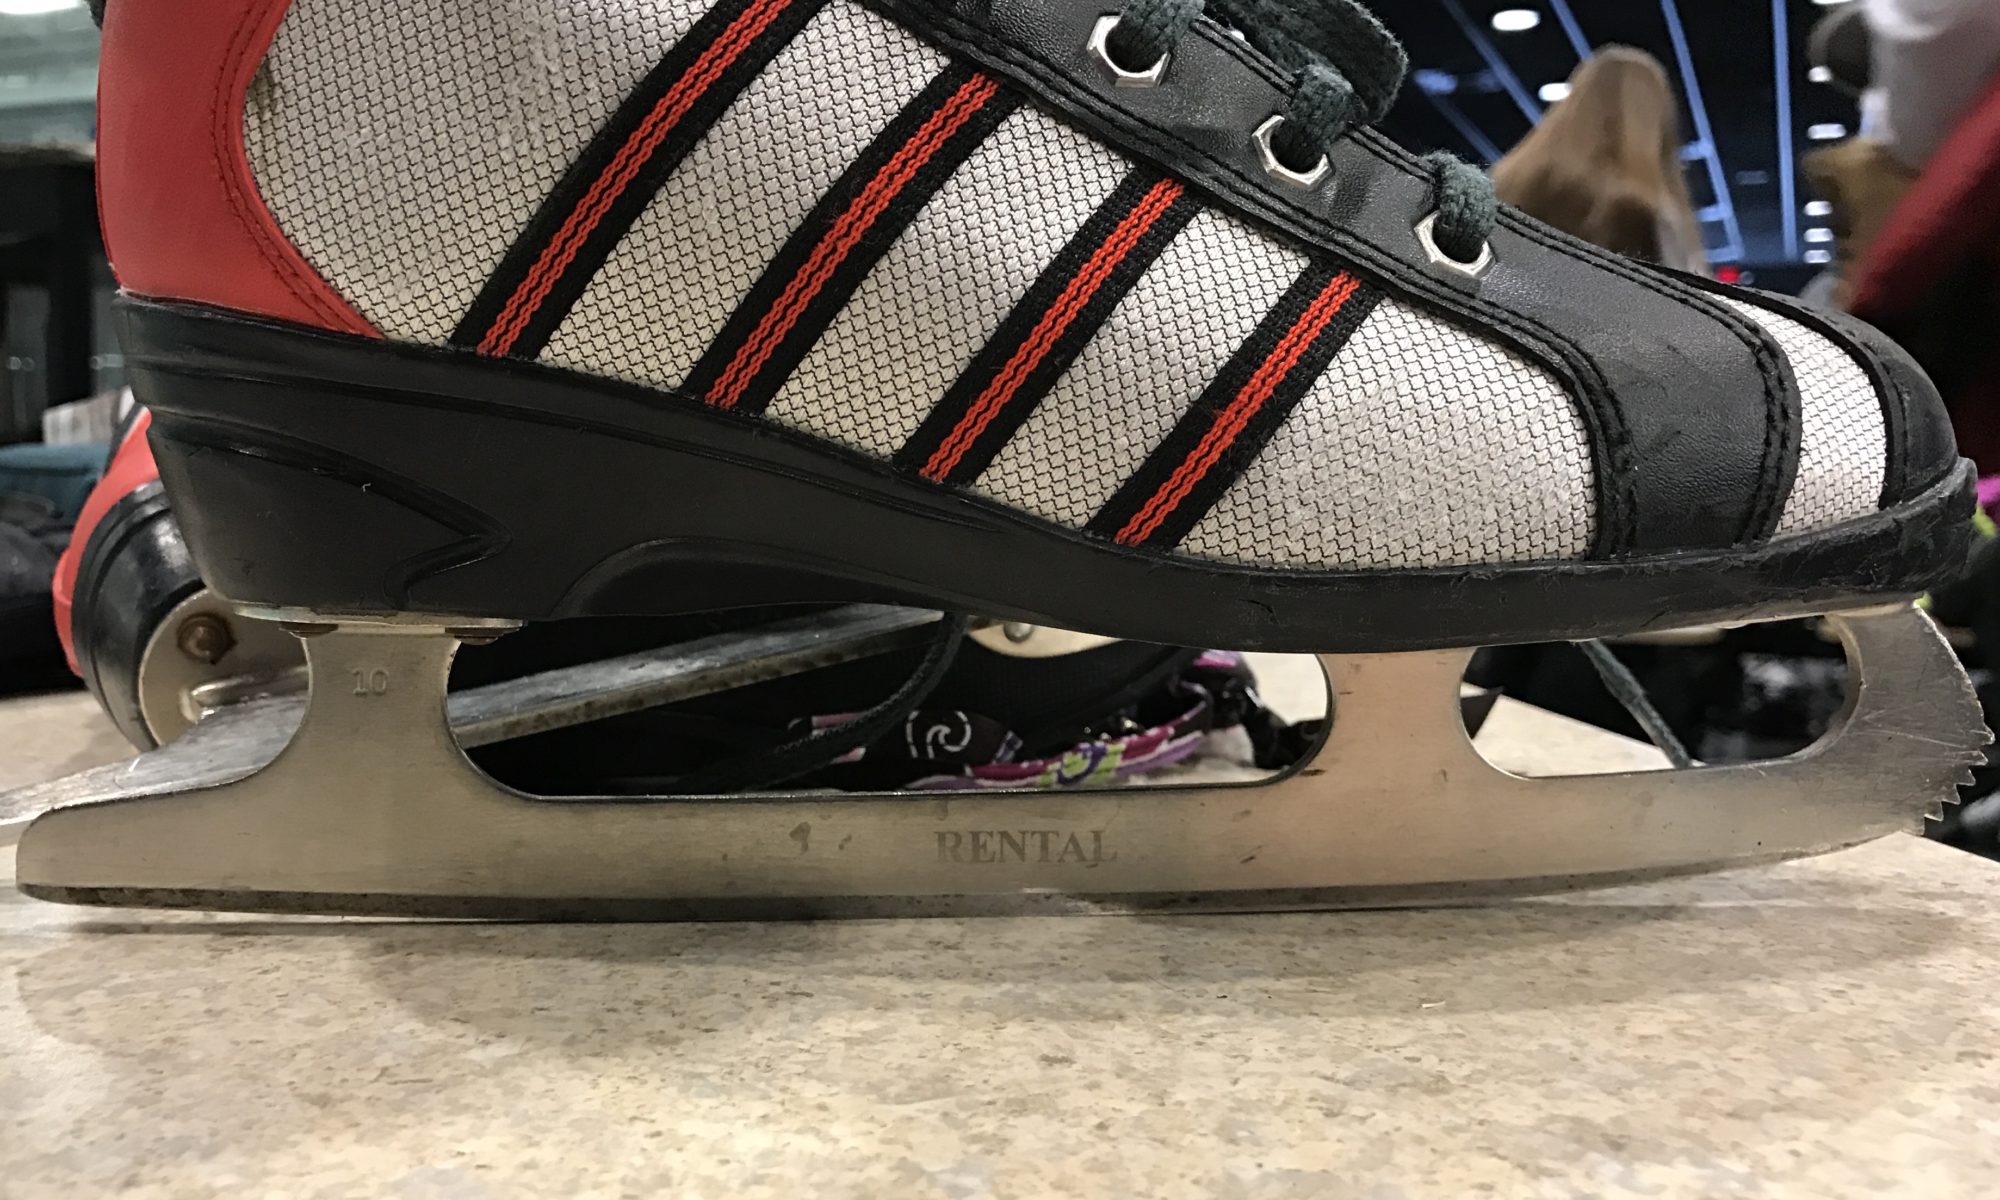
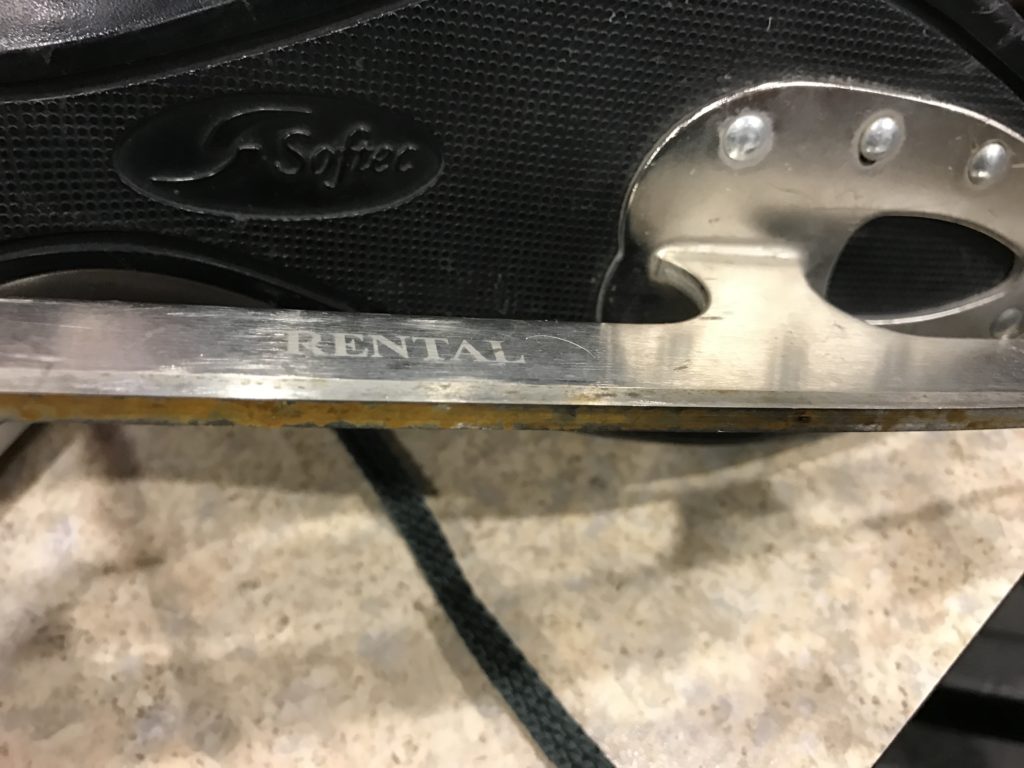
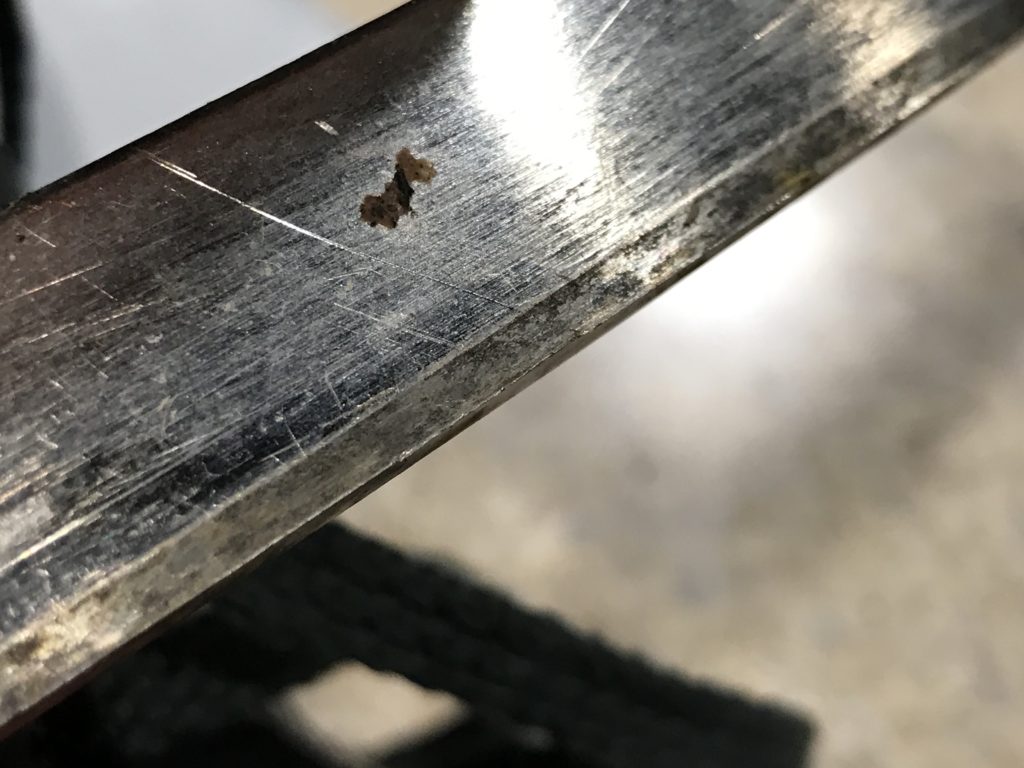
The summary is that rental skates suck. That’s not to say that you can’t have terrific fun wearing them, but they’re designed for casual skating only. They are shaped fit as many different foot shapes as possible, to accommodate the thick, warm socks that casual skaters might choose to wear to the ice rink, and to last a long time. They’re generally what are described as ‘soft skates’, which means they don’t have an awful lot of support (and are thus not safely usable for any kind of jumps and spins). I also don’t see the skate blades being dried off when rentals are returned, and the results are inevitable:

Rusty Blade

In this case, the state of the blades is less than stellar as well:

Dulled Edges

None of these attributes make rentals skates great for serious skating. However, when you or your child are starting out with skating, they are perfectly adequate. After all, who wants to drop money on brand new ice skates when there’s a chance that the child may not enjoy ice skating after all and will change their mind?

My policy was that when my children started following the Learn To Skate USA Basic 1-6 courses, I would not buy them skates at first. They started somewhere around February this year, and I spoke to their coaches to as them to advise me as to when they thought it would be helpful for my children to have their own skates. I also reckoned that this would give me maybe 3-6 months to find out whether they were engaged and enthusiastic before I made an investment. The kids did well using rental skates, and they were in good company; most of the other children in the lower Basic levels were also skating in rentals.

Buying Your Own Skates

Around the time where my oldest skater at the time (12 years old) got to somewhere around Basic 4, their teacher approached me as promised and said that this would be a good time (if possible) to consider getting them skates. Being reasonably well built and getting heavier and taller by the day, it was particularly important to find skates that would have reasonably firm ankle support.

The subject of which skates to buy is such a huge one that I wouldn’t even dare to start advising to go for one brand over another because it’s a very personal choice both in terms of budget, features and options. I will comment that most of the skaters I see at this level end up with Jackson or Riedell skates, but that may be a regional thing as much as anything else.

For the purposes of transparency, I am happy to share that I ended up selecting Jackson Ultima Freestyle/Aspire figure skates for my son.

Jackson Freestyle

While I was emptying out my wallet for one child it seemed rude not to finish the job and also get younger sister (aged 9) her own skates as well, as she was in Basic 3 and learning quickly. She ended up with the slightly cheaper Jackson Ultimate Classique figure skates which are in many ways similar to the Freestyle.

Jackson Classique

There is nothing quite like seeing the pride with which my children look after their skates. They are keen to restore the beautiful high-shine finish on the blades after they finish skating, which is just great. More importantly, after a lesson of tripping (during which they discovered what it is like to have skates whose blades actually cut into the ice!), they found their ice feet again, so to speak, and started improving rapidly from there. The teachers immediately commented on the difference in their performance with the new skates, which was also reassuring.

To summarize, if the skaters are serious and plan to keep taking lessons, budget for their own skates sooner rather than later.

How Much Should I Spend?

This is the impossible question. The common wisdom appears to be as much as you are comfortable spending. With ice skates, you really do get what you pay for to a large extent. Cheaper (e.g. sub-$100) skates of the kind often found in large sporting goods retailers and department stores are usually considered to be a false economy; the skate will be functional for sure, but often lacks support and does not have a blade capable of handling the jumps and spins that will be asked of it down the line. No problem to use these for recreational skating, but I hear over and over again that they won’t cut it for a developing skater.

Are Used Skates Ok?

In theory, yes of course! Like buying a used car, it’s just a question of knowing what you’re buying, what to look out for, how much sharpening life is left in the blades, and whether the price is fair. It’s also worth considering though that when skates are purchased new, over time they stretch and shape themselves to the owner’s feet. When buying second hand, the skates are already shaped to somebody else’s feet; whether that’s a problem may depend how different your feet are to that person, and how much stretching took place. It might not matter, but it’s something to consider. Overall, I am not in a position to advise on these matters, so I would always use somebody who does know about buying used skates as your ally. Coaches at your local ice rink will likely know of people selling skates (perhaps their own students) and can often advise on what will work.

Why Buy?

Have you even been ten-pin bowling before? The house balls are generally pretty chipped, the finger holes never quite fit the fingers properly and are a bit more slippery than is helpful, and the weight is always too heavy or too light. Basically, they’re effective at hitting the pins and it’s possible to do well with them if you can work with their compromises, yet league bowlers typically do not use the house balls; they buy their own. Why? Because then they can get a ball with a more reactive surface; the finger holes are custom drilled to fit the hand size perfectly; finger inserts can be added to add more grip and improve comfort to the holes; the weight can be much more closely aligned with your needs.

It’s the same with ice skates. You can use the rental skates for a while without major issues, but eventually you’ll get to the point where they are holding back your progress on the ice. Eventually, you will have to buy skates or your child will be repeatedly frustrated with their inability to perform the moves requested of them by their coaches.

To coin a phrase, buying your child their own skates will—quite literally—give them the edge they need to keep getting better.