Continue reading "Why is there a bag of screws in the box with new skates?"
The post Why is there a bag of screws in the box with new skates? appeared first on SkaterDad.com.
]]>How Are The Blades Attached To The Boot?
There are two main ways in which blades are attached to figure skating boots (screwed or riveted), and four ways they’re most likely to be purchased (riveted, fully pre-mounted blade, partially pre-mounted blade, separate boot and blade).
Low Price Skates / Rivets
Boots towards the low end of each manufacturer’s product range may well have a blade which has been permanently riveted to the boot. The blade therefore can not be removed, but should also be pretty secure as a result.
It is in theory possible on some boots to drill out the rivets and re-mount the blade if necessary, but that’s very much an “At Your Own Risk” kind of task. Beyond that, the good news is that if you bought skates with riveted blades, in all likelihood there’s nothing you need to do, and there would not have been a bag of screws in the box.
Low to Mid-Range Skates / Fully Screwed
Some skates are delivered with the blade fully attached using screws.
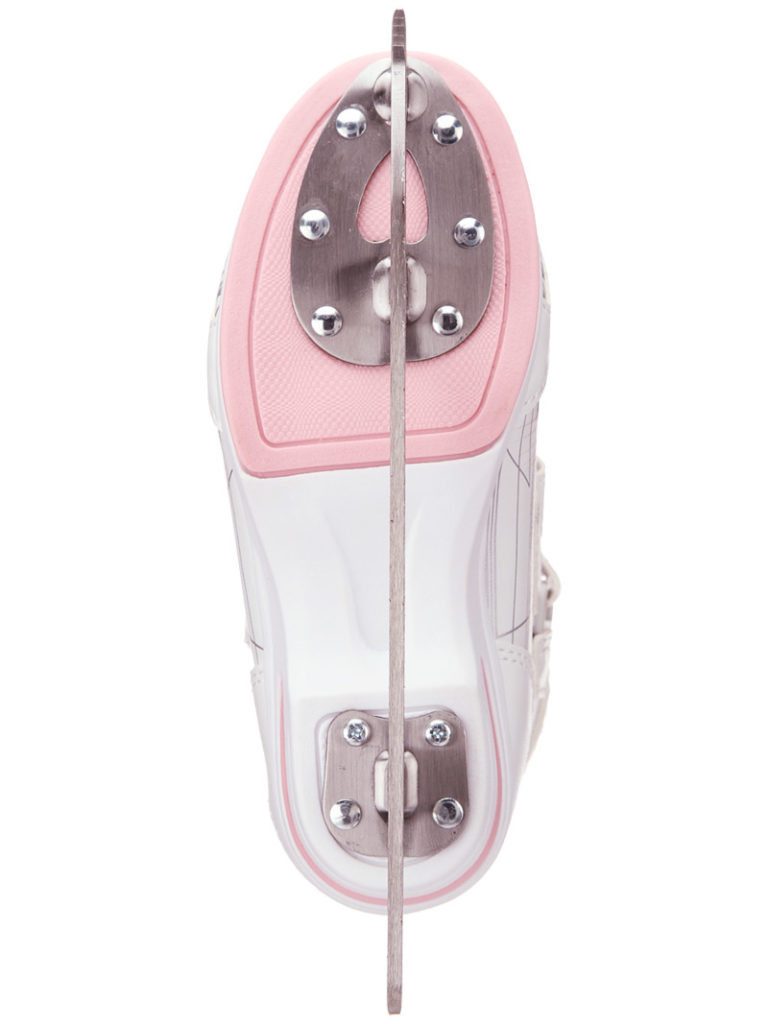
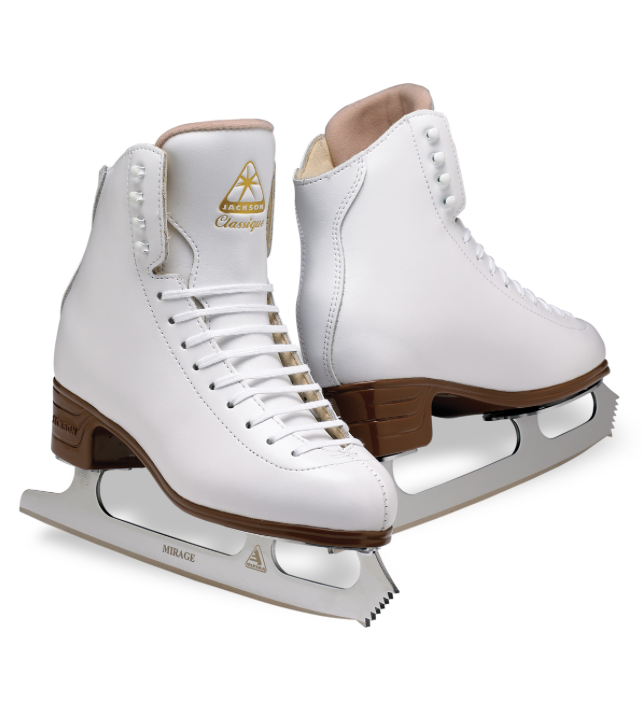
For example, the Jackson Ultima Classique skate (which my youngest child has) comes with a Jackson Mirage blade screwed to the sole. This may come as a surprise to anybody looking at this skate, because there are two types of screw on it (one is countersunk, and one is a flat head). However, the skate images on Ice Warehouse confirm that this is indeed how they come from the factory:

This skate model comes with no bag of screws because all the screws have been put in at the factory. As such there is only one task needed:
- Periodically check the screws; screws can come loose and eventually they can drop out. As somebody who has had a skate blade detach as I took a step, I can offer my assurance that even if the skate itself doesn’t sustain any additional damage, the fall for the skater isn’t pleasant. I ask the skate technician to double check the screws each time I get the blades sharpened.
Mid Range Skates / Partially Screwed
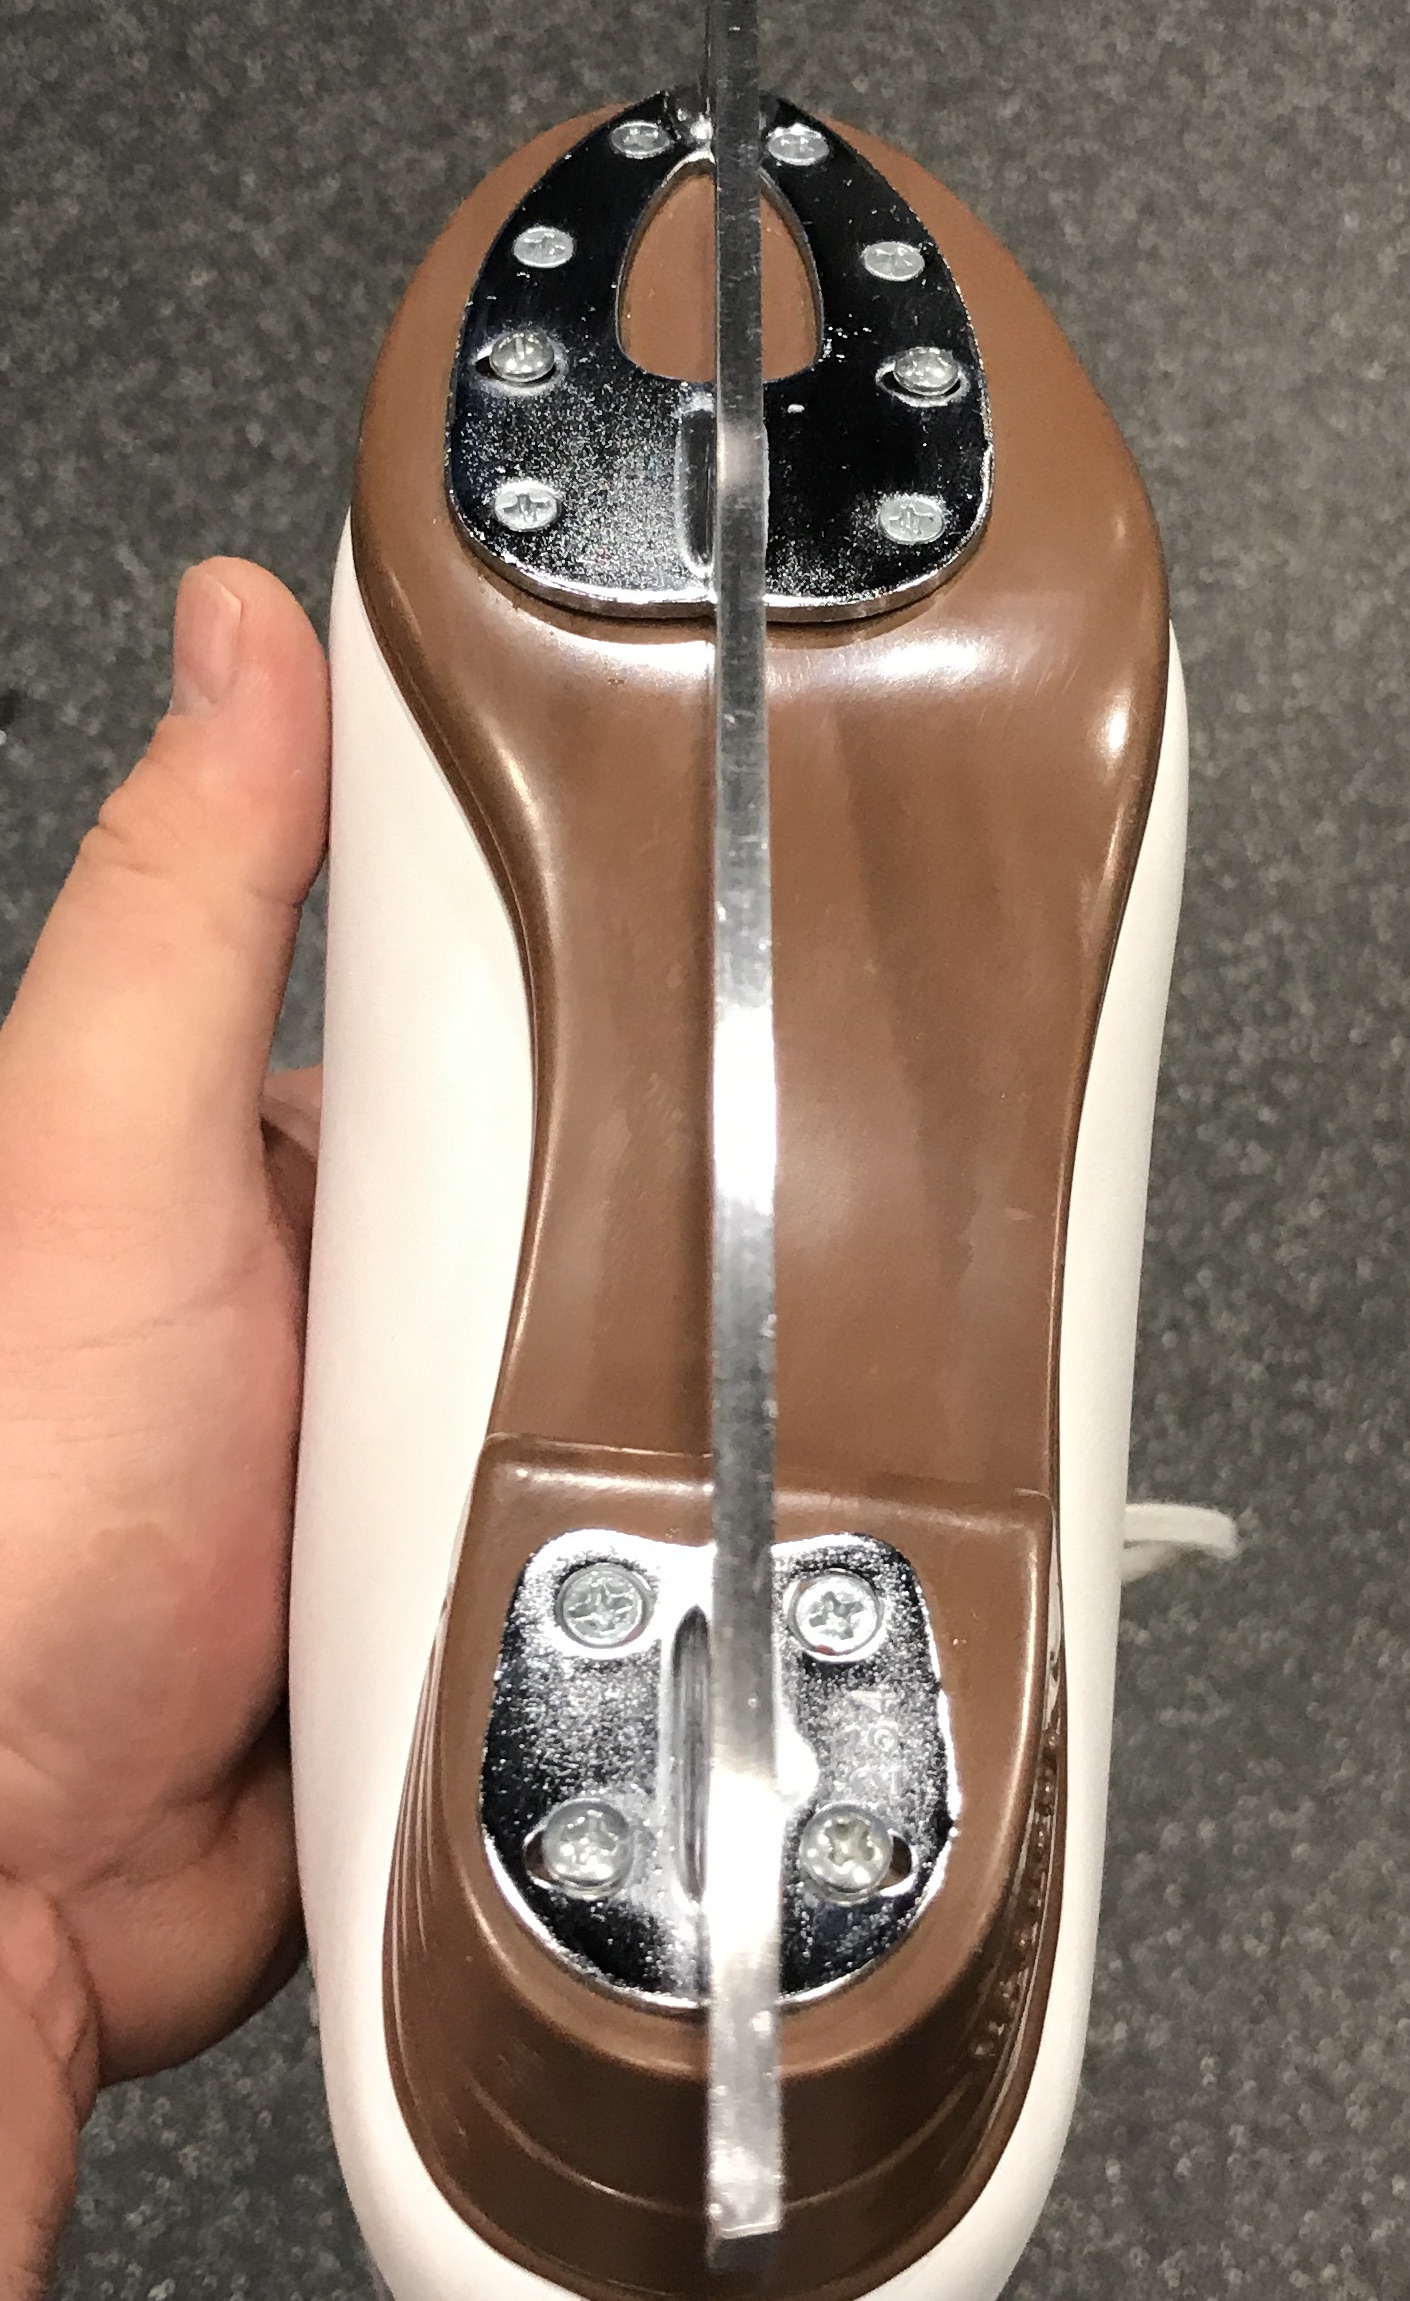
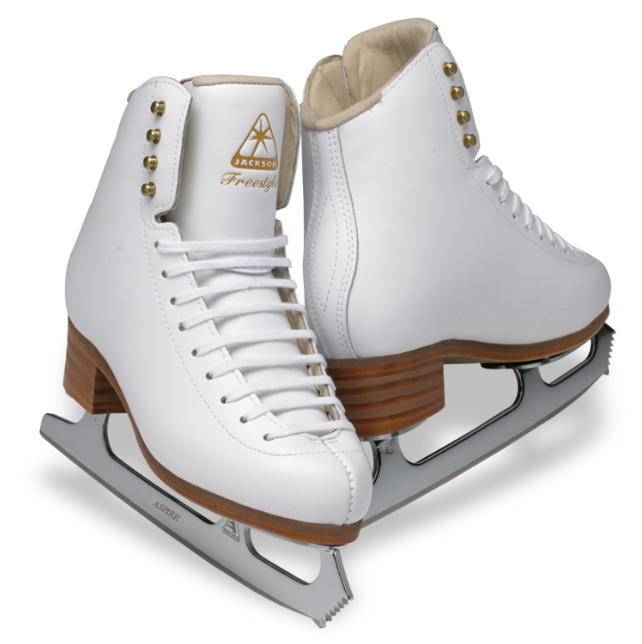
A mid-range figure skate such as the Jackson Ultima Freestyle (which my middle child had) is typically purchased as a bundle, with the blade coming pre-mounted and ready for use. Or rather, mostly ready for use, as evidenced by the little baggy of screws that hides inside the box. Again, an image from Ice Warehouse confirms how the Freestyle would look on delivery:

The blade will be factory-mounted in the most common alignment (intended to work well for most people) with – in this case – just four screws, and there may be a further ten or so screw holes left empty and, coincidentally, there will be around ten screws in the plastic bag. The lack of direction with regard to the screws may be a little worrying, so here’s the deal:
-
- It’s ok to skate on the blades exactly as they come from the factory for a few weeks. However, the boots must not be used for jumps; jumps put a lot of pressure on the blade mount, and as delivered, the blade would likely rip out of the sole as the skater lands. Use this skating time to determine whether the blade mounting position works for the skater or if it needs to be realigned (something usually best determined in conjunction with a coach or a skate tech). Once ready to commit to the blade alignment, continue to step 2.
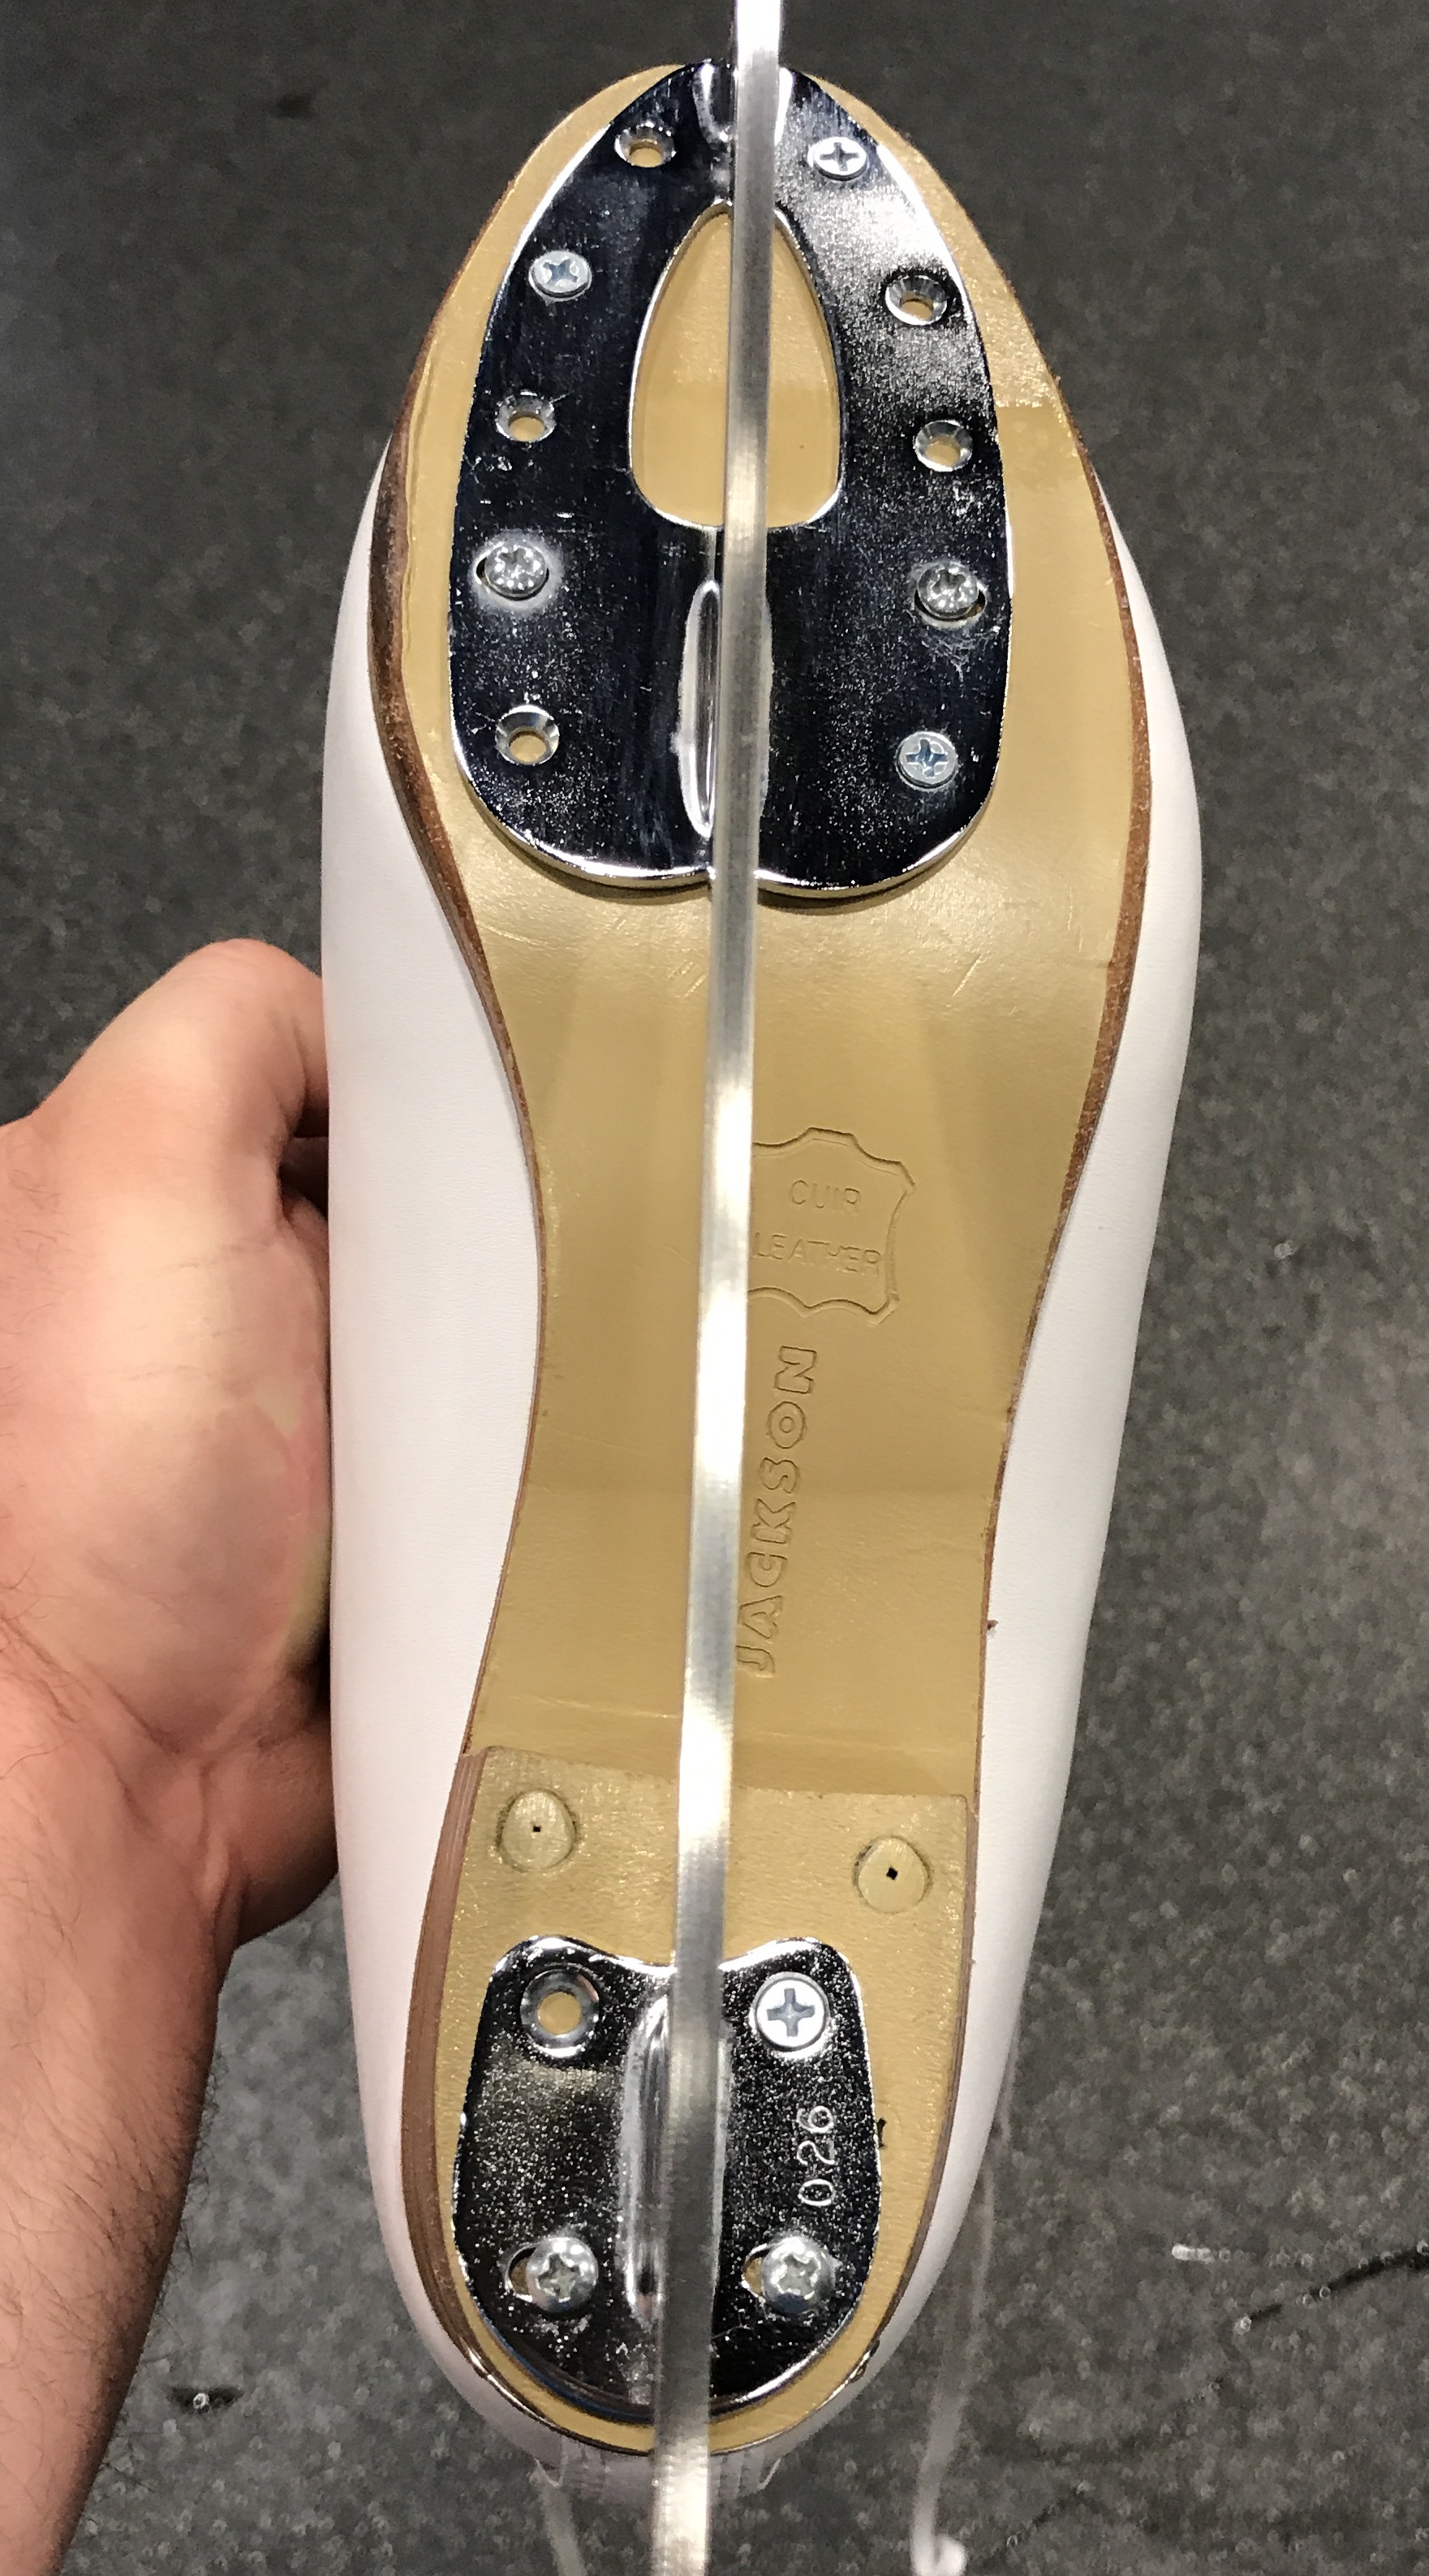
- Don’t grab a screwdriver and put all the screws in. This is really important, because the screws are being driven into (typically leather) soles. The screw threading can strip over time or the soles can rot if left damp, causing the screw to drop out and leaving behind a hole to which a new screw would not grip. The idea is to add about half the screws, leaving at least one unused screw hole at the back, and three to five at the front. That way, there will always be fresh leather to screw into should it be needed. As to which holes to use, and how much to tighten the screws, I have left that decision to my skate technician. I am too scared of ruining an expensive pair of skates by not knowing what I am doing! I’m sure that there are other sites which offer guidance on this subject, but I’m going to play safe and leave it to a professional. Here are my middle child’s Freestyles after having the blade screwed on:
- Periodically check the screws!
Boots Only / No Screws
If you’re (un?)fortunate enough to be buying skates at a level where they come without a blade attached (which usually means higher, or competitive, level skates), strangely enough there may be no screws in the box with the skates; instead the blades usually come with screws.
In terms of steps to take, my recommendation is to mount the blades (tip: get your skate tech to mount the blades) using just four screws just as on the Freestyle boots above, then go and test the skates on the ice. At that point, follow the steps for Partially Screwed skates to complete the process.
Edea Boots
If you have Edea boots, please be aware that Edea sells special screws designed for the thinner soles on their boots, which means really only the Edea screws should be used. Edea also recommends that the screws are installed by an authorized dealer who will have their special mounting rig; some skate technicians may disagree, so that decision is going to be up to the individual.
Do It Yourself?
The obvious question, especially if one is impatient to get on the ice, is “can I do this myself?” Of course! It’s just a question of confidence and care. I know that plenty of people are happy aligning a blade, marking the hole locations, notching with an awl, then pre-drilling the hole before mounting the blade itself. Personally I’d rather leave that to people with more experience than me, but that’s my personal choice.
Whether you choose to use a skate tech or attach the blades yourself, I hope this has been useful in explaining what to do with the screws and why.
The post Why is there a bag of screws in the box with new skates? appeared first on SkaterDad.com.
]]>Continue reading "Choosing An Ice Skating Bag – So Many Choices!"
The post Choosing An Ice Skating Bag – So Many Choices! appeared first on SkaterDad.com.
]]>The Zuca Rolling Ice Skating Bag
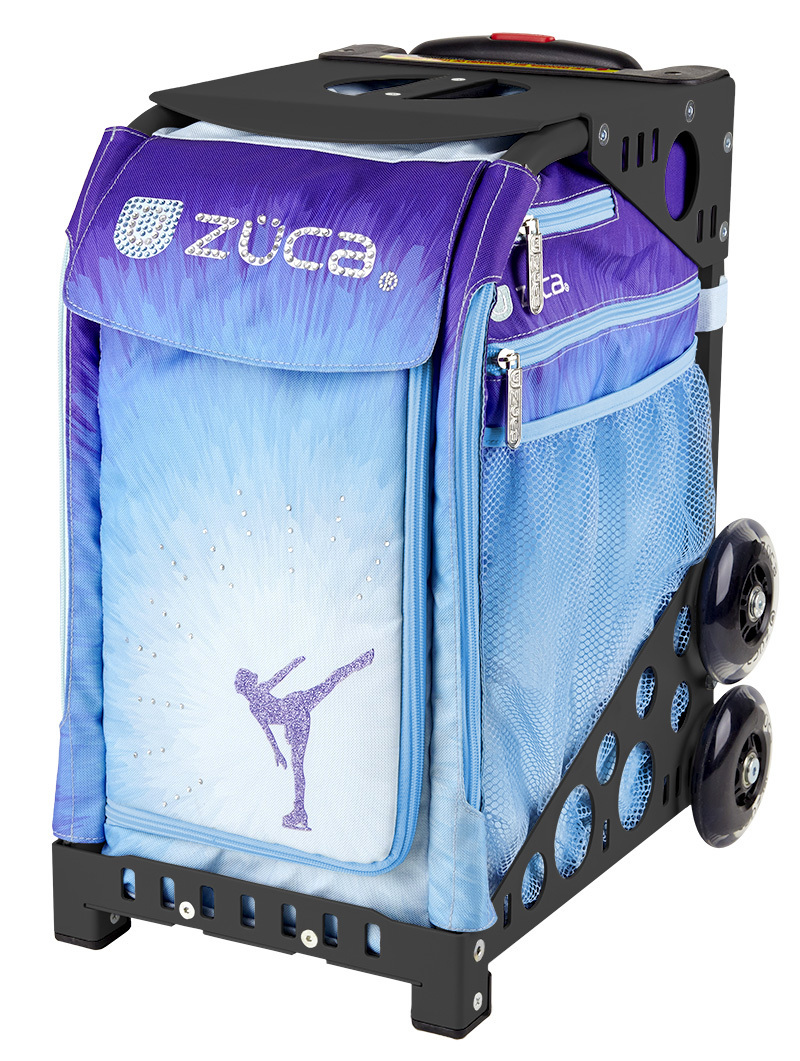
Buy a Zuca and your child will love you forever. At least, that’s what I’m told; I haven’t bought one. Brand new, a Zuca rolling bag (frame + insert) costs around US$170, which is an awful lot of money, especially when new to ice skating. The frame and insert are sometimes sold as a set or they can each be bought separately to customize the appearance of the bag. So why do so many figure skaters have them? Well:
- Large range of bag insert designs and frame colors. You can even have wheels with flashing lights in them.
- The seat on top can hold up to 300lb, so you always have a chair wherever you go
- Smooth wheels and an extendable handle mean it’s easy to move, and because it’s not being carried, there’s no issue of it being too heavy for a child to lift
- Matching accessories like a seat cover, lunchbox or utility pouch
- Handy pockets on the outsides, the inside of the ‘door’ (the front flap) and even inside the top of the insert.
- Having a strong metal frame around the insert provides your skates with a degree of protection (though the insert itself is not rigid of course).
However, here’s the bad side as far as I’m concerned:
- They’re expensive. At least, they’re more than I would casually pay for a bag.
- The web site fails to display the inside of the inserts in most cases, and even when shown, you can’t see it all. For example, somebody recently bought an insert and discovered that it did not have the very useful storage pocket inside the ‘roof’ of the insert, but you’d probably have no idea based on the website pictures.
- The skates get put inside the bag along with everything else, then the bag gets zipped shut. This is not great for ventilation, so to look after your skates properly the case must be opened once it gets home to let the contents dry out properly.
With all that said, the Zuca is clearly still the number one ice skating bag choice for figure skaters, so if you can find somebody selling their old Zuca for $20-30, it’s a pretty neat option.
Ice Skating Bags
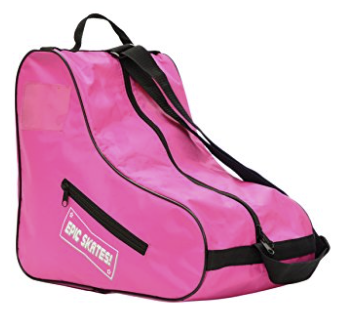

There are many bags available which are basically triangles with zippers on them, and they tend to be priced very reasonably. Typically these skate bags have a single zipper on them, and everything gets put into the single central pocket
. Unfortunately, like the Zuca bags, the design of these bags would appear to encourage the collection of moisture within them, and unless the user is consistent about opening and ventilating them when arriving home, I would worry about building up a moldy smell, and the potential for rust on the blades. Lacking wheels, these bags usually have both a shoulder strap and a handle for carrying.
Despite the reasonable price, I can’t persuade myself to purchase a sealed ice skating bag like this. Instead, I’ve come to appreciate the ventilated ice skating bags.
Ventilated Ice Skating Bags
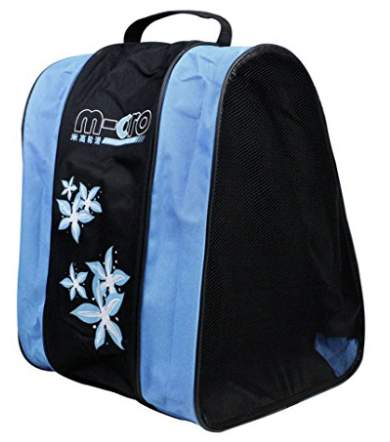

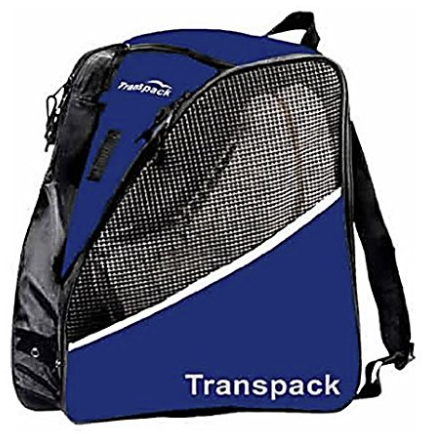
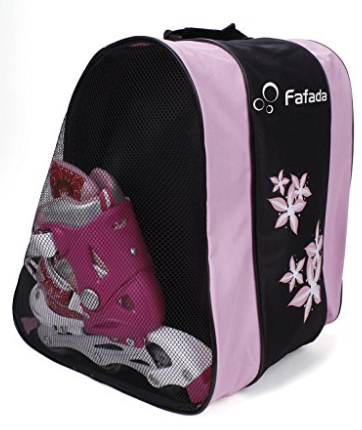
Here’s my current preferred ice skating bag. For a beginning skater I believe this is the perfect blend of low price and functionality, and to be honest, it’s not far off being ideal for a more advanced skater too.
These bags are all similar in size to the ice skating bags above, with one crucial difference; the ice skates go in zipped outer pockets which are covered wholly or in part by a mesh. This is actually a really great thing because it provides easy ventilation for the skates, which means the soakers dry out quickly, and the (possibly stinky) skates themselves get to air out a bit. Arguably the one down side of the mesh might be that carrying this bag for a distance in the pouring rain would let the skates get wet, although that has yet to be a problem for me.
The center zipper section is reasonably roomy, and without the skates being in there getting in the way, digging through to find the thing you’re looking for is fairly easy, although with most of the bags, a black lining means that anything dark (gloves, boot covers, etc) disappears into the visual void pretty quickly. Overall though, these bags are just great, and for the $15-20 I paid new for each of the bags for my children, I’m happy.
The Transpack bags shown above have another trick up their sleeve; where the other two bags have a shoulder strap, the Transpack ice skating bags are actually back packs.
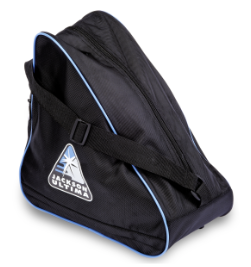
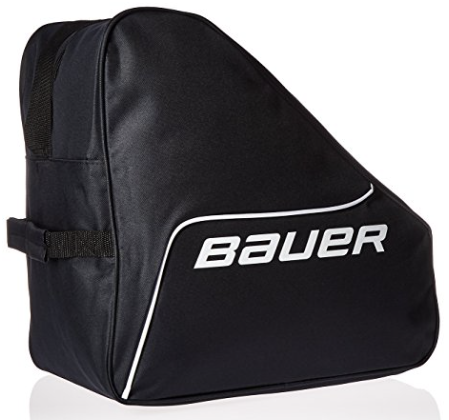
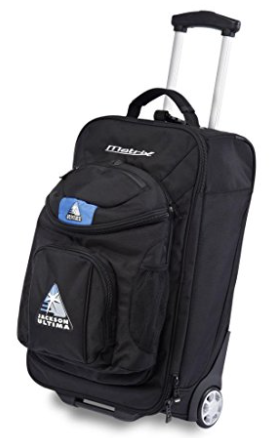
Ice Skating Back Packs

Ice skating back packs tend to align with the two bag categories above, either ventilated (like the Transpack) or unventilated like the Jackson Ultimate back pack shown here.. The same basic pros and cons apply in terms of allowing the skates to dry out, with my personal favor leaning towards the ventilated back packs for that exact reason. Prices for back packs can be higher than for the simpler ventilated bags, but that extra money buys you more pockets and compartments than you can shake a stick at. Anybody who loves a well-organized bag would do well to consider something similar to the Jackson Ultimate JL600 shown above. The Transpack Ice by comparison is basically a ventilated ice skating bag with back pack straps, so a simpler and cheaper compromise.
Rolling Suitcases / Trolley Bags
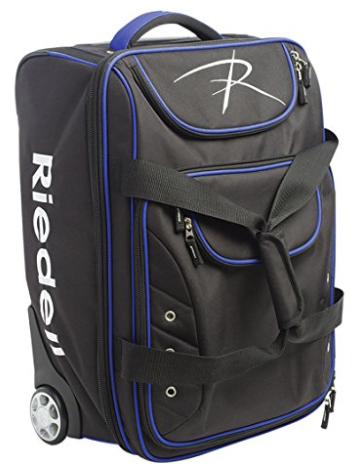
Recently I’ve been seeing more skaters opting to use some kind of rolling suitcase, typically hand-luggage size, or pretty close to it. While some are genuinely items of luggage, others – like the Riedell Travel Bag and the Jackson Trolley Bag are designed specifically for skates. I must confess that despite the high price, I’m particularly enamored by the Jackson Trolley Bag, which not only has dividers on the inside of the case to organize the contents, but the bag on the front detaches and becomes a backpack with a number of compartments in it. It’s not ventilated, but none of the wheeled bags appear to be, so with the caveat that skates should probably be removed when not in use, I happen to think these are a really nice, if costly, option.
The Box The Skates Came In
Admit it, you considered it – and that’s ok. The problem is that the box is bulky, often uncomfortable to carry, has little room for anything else, and – being cardboard – will break within a week or two. Still, for short term use when new skates arrive, the box is an easy initial choice.
Any Other Bag
All the options above (except perhaps the box) are designed for use with ice skates, but that shouldn’t lead to the conclusion that only these special ice skating bags are acceptable to use. It’s perfectly fine to use any bag that will hold the skates and all the other essentials a figure skater needs. Really, once you get to the rink, who cares what the bag looks like? The ice is what matters! If you do get a regular bag of some kind, just take the time to size the bag properly so that the skates aren’t jutting out through the sides and banging into everything you walk past, or trying to stab your legs at every opportunity. Beyond that, from Walmart to Gucci, if the skates fit and you like the bag, enjoy using it!
Affiliate Links
(If you can’t see any links here, you probably have an ad-blocker)
The post Choosing An Ice Skating Bag – So Many Choices! appeared first on SkaterDad.com.
]]>Continue reading "Figure Skater Essentials – Top Ten Must Haves!"
The post Figure Skater Essentials – Top Ten Must Haves! appeared first on SkaterDad.com.
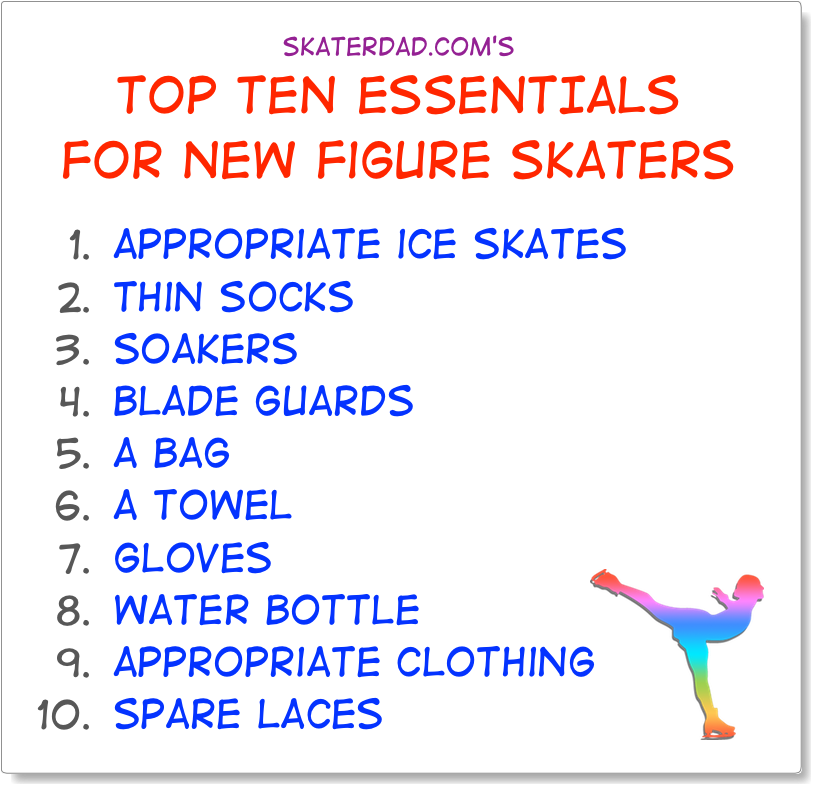
]]>So without further ado, here’s SkaterDad.com’s top ten essentials for new figure skaters.
New Figure Skater Essentials
Breakdown of the Figure Skater Essentials
For each of the essentials I listed above, here’s a bit more detail and some links to more information.
1. Appropriate Ice Skates
This is really the most important of the figure skater essentials. I know it sounds silly, but if you are going to buy ice skates, make sure they are suitable for the stature of the child and the level of their skating.
Link: Renting Skates versus Buying Skates (SkaterDad.com)
2. Thin Socks
Perhaps counter-intuitively, figure skaters tend to wear thin socks (maybe trouser socks for women, and thin dress socks for men). Some figure skaters even go barefoot, which should reaffirm that a thick sock is neither desirable, nor a requirement for figure skating. Soft rental skates are far more tolerant of thick socks, but when you buy your own skates, thick socks tend to go out the window.
3. Soakers
As figure skater essentials go, this one is pretty critical. No matter how carefully you dry your blades when you come off the ice, the metal is so cold that moisture will condense on it for a while after you finish skating. The simple equation is Water + Blades = Rust. In my opinion, soakers are a non-negotiable item.
Link: Soakers: Why Are They Necessary? (SkaterDad.com)
4. Blade Guards
Cheap, colorful, and they save your blades from getting ruined when you need to walk off ice or off the ice rink rubber surfaces. Buy them. Love them. Bring them with you.
Link: What Are Blade Guards? (SkaterDad.com)
5. A Bag
Don’t be under any illusion that it will be ok to bring your new figure skates back and forth to the ice rink in the cardboard box in which they were originally packaged. Trust me, I tried, and a) the box is bulky and inconvenient; b) it won’t last very long before the “handle” (i.e. hand hold) breaks; and c) there’s not much room in there for the other things you need to bring with you.
You do not–under any circumstances–have to splash for the ~$170 Zuca skate bag with the flashing LED lights in the wheels. I know the other (mostly) girls have them and they are indeed super cool, and your child will undoubtedly think that you are the most awesome parent in the whole world ever, EVER. The bags I bought for my children cost around $15 each; my kids still talk to me. Of course, if you can find somebody selling a used Zuca for $30, well, that’s a different question.
Link: Choosing an Ice Skating Bag (SkaterDad.com)
6. A Towel
How are you going to dry your skate blades and soles after you finish skating? I can’t stand using paper towels snagged from the snack bar or the bathroom; they feel like they are scratching away at the beautiful shiny blades I paid so much for. Thus when you go skating I advise bringing either a towel, a chamois cloth, a terry cloth, or anything else soft and absorbent which will dry the blades gently effectively. Yes, this includes the ShamWow, if that’s what floats your boat!
7. Gloves
Most people I’ve spoken to tell me that their hands get cold when they skate. Gloves, therefore, are probably a requirement for most skaters, during practice, at least. There’s no special magic to this item; buy whatever gloves suit your budget, keep your hands warm and allow you to still grab the rail, a skate (if you’re doing those kind of moves) or your partner’s hand (for pair skating).
8. Water Bottle
Skating is exercise, and that means you’ll get thirsty. A water bottle is something you can bring rink-side without upsetting anybody. For perhaps obvious reasons, don’t fill it with anything else except water; nobody wants a sticky brown soda puddle freezing on the ice surface. Yuck. And anyway, drinking soda during a vigorous skating workout sounds like a recipe for trouble, if you ask me.
9. Appropriate Clothing
What is appropriate clothing? There’s no right answer, but if you believe many skaters there are some wrong
answers. The only thing it seems to be generally agreed is inappropriate to wear for skating is a pair of jeans, in part because the seams can chafe, in part because they’re not typically very flexible, and in part because once wet, jeans tend to hold the water and then get freezing cold, which is not very nice. That said, I’ve seen stretch jeans worn quite successfully before, so just expect a little gentle ribbing if you wear them. Beyond that, the general idea is to wear something that doesn’t restrict the movement of your arms or legs, and that keeps you warm enough. On the bottom half, boys typically seem to wear sweat pants or tracksuit pants, and girls typically lean towards lined leggings or sweat pants. On the top half I see everything from t-shirts (my children are apparently impervious to cold) through long sleeve shirts, to sweaters, hoodies and sweatshirts. The trick is to bring layers of clothing so that the skater can adjust to how they feel out on the ice. Once it’s a little clearer what works best for each skater, it’s easier to bring exactly what’s needed going forward.
10. Spare Laces
I’m guilty of failing on this one, but if a lace breaks just before a skating session (or worse, a competition), somebody is going to be upset. Whether the child will be more upset because they can’t skate today, or I would be more upset because I just wasted an entrance fee, is another matter entirely. Laces are relatively cheap, so having a spare pair of the right length in your bag will at some point save your figurative bacon. And now I should really go and order those spares…
The post Figure Skater Essentials – Top Ten Must Haves! appeared first on SkaterDad.com.
]]>Continue reading "Making Sense of Figure Skate Blade Profiles"
The post Making Sense of Figure Skate Blade Profiles appeared first on SkaterDad.com.
]]>
Blade Profiles
The phrase blade profile
refers to the shape of the blade surface (that is, the bit that touches the ice) as viewed from the side. I’m only one sentence in, but I already have to add a caveat that some manufacturers have also created products which change the profile of the width of the blade along its length (for example, John Wilson Parabolic blades, or some of the tapered blades which are thicker at the front and narrower at the back). For the purposes of this page however, we will ignore this complication and concentrate on the side profile of the blade.
Unsurprisingly there is no “one size fits all”
for blade shapes, and over the years manufacturers have experimented with different curves and toe pick designs with varying degrees of success. In the end, though, many current blades seem to try to emulate some classic John Wilson blade designs such as the Gold Seal and Pattern 99, which are ubiquitous competition-level blades.
Anatomy Of A Blade
Figure skate blades are made up of three main functional sections, and understanding what each part of the blade does will help with the further explanations below.
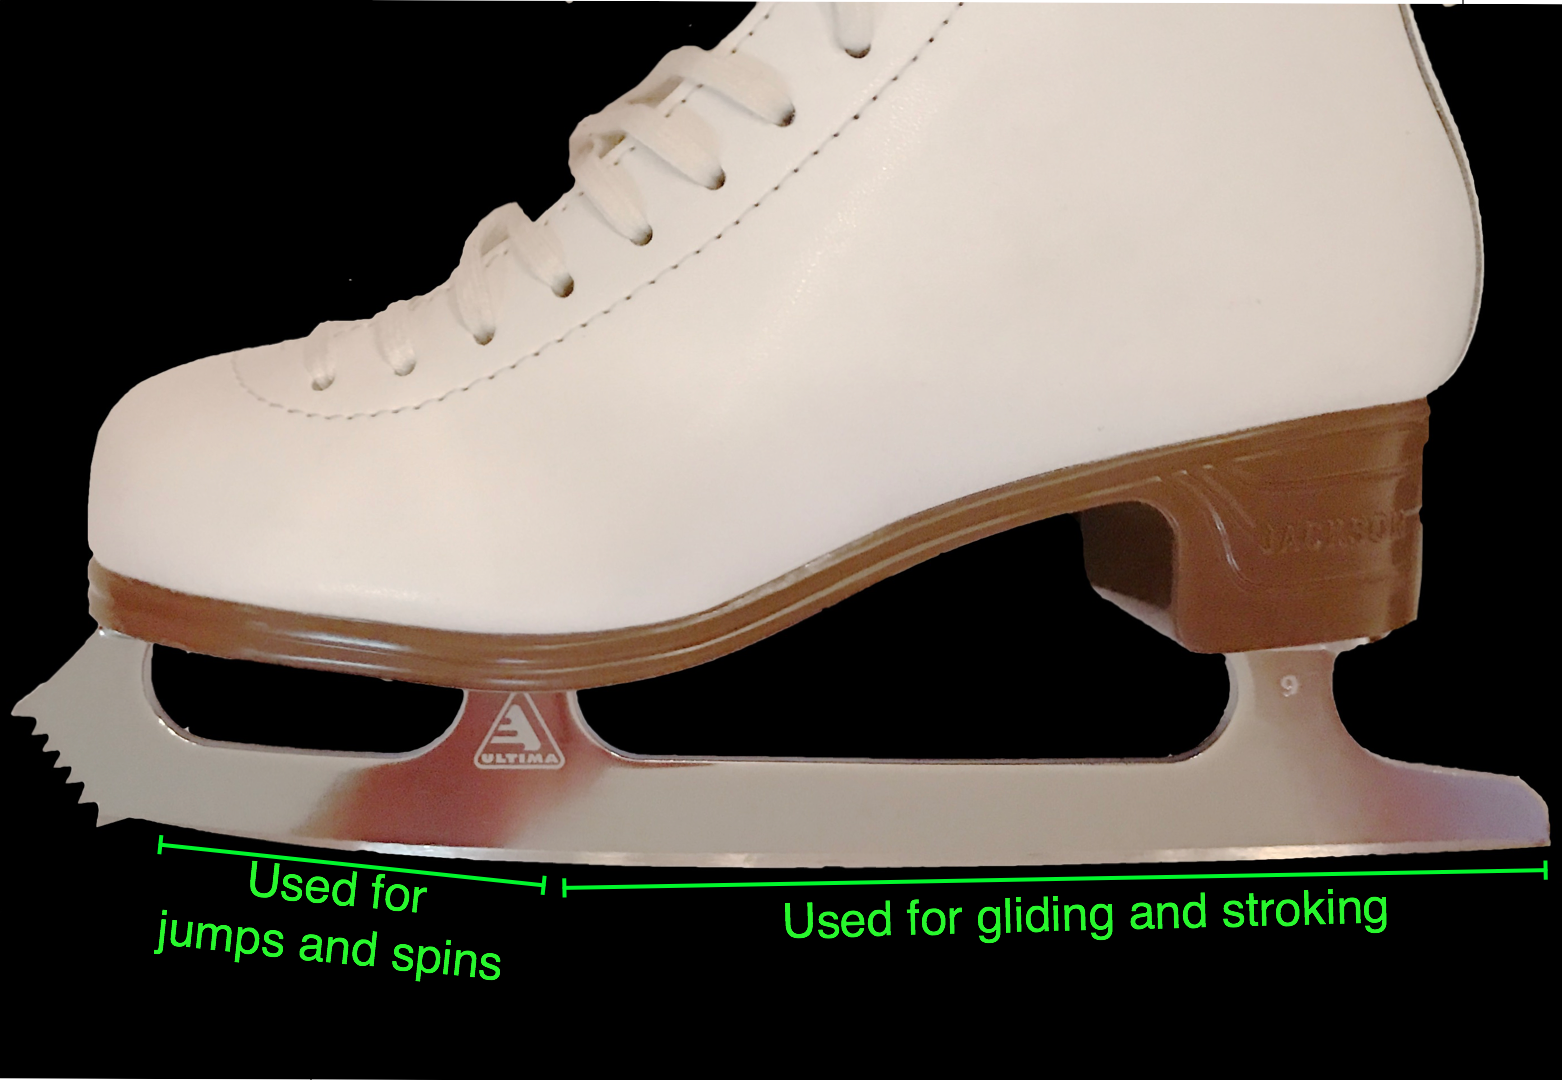
The diagram above shows the two parts of the blade which are used for movement; the third part are the toe picks on the front. I am, by the way, ignoring the lethal weapons (toe picks) on the front of the blade for the moment. While they—and their relationship to the blade—are important, they won’t help this discussion any.
It’s important to understand that the two labeled parts of the blade are used for different moves. When gliding or stroking on the ice, the skater uses the rear part of the skate (the rocker). When performing jumps and spins, however, the skater moves their weight forward to use the front part of the blade (sometimes called the “spin rocker”). This is why the tapered blades I mentioned above are thicker at the front; to support the jumps and spins.
Rocker Radius
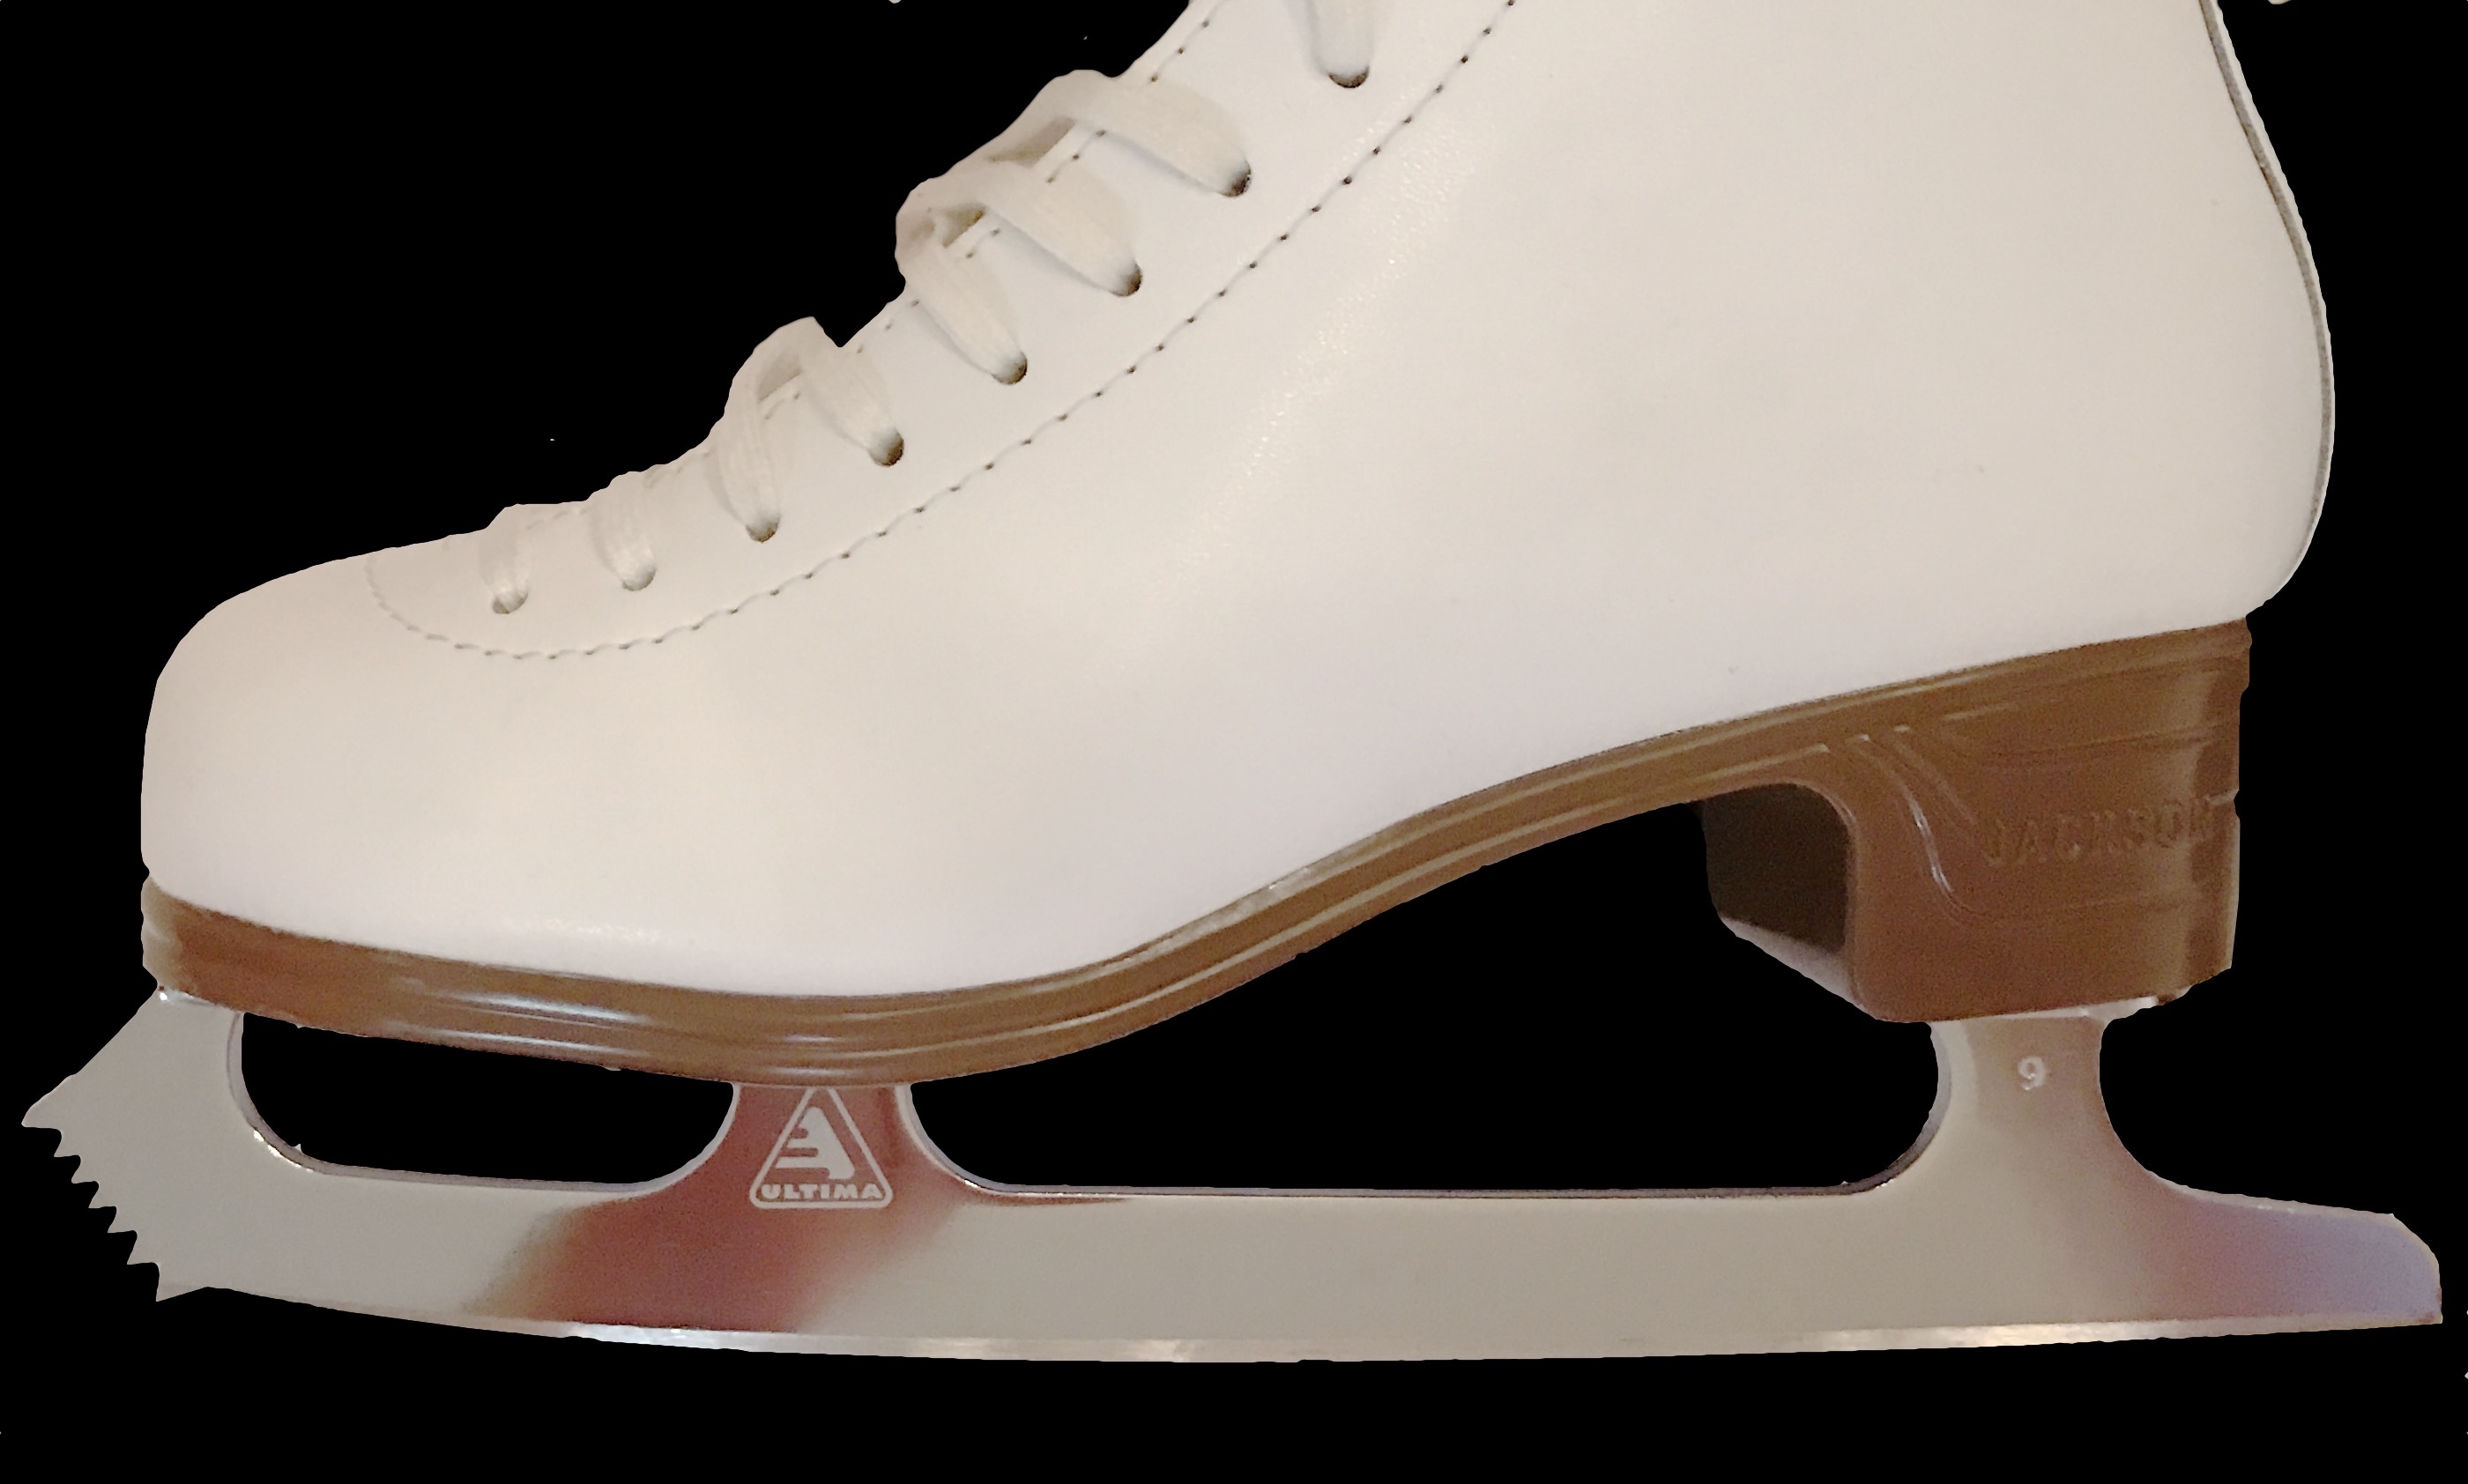
The shape of the blade profile for figure skates is usually quoted in feet, and as with Radius of Hollow, the idea is that if one were to draw a circle with that radius, the shape of the bottom of the blade would follow an arc of that circle. If that’s confusing—and it probably is—let’s make it clearer by using my daughter’s Jackson skates as an example. Her skates have the Mirage blade on them, and Jackson’s website has this specification:
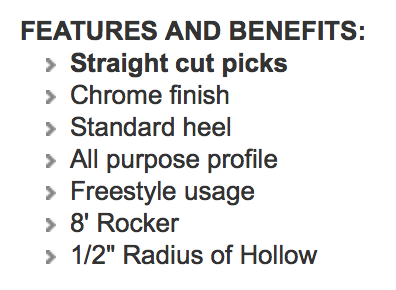
Based on the information above, the Mirage has an 8′ rocker radius. To illustrate this, I took the skate image into a drawing program and scaled it to represent its actual measured size. I then created an 8′ radius (16′ diameter) circle and overlaid it so that the circle’s arc could be matched against the blade. This is the result, and the thin yellow line is a small arc from that huge circle:
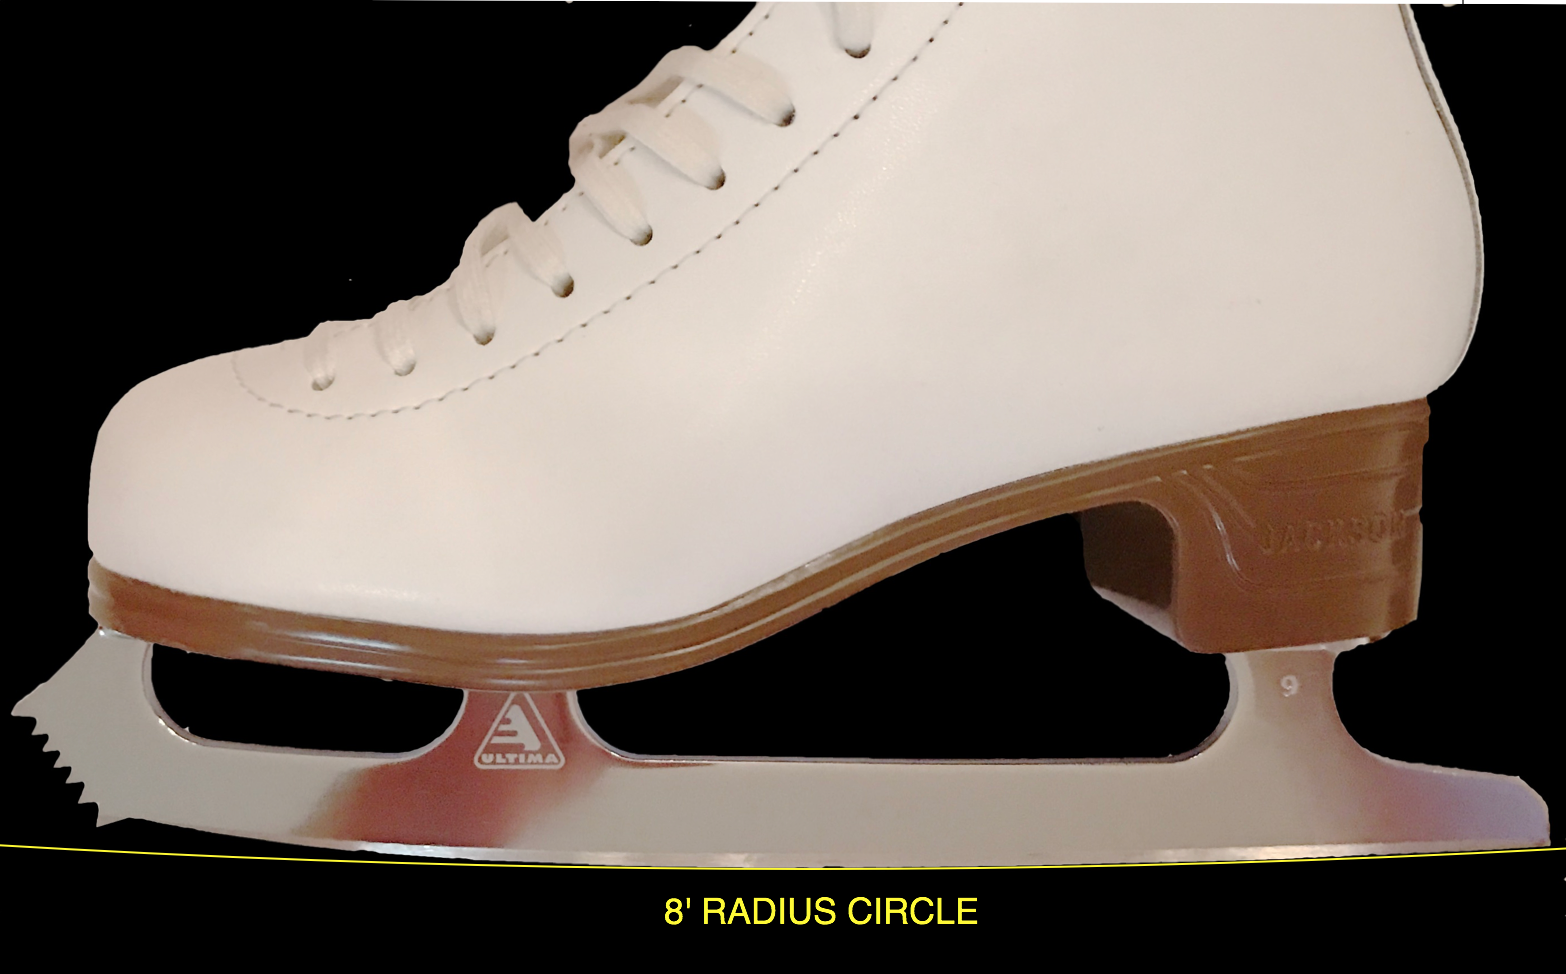
What should be obvious here is that while much of the blade aligns with the stated rocker radius, not all of it does. The rocker radius really refers to the rear part of the blade that’s used for gliding and stroking. The section of the blade used for jumps and spins is clearly not using a circle of the same radius.
What difference does the rocker radius make? Well, a larger radius means a flatter blade, which means more of the blade will contact the ice at any one time. This may make the blades feel a little more stable, although they may be marginally less maneuverable on the ice. Conversely a smaller radius means a smaller contact area, and skaters seem to report more instability especially if they were used to a larger radius rocker previously. Choosing an appropriate rocker radius is definitely an area where talking to your skate tech and coach is important. However, as you’ll see below, the rocker radius alone does not define everything about the blade’s behavior.
Two and Three Radius Blades
Figure skating blades do not in fact use a single radius, despite that being what’s quoted on the literature; they typically use two or even three radiuses along the blade. The largest radius is reserved for the rear section, and the front jump/spin section will normally be cut either from one other radius, or split into cuts along two different radius arcs. Looking at the Jackson Mirage blade again, the front section appears to be cut using somewhere around a 17″ radius. I have overlaid a green circle on the previous image demonstrating this much sharper arc as seen at the front of the skate:
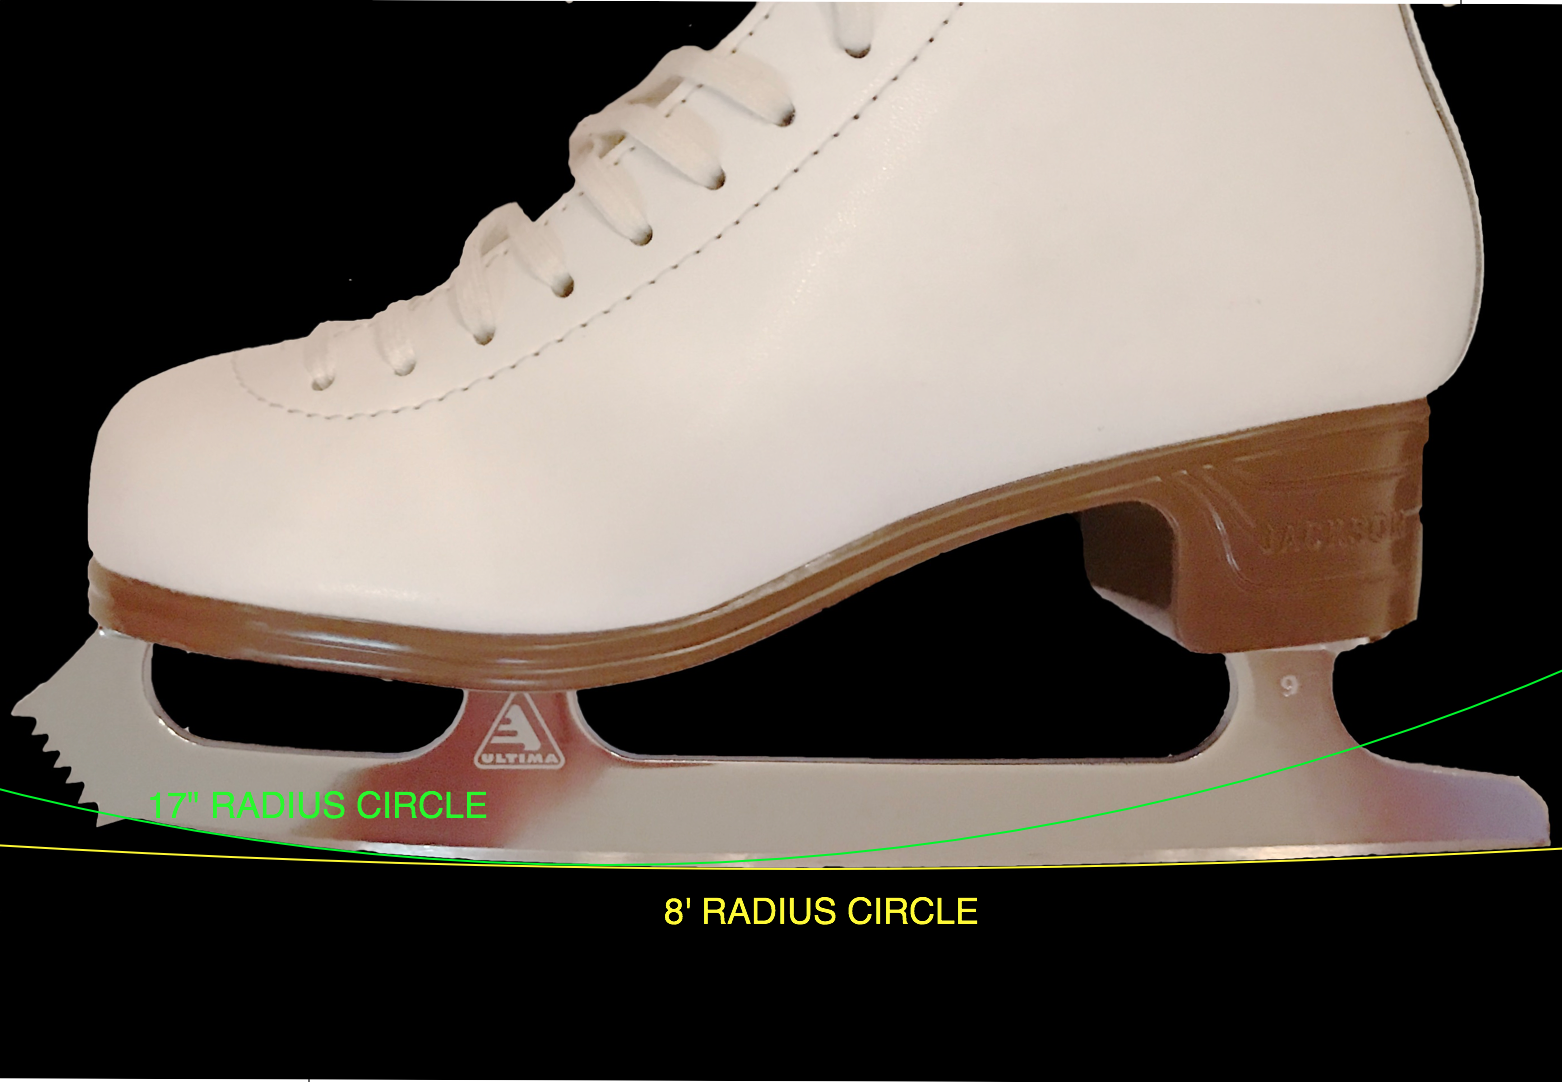
It’s interesting to me that the only radius quoted for almost every blade is the main rocker radius rather than the front radius (or radiuses), because it seems to me that for a figure skater the properties of the area on which they perform jumps and spins might be far more important to them, or at least might have more impact on the skating performance. Maybe I’m wrong. What do you think?
Accuracy of Sharpening
Given that the exact curvature of each make and model of blade are part of the blade’s characteristics, finding a skate tech / blade sharpener who can accurately and consistently grind the right profile on to the blades is really important. In fact, this will probably become a recurring theme on this blog when it comes to skate maintenance: find a great skate tech (word of mouth is usually a good way), make friends with them, grab hold of them and never let go! You need to be able to trust that when your skates are sharpened, they’re going to come back correctly sharpened, the same way, every time. The corollary to this is that taking your skates to be sharpened by a different person or at a different place each time is a bad idea.
Hopefully if this was previously a confusing topic, this helped shed some light on the subject.
The post Making Sense of Figure Skate Blade Profiles appeared first on SkaterDad.com.
]]>Continue reading "Ice Skates in Transit Need Protection Too!"
The post Ice Skates in Transit Need Protection Too! appeared first on SkaterDad.com.
]]>
Protection For Ice Skates
Bag Choice
The first thing to consider is whether you have, or can select, a bag which isolates the skates from everything else and preferably from each other. I will discuss bags more in a separate post, but it’s something to consider when evaluating options.
However, assuming that you already have a bag or it’s not possible to find a bag which keeps the skates separate, what can be done?
Towels
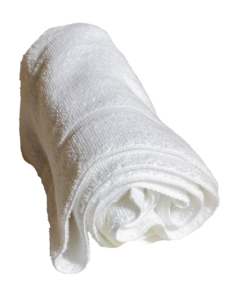
Cheap, cheerful, effective. Wrap your skates in towels when you’re done and you have a four-way win, even if, perhaps, it looks a little amateurish:
- The towel helps to keep the boot uppers dry;
- You can stuff some of the towel into the boot itself to help draw out the inevitable moisture left there by the sweaty feet which so recently inhabited the space;
- Wrapping the boots in towels gives protection them from rubbing against anything other than the towel in transit, thus helping to keep your skate boots in pristine condition;
- The towels act as padding against knocks and bangs, so offers some protection from external harm.
By the way: amateurish, smamateurish. I do not care if somebody thinks I look silly using a towel. If it works and doesn’t have any obvious down sides, why knock it? Sure, buy a towel with an ice skate embroidered into it if you like and if it feels more like something a serious
skater might use, but otherwise I would look to grab a couple of plain white towels and put them to good use.
The one negative I can see for towels is that they are somewhat bulky, so will take up space in the skate bag which may be needed for something else. That’s a judgement call for each person.
As a side note, I live in constant fear of heavily colored items leaving dye stains on the lovely white skate boots, and in some cases if you believe the reviews on Amazon and elsewhere, I am right to worry about everything from boot covers to bags and more. Buying / using white towels avoids the whole issue.
Pillowcases
If you thought the towels looked silly, try using a couple of old pillowcases. Pillowcases are not as absorbent as towels, so don’t have as much benefit in terms of keeping the boots moisture free (or accelerating the drying process), but most people will be able to find a couple of old pillowcases, and once the skates have been dried off and have soakers on, it’s quick and easy to put each one in its own pillowcase before putting them into the bag.
One thing in favor of pillowcases is that they are very compact; they take up almost no space over and above the volume of the skates themselves.
Pillowcases primarily protect the boots from one another; since they are not as padded as towels, they offer less cushioning against impacts, but using pillowcases is definitely better than using nothing.
Special Skate Pouches / Bags
I’ve read somewhere (though I forget where now) that you can buy special soft lined pouches in which to put ice skates. When I looked for these online, however, I came up with nothing. Maybe there’s a particular name for them which, if I knew it, would magically generate results. Anyway, I mention them only because somebody said they existed. If you know about them and can point me to a link to some, I’d be delighted to update this post with the information you share!
Any Other Ideas?
If you do something different to protect your skates and are willing to share, could you please comment below so I can share it with others here too?
Conclusions
Towels are looking really good right now, aren’t they? With that said, I see many skaters who do not bag or wrap their skates up at all. Currently, the bags my children use have a section on the outside and they can put one skate in each pocket with nothing else in there. However, I’m seriously considering those towels…!
The post Ice Skates in Transit Need Protection Too! appeared first on SkaterDad.com.
]]>Continue reading "Blades: Radius Of Hollow (ROH)"
The post Blades: Radius Of Hollow (ROH) appeared first on SkaterDad.com.
]]>Radius Of Hollow(ROH). Ever wondered what it is?
Radius Of Hollow
When blades are manufactured (or sharpened), part of the decision to be made is what ROH to cut into the blade. Typical values for ROH might be between ¼” and 1½”, but more commonly for figure skates you’ll see values from 5/8″ to 7/16″. But what does this all mean?
Somebody who has never looked closely at an ice skating blade might have assumed that the blade surface (the part that is skated on) is flat, so looking at the blade end-on (rather than side-on), one might assume it looks like this:
In an ideal world, a perfect skater could (would?) use flat blades. The disadvantages of the flat blade though are that unless the skater were always 100% perfect in their movements, they would likely fall regularly, especially after jumps. Using a non-flat blade surface helps us get better grip and control on the ice, and since we are all terribly imperfect, that’s the norm.
With that in mind, the blade is ground (sharpened) using a curve, creating a kind of arch shape over the ice. This means that the blade actually touches the ice on two rather sharp edges:
The arch creates an empty space between the blade and the ice, and this is what is being referred to as the hollow
in Radius of Hollow
. As for the radius part, you probably know that a radius is the length from the center of a circle to the outside (i.e. it’s half the diameter, or distance from side to side).
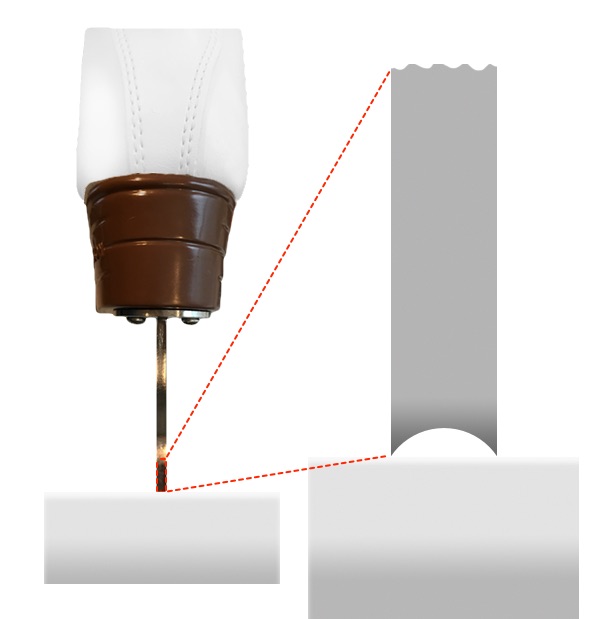
To create the hollow, take a circle with the desired radius, center it horizontally on the blade, then move it until the bottom corners of the blade just touch the circle at those two points. The arc between those points is the curve we want to cut into the blade:
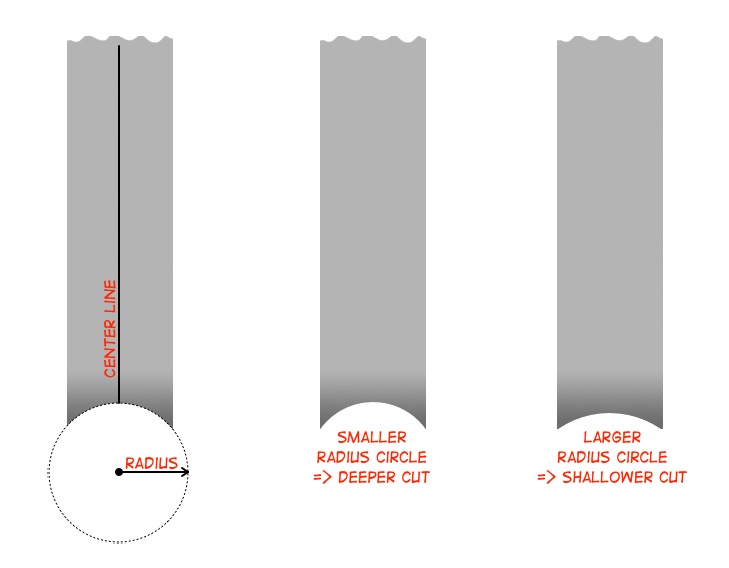
A larger radius means a larger circle, so the hollow that is cut out will be shallower. Conversely a smaller radius means a smaller circle, which leads to a deeper hollow.
Radius of Hollow (ROH) therefore refers to how deep a hollow is cut into the blade surface, and the value given represents the radius of the imaginary circle from which the hollow’s arc (curve) is taken.
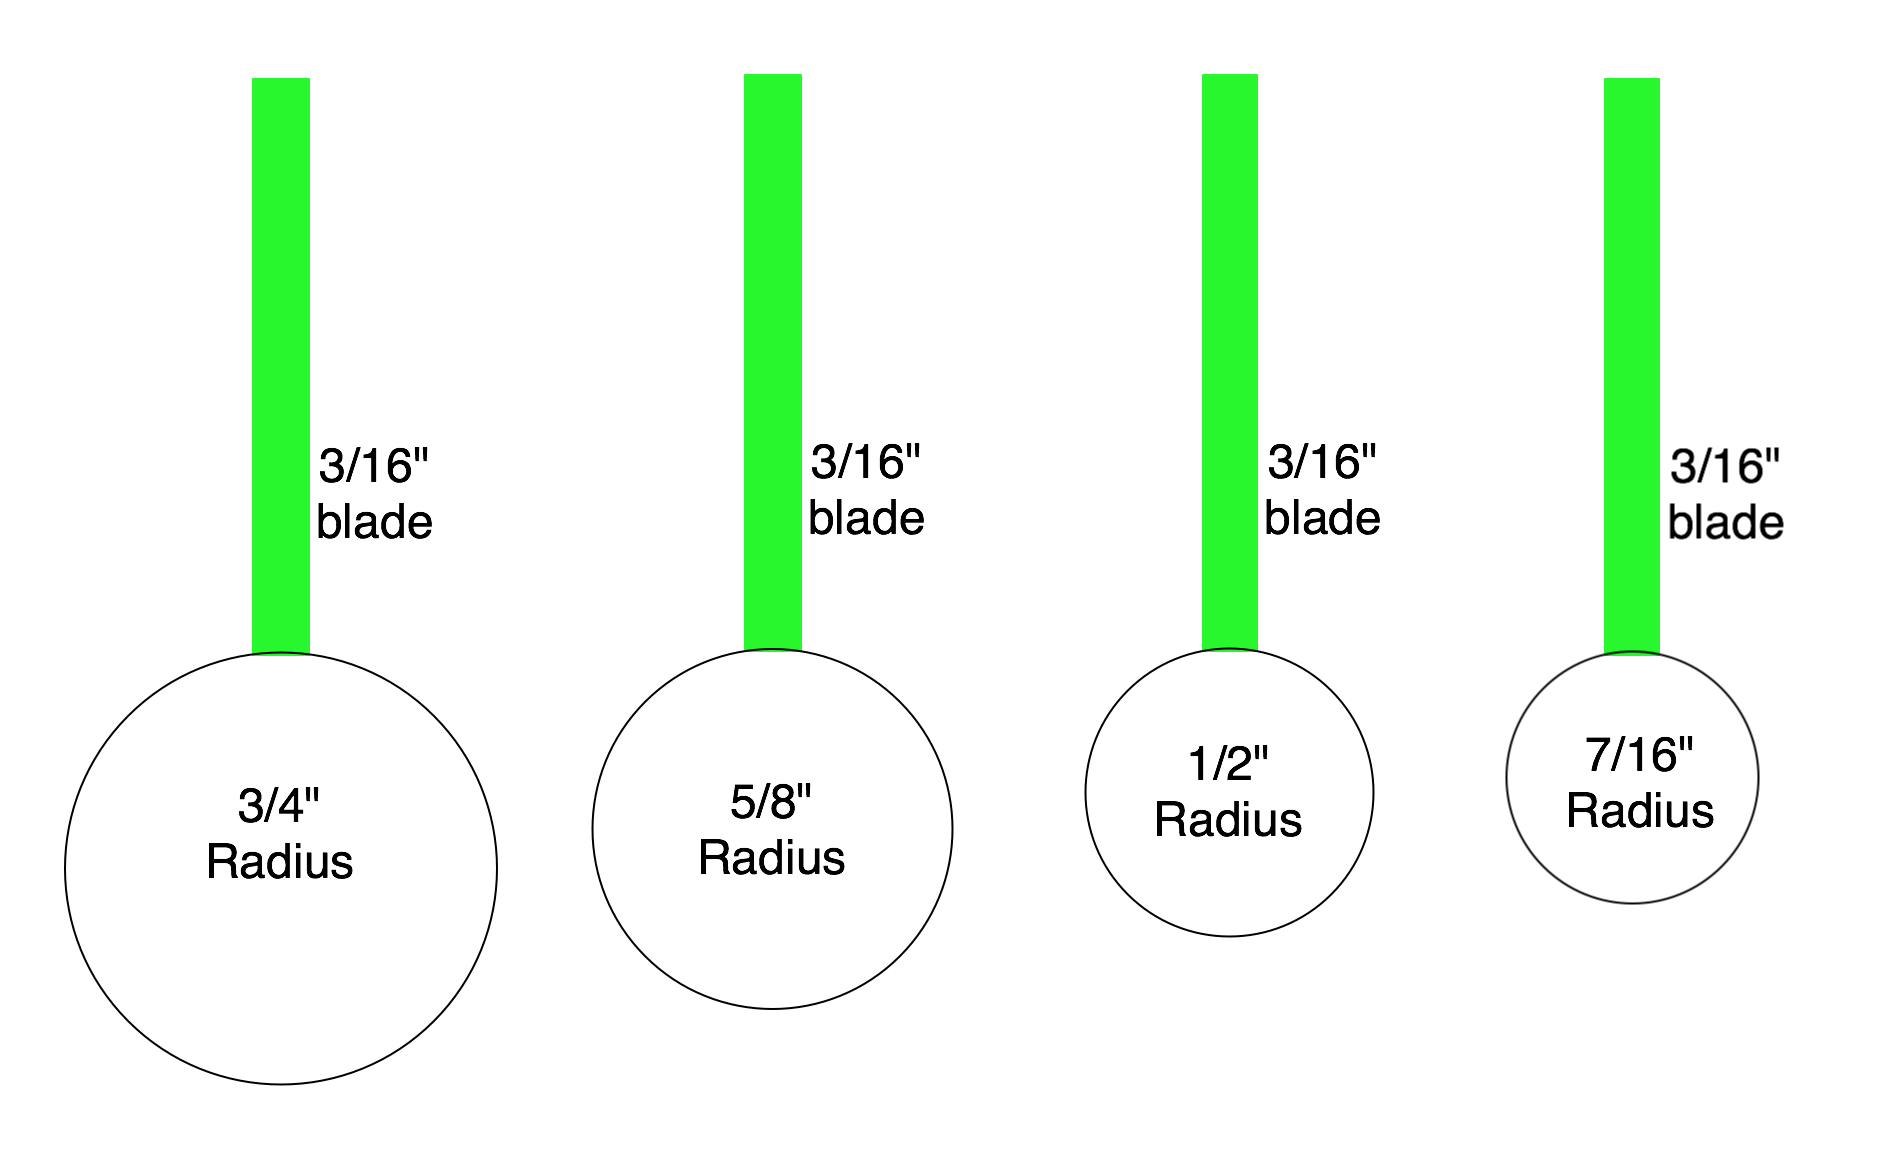
ROH Drawn To Scale
The images above show an exaggerated representation of the ROH on the blades in order that it’s more obvious what’s going on. Drawn at scale, here is a 3/16″ width blade (fairly typical) with four different ROH:
It’s a bit hard to see the difference, so here’s a close up of the same four ROH profiles:
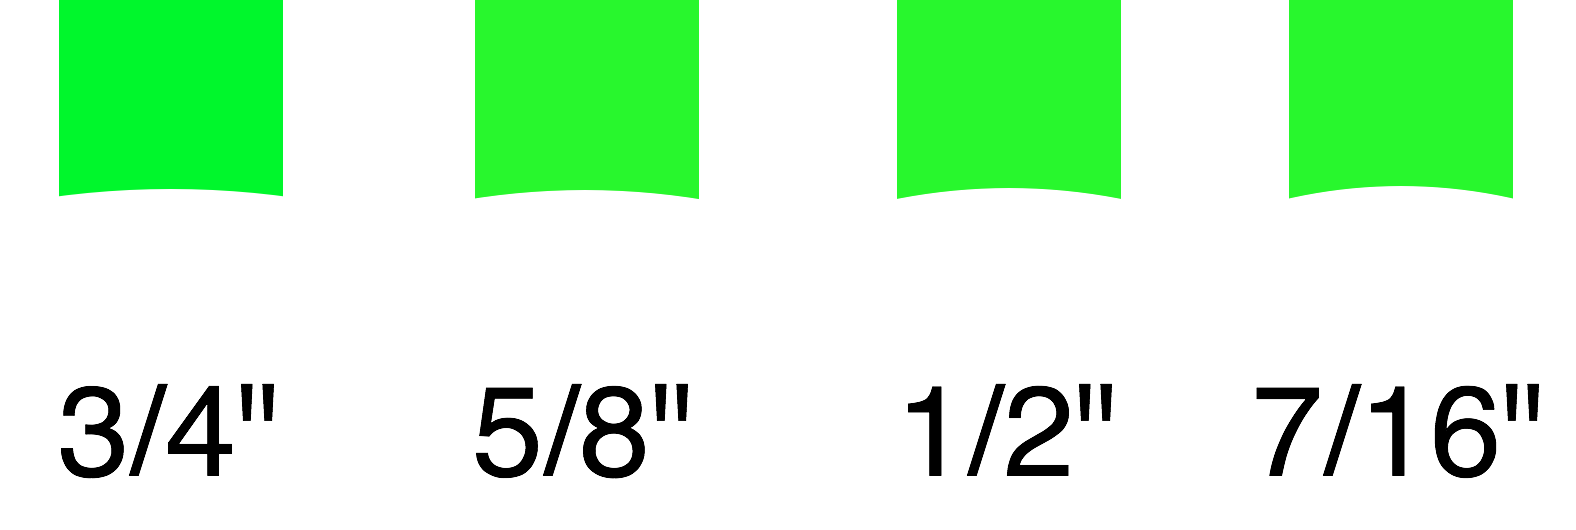
The difference is hopefully visible now, but looking at a skate blade I suspect I would be hard pressed to identify which ROH had been used!
Edges
The two sharp parts of the blade touching the ice are the edges
. I’m going to state what’s probably obvious here and confirm that the sharp part on the outside of each foot is known as the outer edge and the one on the inside of each foot is the inner edge.
Misalignment
One reason to use a reputable skate technician to sharpen your skates is to ensure that they are capable of aligning the cutting tools very precisely. If the tool is off-center even by a small amount, the results can be anywhere from irritating to disastrous:
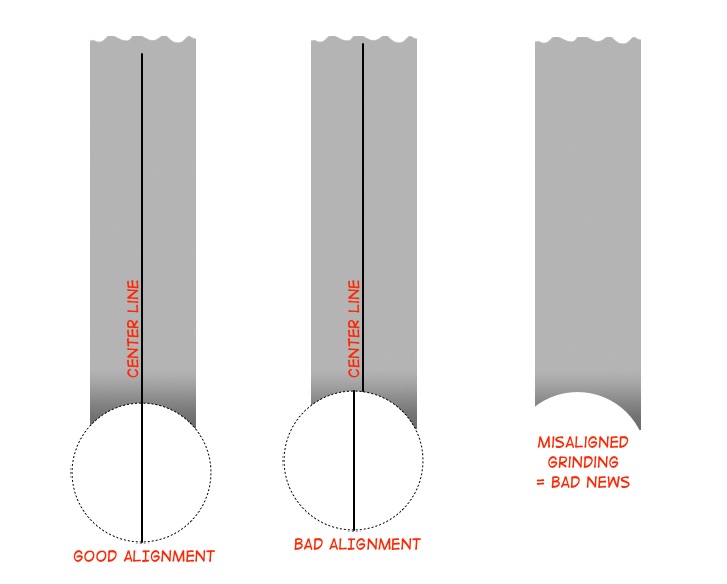
Trying to skate on misaligned edges like those shown above would be virtually impossible.
What ROH Should I Use?
Choosing a ROH is a matter of personal preference and, sadly, trial and error. There’s not really a magic formula to determine which will be best for an individual, as a number of factors can influence that decision. A radius of hollow around 5/8″ is a fairly typical place to start, sitting roughly in the middle of the usual ROH range.
Typically, the better
the skater, the larger ROH they will use. To that end, one way to determine the shallowest possible ROH for your skater would be to increase the ROH each time the skates are sharpened, and then when an ROH is reached where skating becomes too difficult, back off to the previous ROH. It’s not a hard and fast rule, but it’s a start.
Larger ROH (Shallower Hollow)
A larger Radius of Hollow (shallower / flatter hollow) gives slightly less control and less tight turns, because the edges cut into the ice less than a deeper hollow would do. On the up side, the flatter hollow glides well and can (subjectively) make the skater look a little more fluid on the ice as a result.
Smaller ROH (Deeper Hollow)
A smaller Radius of Hollow typically gives more control and tighter turns (because the deep hollow means that the edges cut into the ice more) and as a result the blades are more forgiving of the skater’s form, especially where landings are concerned. Small ROH means more bite, but also means the skates will glide less well, and it may take a bit more effort to skate as a result. One final point is that the marginally sharper edges with a deeper hollow mean that the blades can apparently be more prone to chipping.
Weight
Weight is a really important factor to take into account because it alters the effectiveness of the hollow quite significantly. Heavier skaters will need to use a larger ROH (i.e. a shallower hollow) because their additional weight will force the blades into the ice harder and allow them to cut in effectively despite a relatively shallow hollow. Cut a deep hollow on skates for a heavy skater and they may find that their weight pushes the edges into the ice so deeply that they can’t stop properly, trip over themselves or have difficulty turning. Too much ‘edge’ can be as bad as too little edge in this case.
A lighter skater in comparison will generally need a smaller ROH to get better control because they don’t push the skates down as hard and the extra depth creates more angular edges which will cut into the ice more effectively.
Ice Temperature
Believe it or not, the temperature of the ice also plays a part in the effectiveness of the ROH choice. Colder ice is firmer which prevents the edges from cutting in quite as much as they would on warmer ice; therefore a colder ice rink may require a deeper hollow on the blades (smaller ROH) to get similar bite to a larger ROH on a warmer rink. This is something a little more out of the skater’s control, unfortunately, but it’s worth knowing about nonetheless.
The post Blades: Radius Of Hollow (ROH) appeared first on SkaterDad.com.
]]>Continue reading "Boot Covers: Just Fashion or an Essential Accessory?"
The post Boot Covers: Just Fashion or an Essential Accessory? appeared first on SkaterDad.com.
]]>recommendedcategory nonetheless.

What Are Boot Covers?
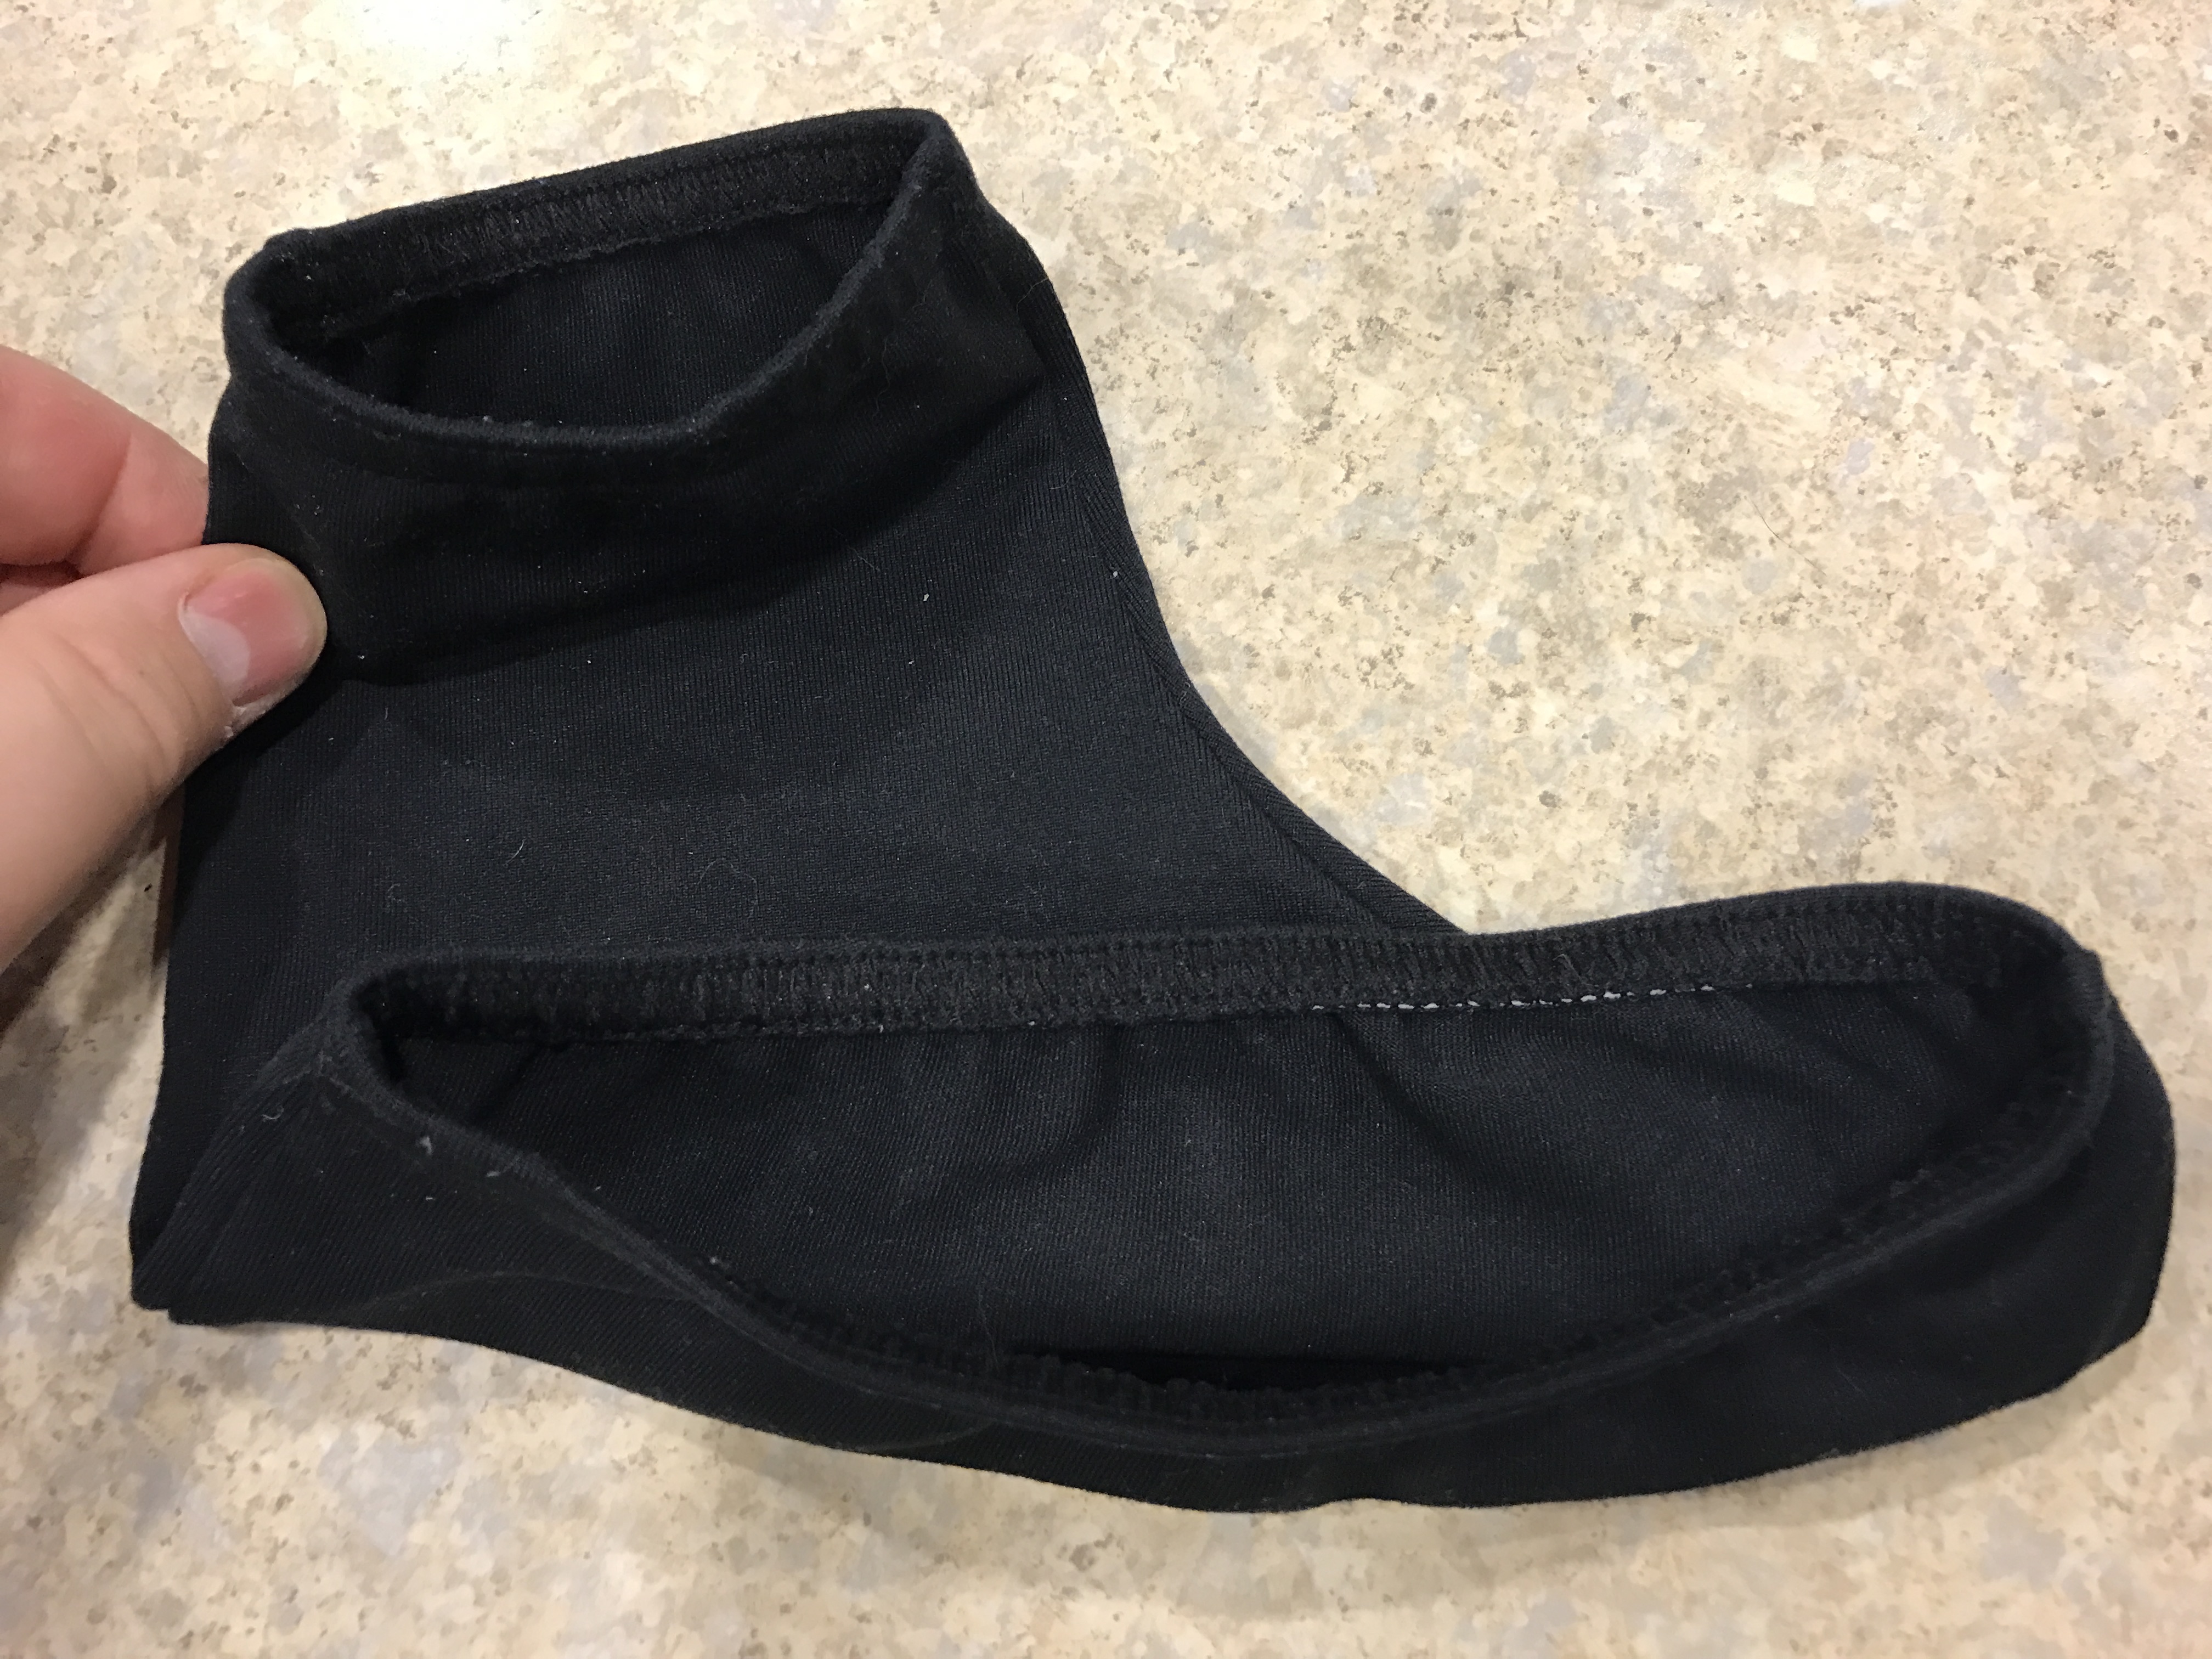
Boot covers are typically made of a stretchy lycra / spandex / polyester material and are designed to cover the entirety of the boot, from the top of the boot down to just under under the sole (wrapping underneath the foot just enough to hold the cover in place). They’re a pretty simple design, kind of like a soft bootee without a sole on it:
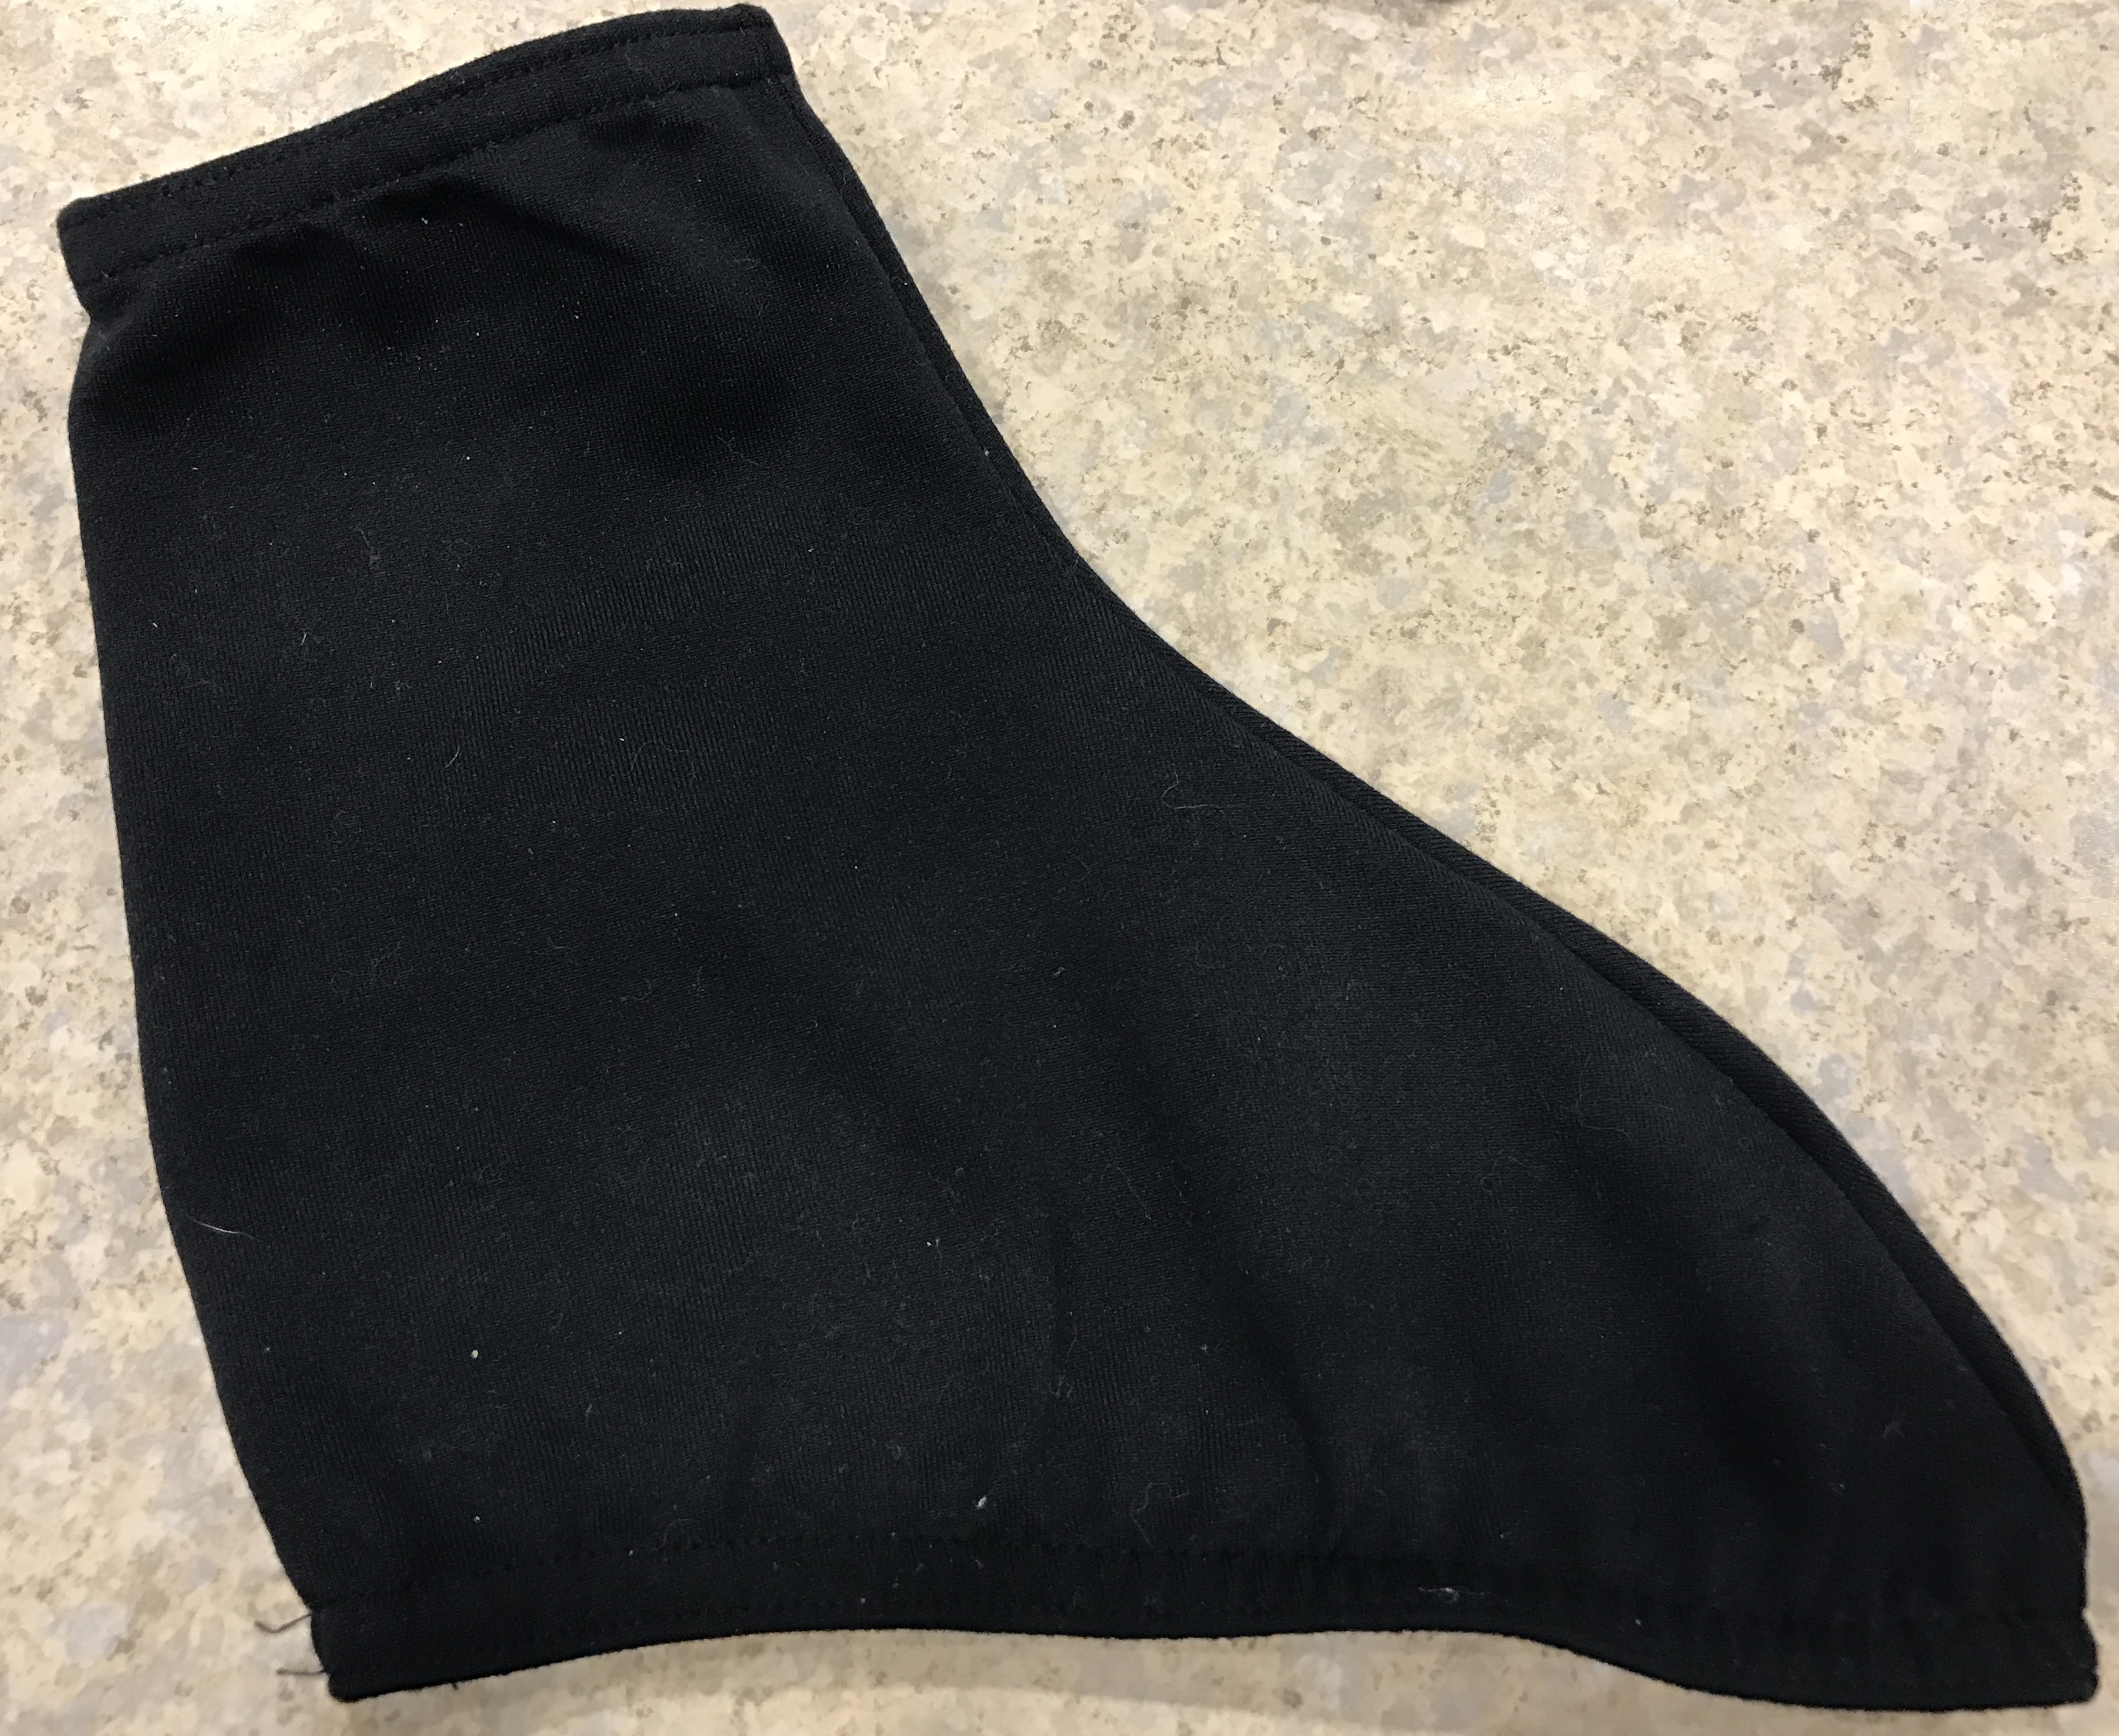
The top and bottom of the boot cover are elasticated so that the cover will hold in place properly:
Why Boot Covers?
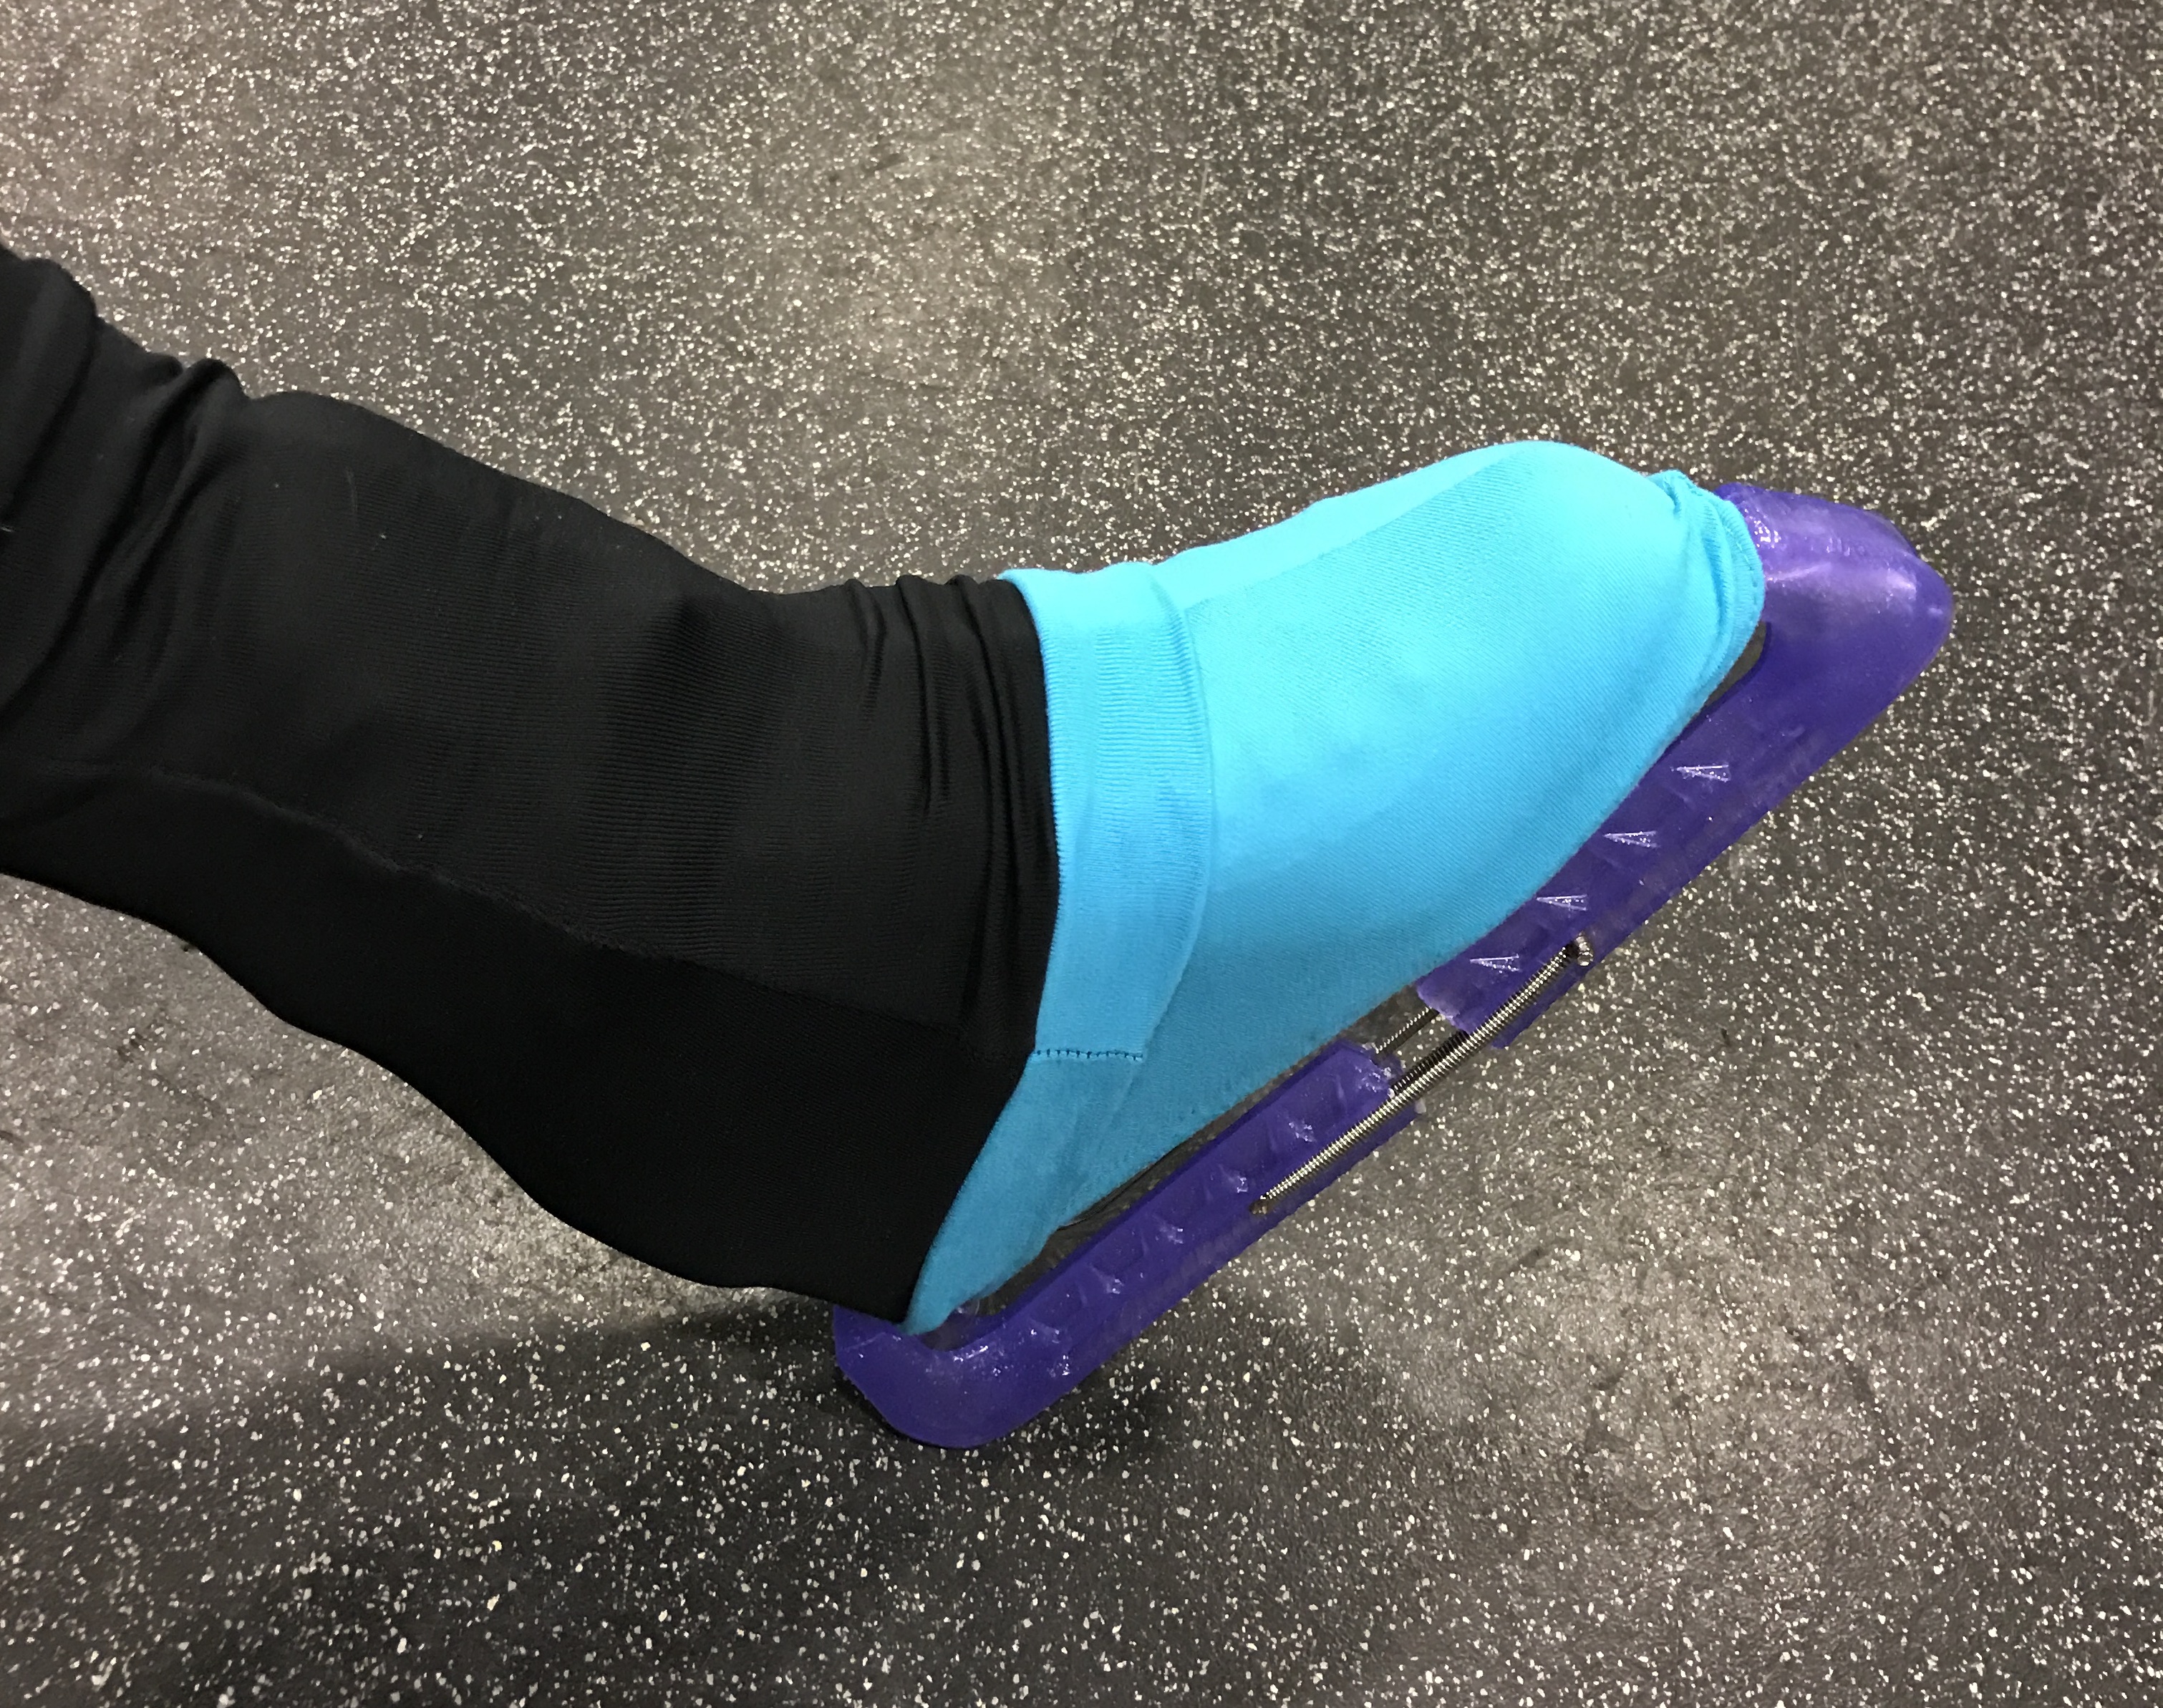
Some people wear boot covers because the wide range of colors and designs available can make the ice skates look prettier or more fashionable, and that’s a very valid reason. My youngest daughter, for example, loves wearing her turquoise boot covers with her turquoise spiral skate pants because by chance, the colors match so well it makes the pants and boots merge in a pretty seamless way:
My son wears black boot covers because while most boys / men wear black skates, he has white skates (for reasons I’ll explain in another post); black boot covers normalize his skates’ appearance to the color people seem to expect.
However, the very best reason I know for wearing boot covers is to protect your investment in your ice skates. The ice skate uppers are made of leather, which can get scratched and dinged like any other shoes. Ice can be rough when you scrape your boot along it doing a lunge, for example:
When practicing crossovers, it’s easy to nick one skate with the blade of the other. Scraping against the wall at the side of the ice can damage the leather as well. Rather than try to clean and repair the surface afterwards, it’s much easier to protect it beforehand and minimize the risk of damage. For purely protective purposes, it’s very common to use white boot covers over white boots; it’s not necessary to go with funky colors and patterns if you don’t want to!
Sizing And Cost
One size fits all, they say. I disagree, but apparently I’m in a minority because most covers are at best available in Child (to fit size 1-13) and Adult sizes. Adult, in this case, seems to mean Adult Women
based on the fact that Adult in the popular Chloe Noel brand, for example, is Size 1-8
. It’s not clear what a boy or man with feet larger than size 8 is supposed to do, because most brands seem to only offer those sizes. As a guide, my 12 year old son wears an adult size 8½ skate, and his “Adult”
boot covers only just fit. I am not entirely sure what to do when his feet grow larger, but I’ll cross that bridge when I get to it.
Interestingly, when seeking larger boot covers I did find them for sale in the UK. It seems that the Spanish company Intermezzo manufactures boot covers in an XL size. Sadly I have not found a US distributor for them. Maybe I have just found a new business for myself! I plan to get hold of a pair of all three sizes that they make in the near future and I will report back on the sizing, and whether we can organize some availability in the US going forward.
If the sizing is a pain, in comparison the pricing is a joy. A pair of boot covers in the USA typically runs from ~$10 upwards, depending on brand, color, material or pattern. I’ve linked some examples below, and as ever these are not personal recommendations, just examples of the type of thing available.
For the $10 or so it costs to get a pair of boot covers, my belief is that they will pay for themselves over time, so for me they are highly recommended.
What If I Hate Boot Covers?
Not everybody likes boot covers; I get it. The only way to protect a boot is for it to be protected. Boot-covering tights may provide some protection if you wear those. Similarly I’ve seen some people use tape to protect the most vulnerable areas of the boot. I can’t speak to either of these directly, but the verbal advice I’ve had from the coaches I’ve spoken to has always been to use boot covers.
The post Boot Covers: Just Fashion or an Essential Accessory? appeared first on SkaterDad.com.
]]>Continue reading "Stepping On To The Ice: Did You Know?"
The post Stepping On To The Ice: Did You Know? appeared first on SkaterDad.com.
]]>
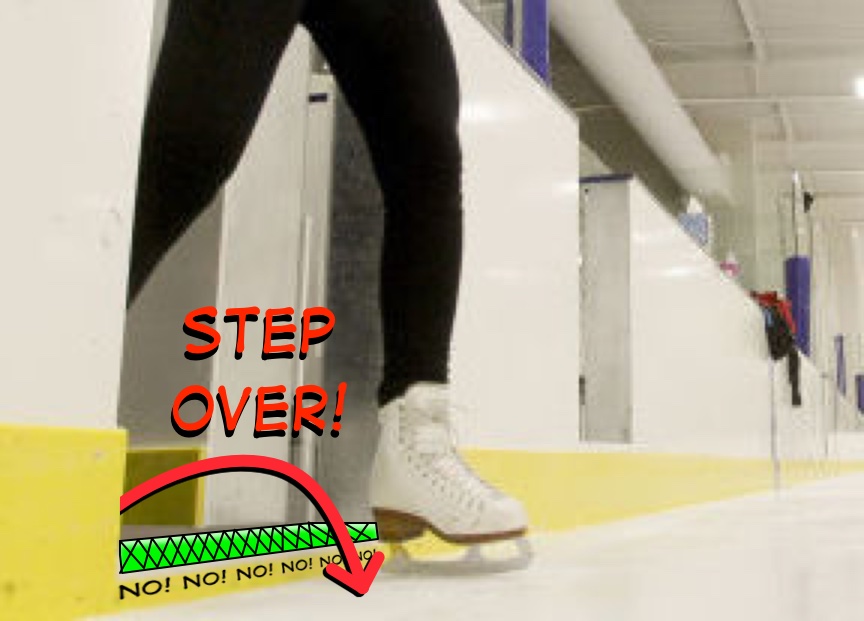
STOP RIGHT THERE
Do not step on the white plastic sill.
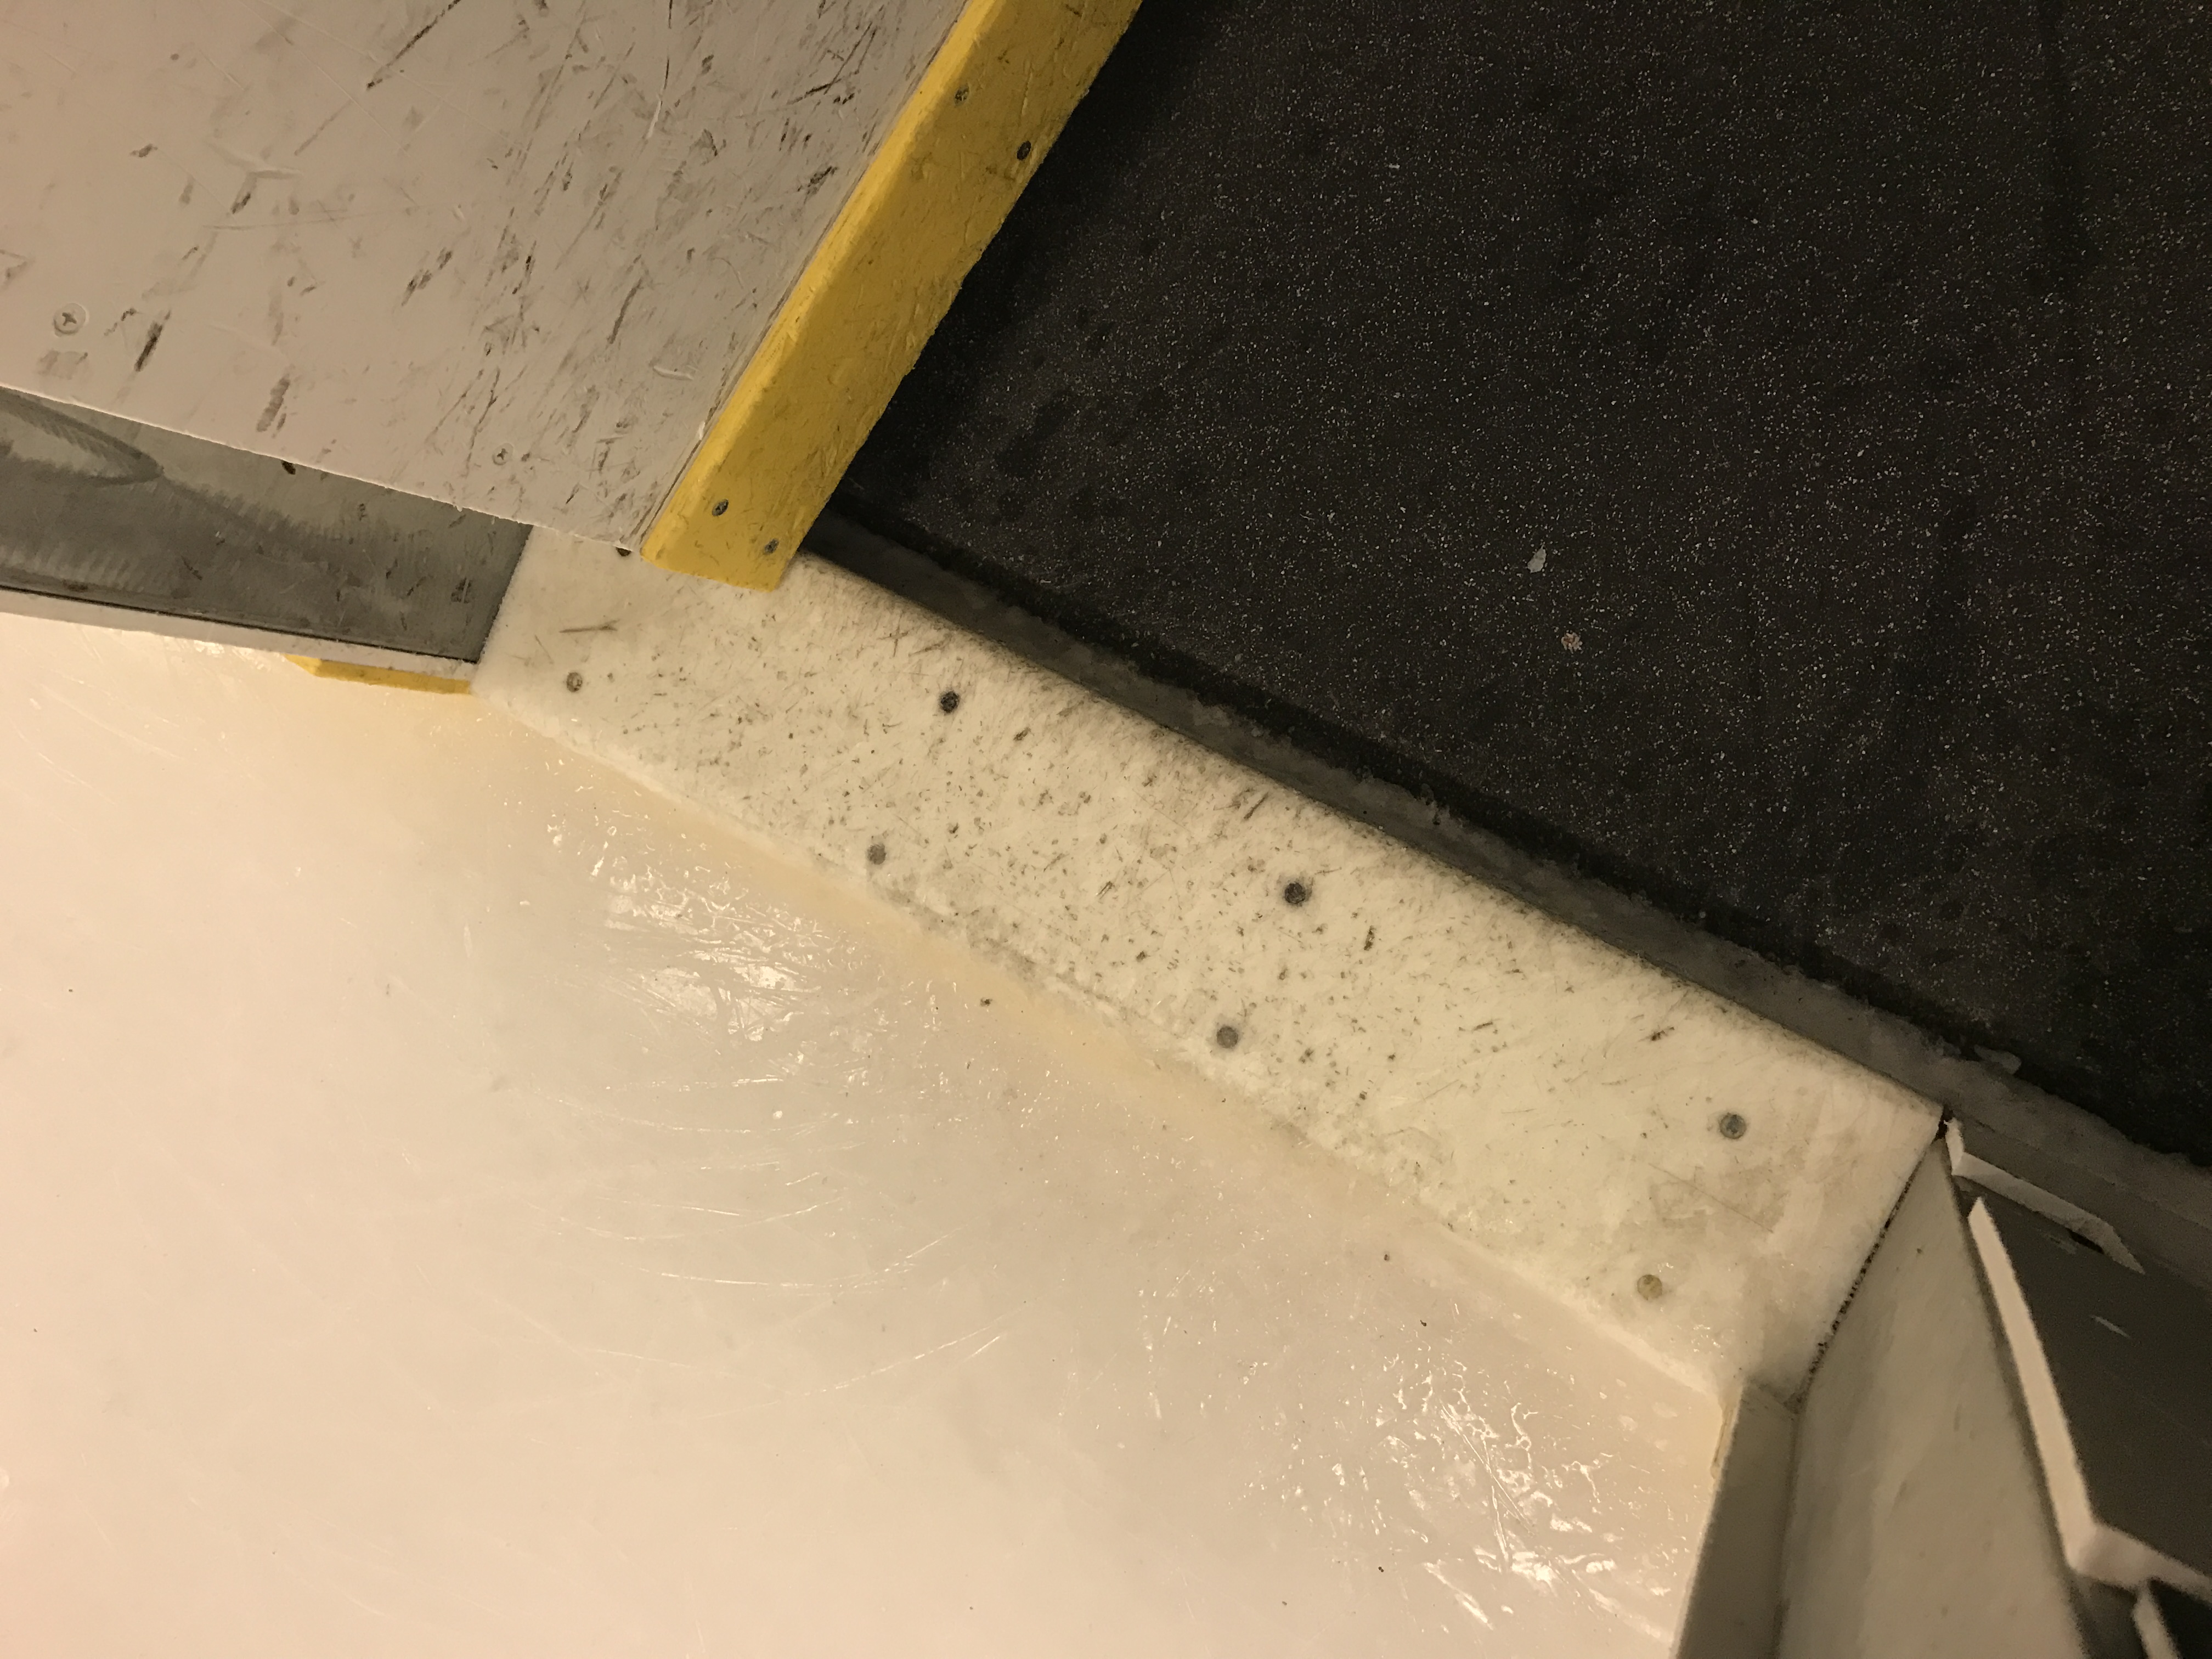
I know it looks like it’s there to help you. I know it feels like stepping up and over the step might make you slip when your skate goes on the ice. Or likewise when stepping off the ice it feels like a long way down to the rubber flooring. I hear you and I feel for you. However, that sill is an evil temptation just begging you to do the wrong thing.
If you aren’t sure why I’m shouting that you need to avoid stepping on that little white sill, take a moment to read the page about blade guards. In particular, that article highlights two surfaces on which skates can or should be worn without guards:
- the ice
- rubber flooring
That innocent-looking white sill is neither ice nor rubber; it’s hard plastic and it can do damage to your skate blades just as much as walking on other bad surfaces. You might also see in the picture above that the sill is screwed into place; I promise you, you do not want to ever have one of those screw heads touching your skate blades!
I don’t understand why there isn’t simply a sign next to each of the doors on to the ice saying do not step on the sill
. Instead this is one of those useful pieces of information which seems to be passed down as local knowledge instead.
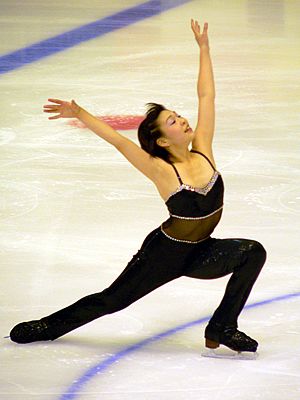
Let’s look more closely at the earlier picture of the skater (an ice dancer in this case) stepping on to the ice:
She knows what she’s doing. So next time you step on to or off the ice, for the sake of your blades, please step over that plastic sill.
The post Stepping On To The Ice: Did You Know? appeared first on SkaterDad.com.
]]>Continue reading "Soakers: Why Are They Necessary?"
The post Soakers: Why Are They Necessary? appeared first on SkaterDad.com.
]]>
Soakers
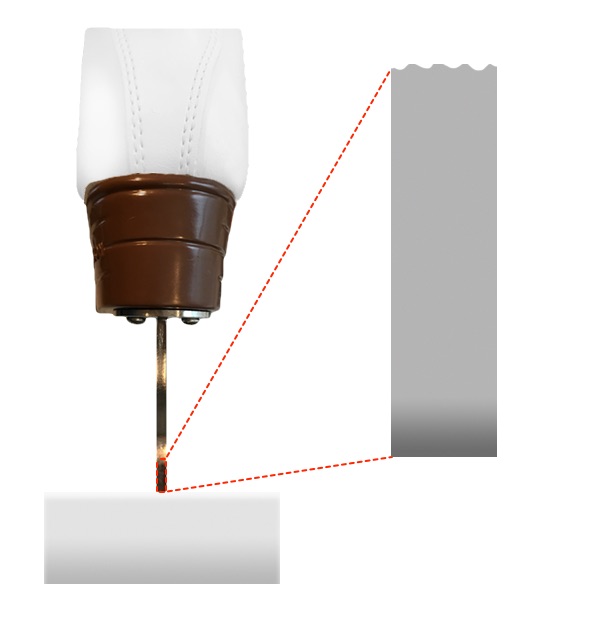
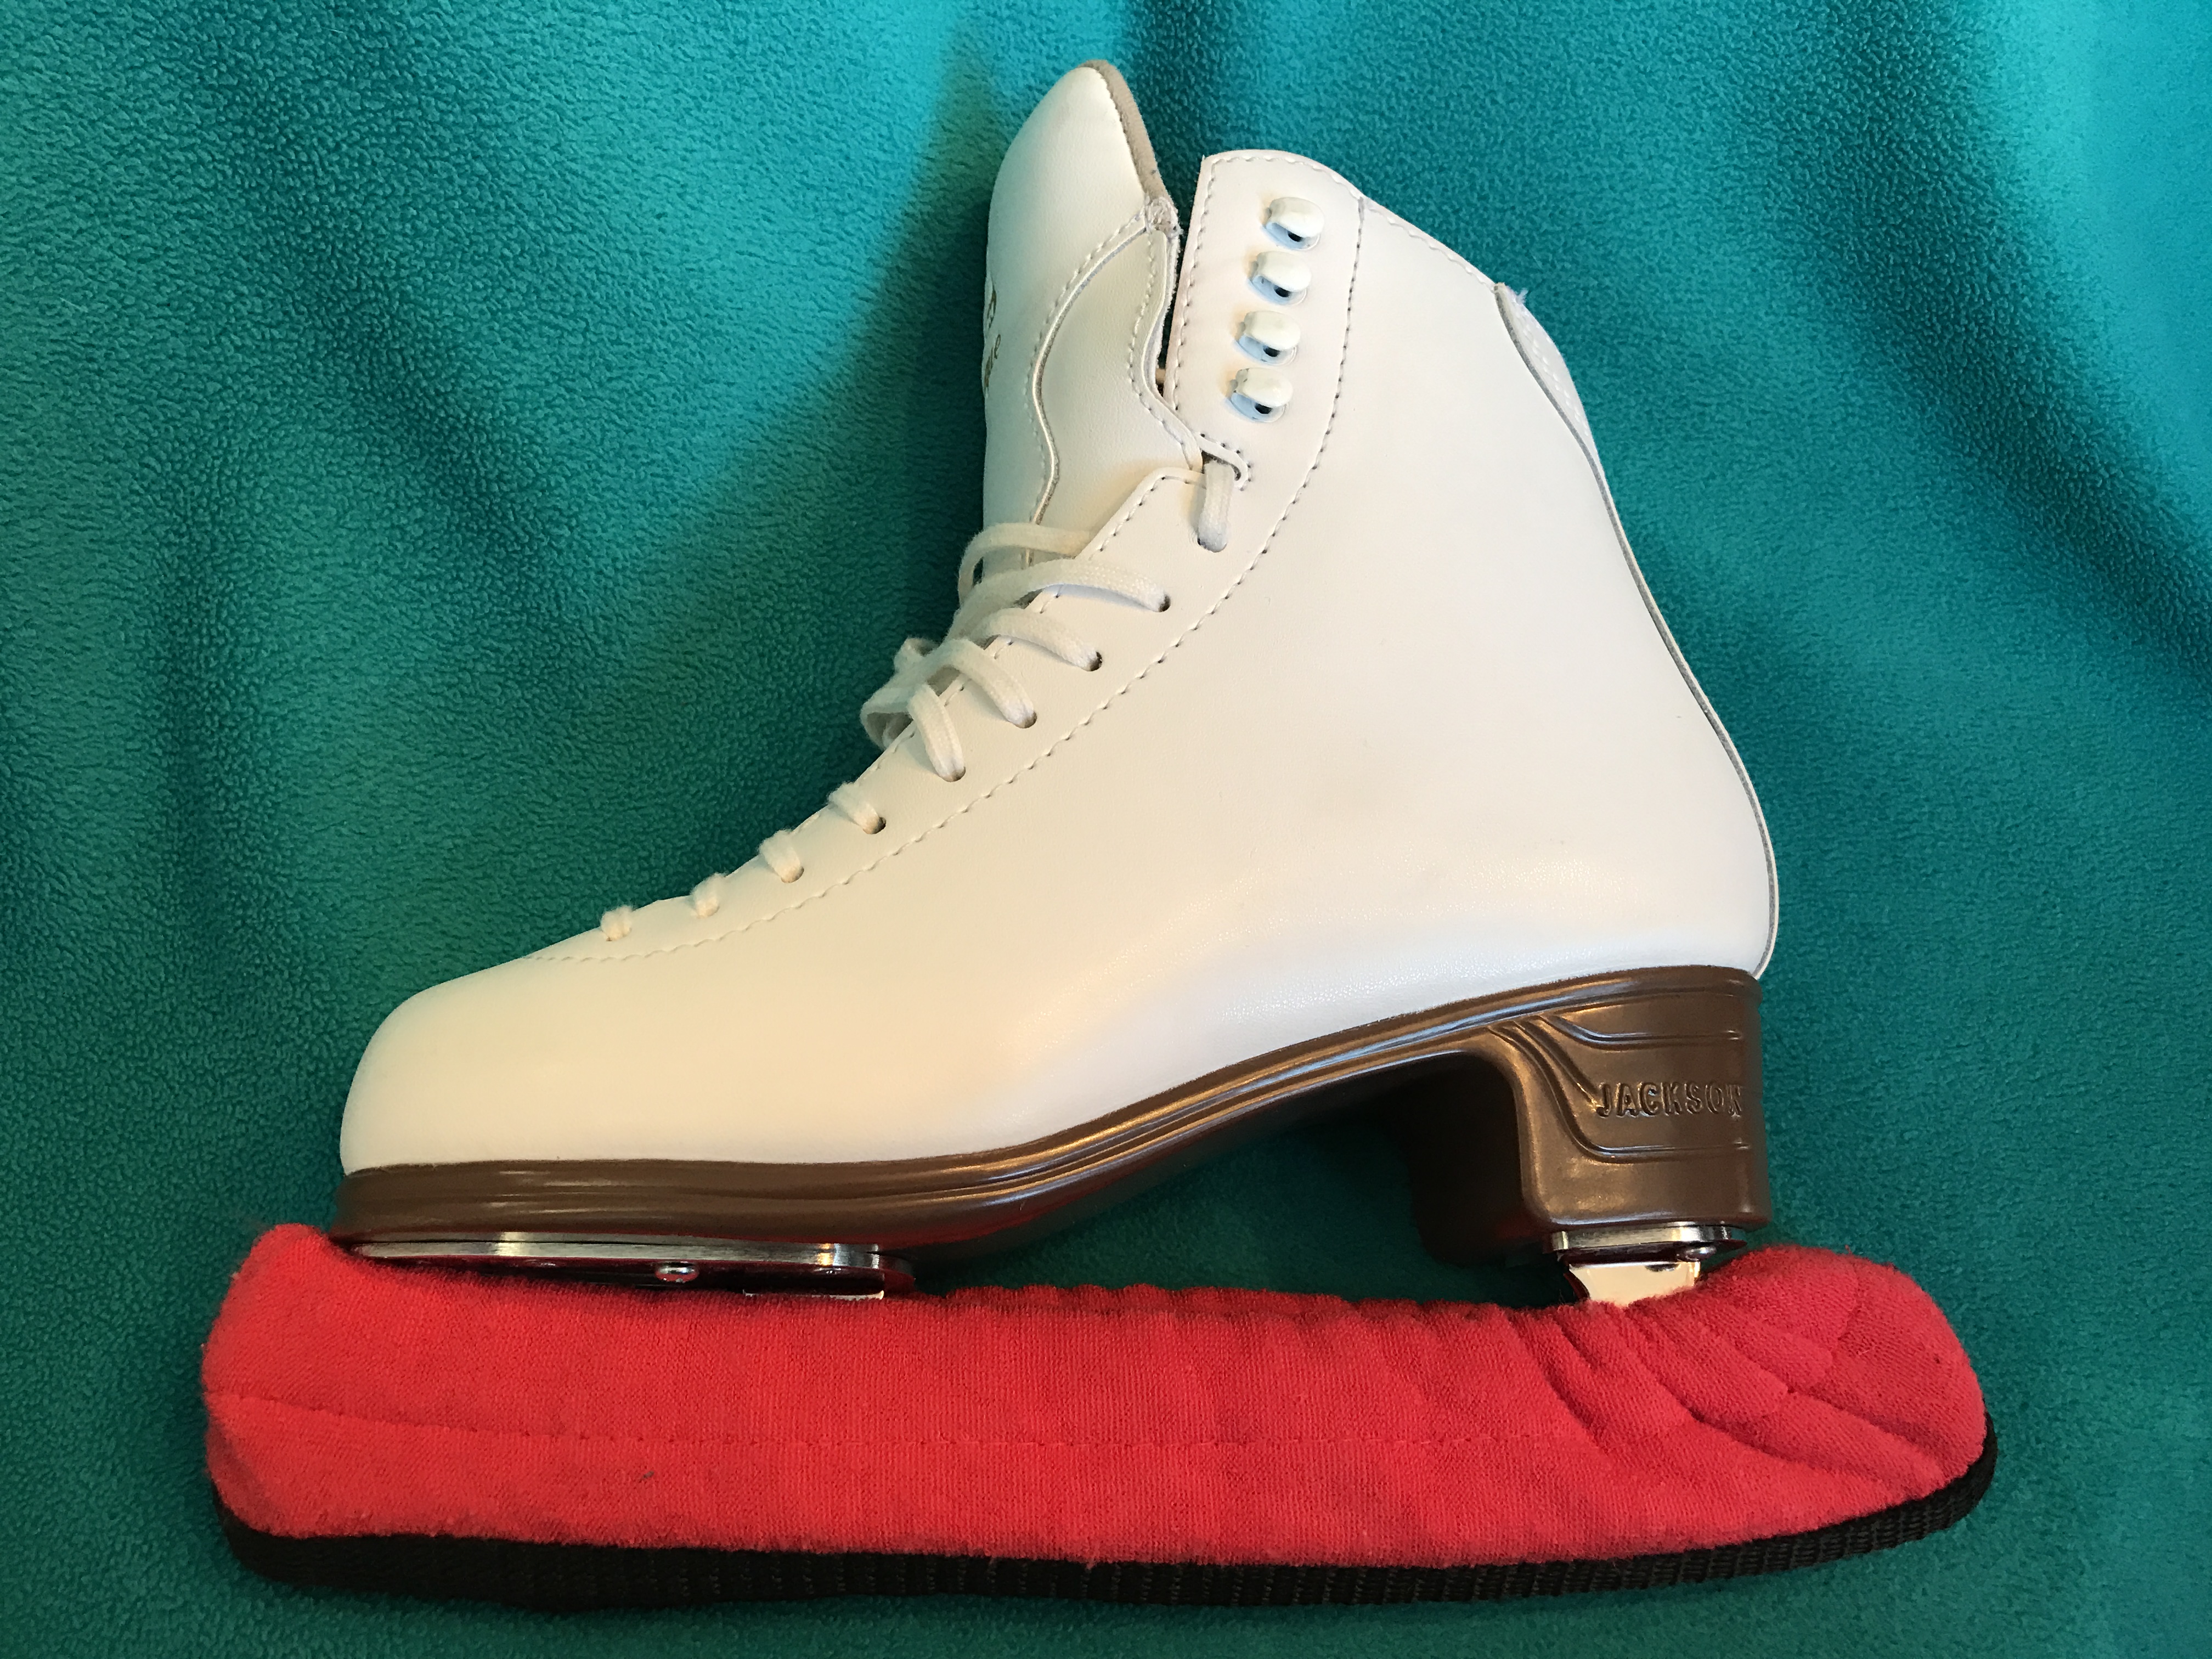
A soaker (also known as a blade cover) does exactly what it says on the tin; its soaks. Specifically, its job is to soak up moisture from the blade once the skate has been taken off, so that it doesn’t hang around and cause rusting (which shortens the blade’s life). You can see a red soaker on the blade of the skate in the picture above. They’re simple and thankfully they’re also very cheap.
How To Use Soakers
When your child finishes skating, they should wipe the blade and the boots (the soles in particular) down with a cloth or towel in order to remove as much moisture as possible. There’s more to this than might at first meet the eye, because the blade has just spent time pressed into ice, so it’s really quite cold by the time the boot comes off. Cold metal is like a magnet for moisture in the air, and consequently even if you dry the blades diligently, more moisture will inevitably accumulate on the cold metal surface of the blade, and if not removed will likely cause rusting.
Once the blade (including the mounting hardware, not just the sharp part) is as dry as possible, put on a soaker. That way if any moisture condenses on to the blade, the soaker will wick it away and let the blade stay dry. This is, therefore, how ice skates should be stored for transport after skating. Should soakers be removed? Well, some people say to leave them on until the next time the skates are used, and others say that once the skate has been inside for a while (i.e. has normalized the blade temperature with the interior), the soakers should be removed so that they themselves can dry. I suspect both are ok so long as the skates aren’t being left inside a moisture-holding sealed bag all the time. The skates need to be dry both inside and out, and if they are left with a damp soaker in a reasonably well-sealed bag, just as a used Gym/P.E. kit will start to mold (UK: mould) and go rank pretty quickly, you can bet that something similar will happen to your beautiful skates. See the page on bags for some examples of skate bags which can help in that regard.
It is of note that in order to minimize condensation on the blades, skates should be stored somewhere relative dry between uses; they shouldn’t be left in a garage or in the trunk (UK: boot) of a car.
How Much Are They?
Cheap, cheap, cheap (from about $6 upwards)! Or expensive. It just depends on your tastes. Here are some examples (click for links to Amazon):
For adults the soakers tend to be one size fits all, but some companies also offer a kids
size for smaller skates. It doesn’t matter whether you go for plain soakers or if you splash out on some crazy character blade covers; the point is, if you have skates and don’t have soakers, you need to buy some right now.
The post Soakers: Why Are They Necessary? appeared first on SkaterDad.com.
]]>Continue reading "Renting Skates versus Buying Skates"
The post Renting Skates versus Buying Skates appeared first on SkaterDad.com.
]]>
Renting Skates
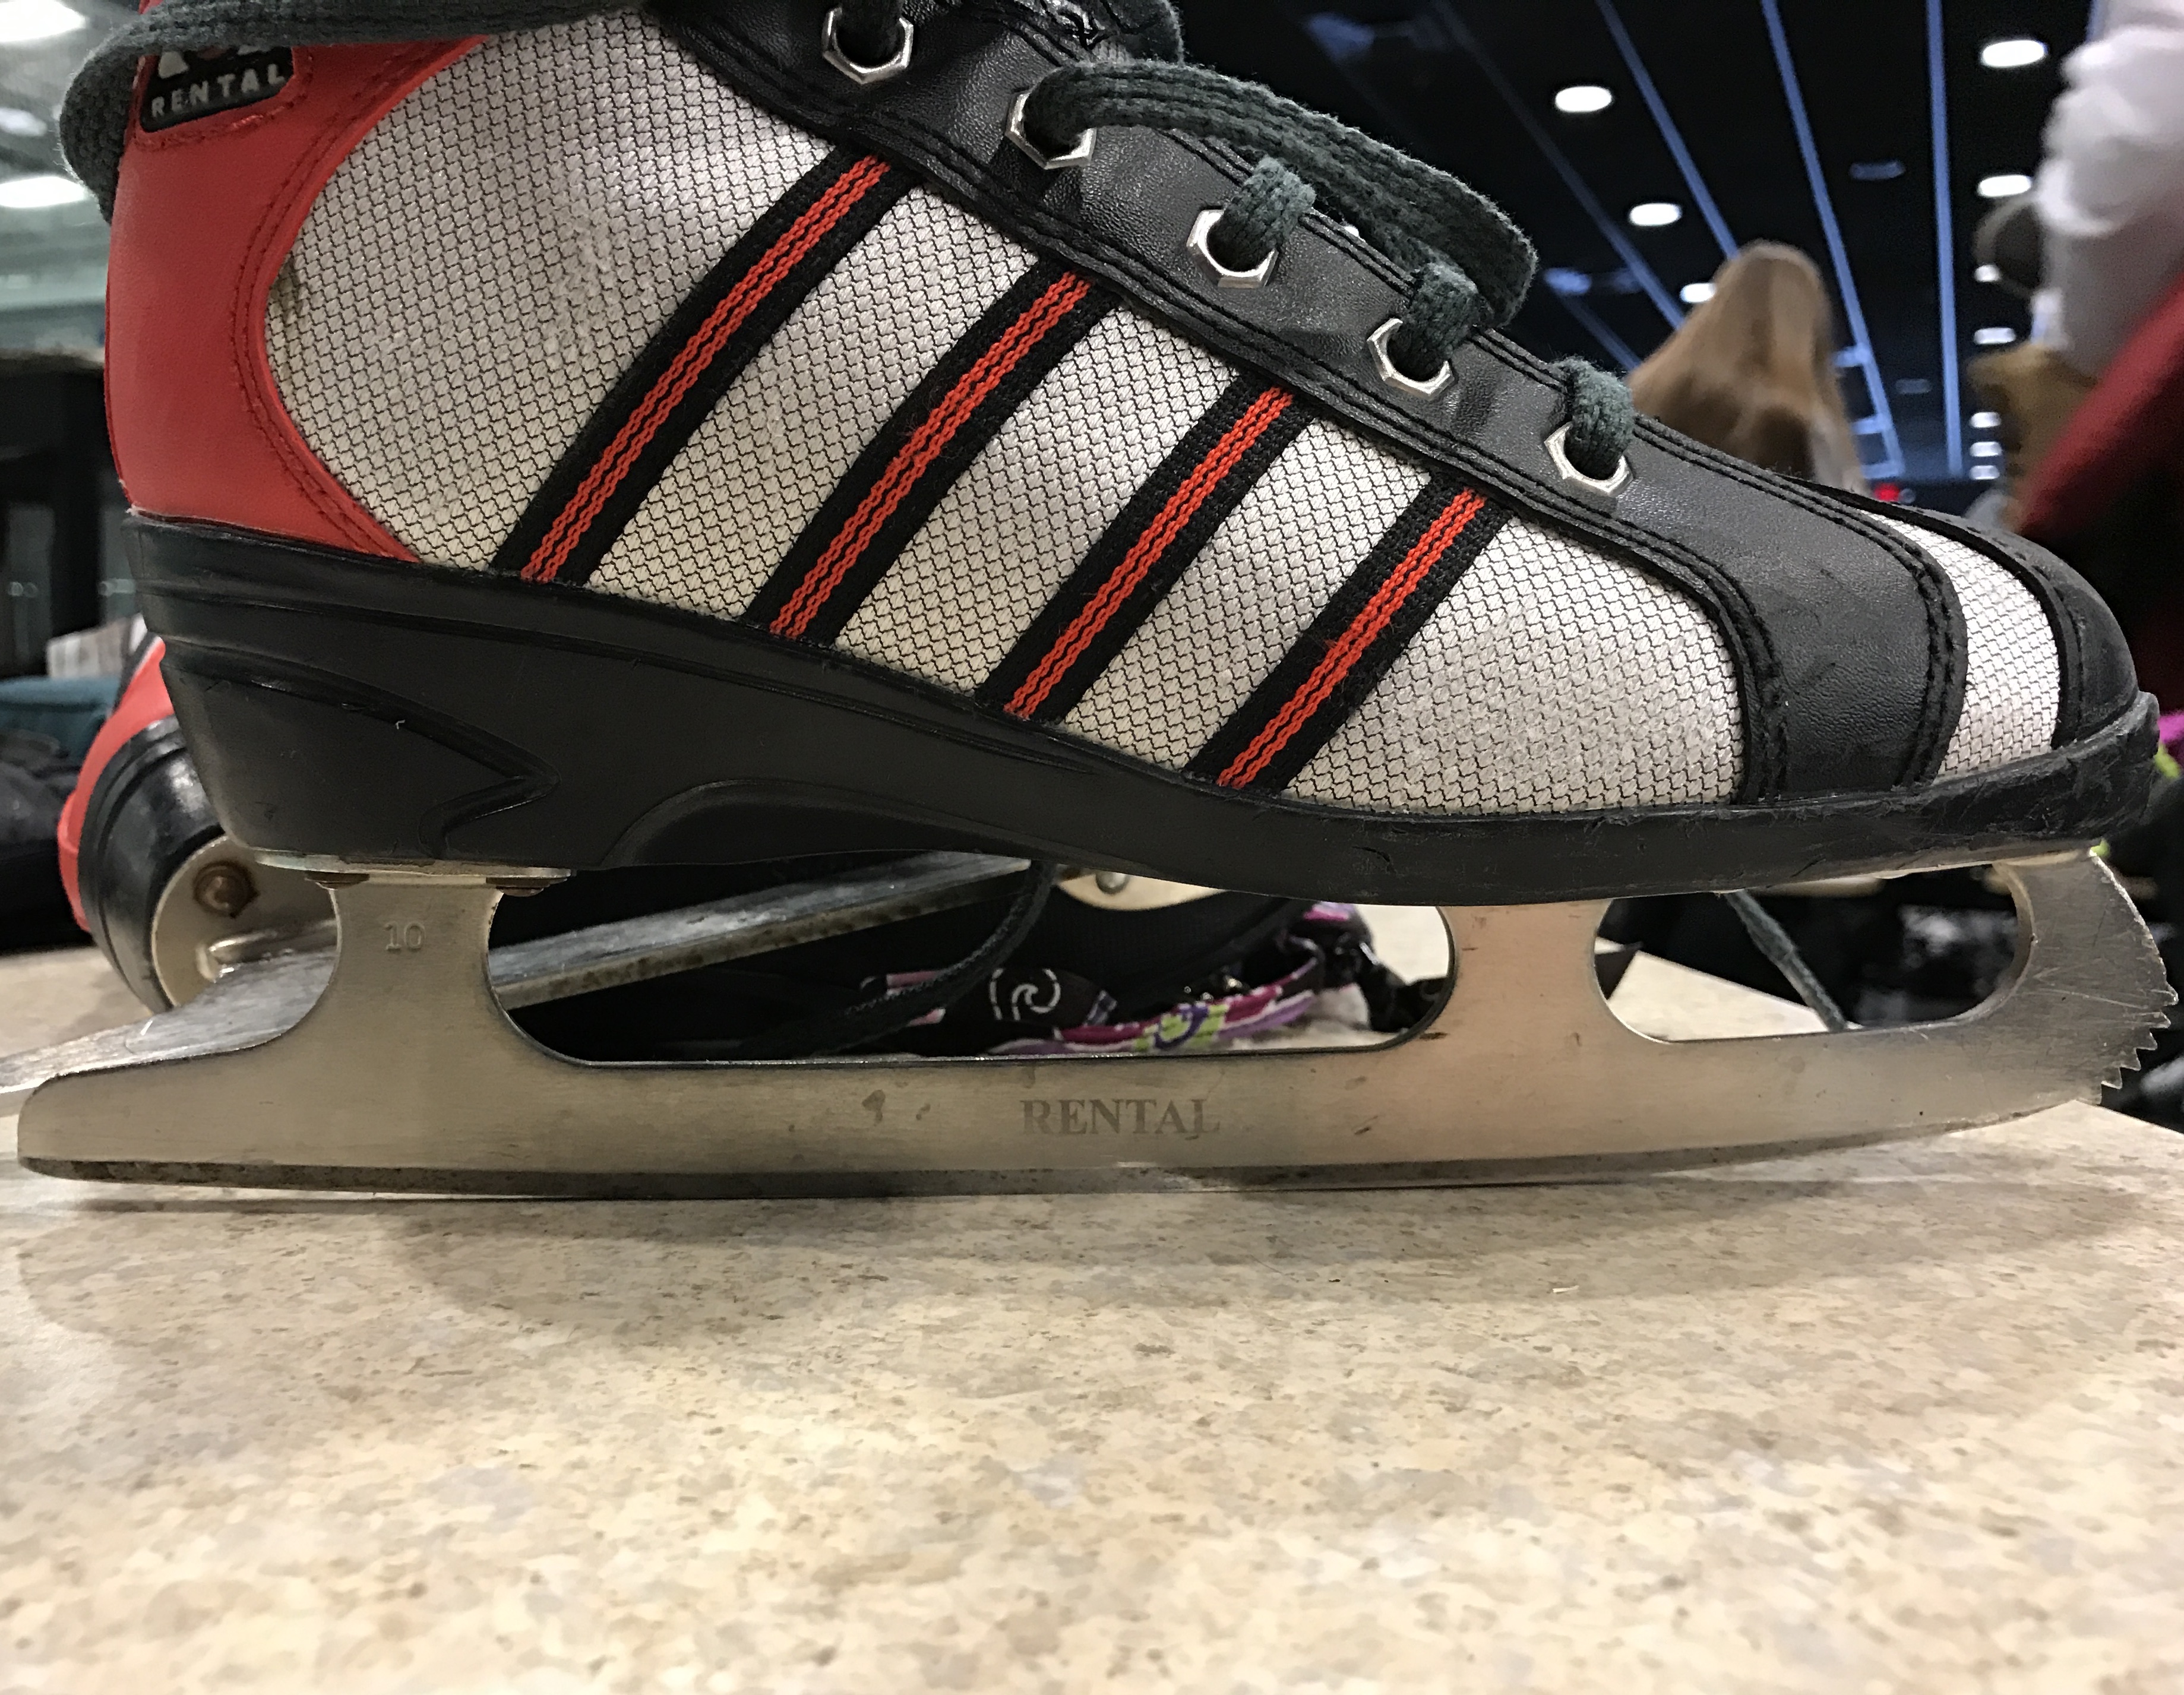
The summary is that rental skates suck. That’s not to say that you can’t have terrific fun wearing them, but they’re designed for casual skating only. They are shaped fit as many different foot shapes as possible, to accommodate the thick, warm socks that casual skaters might choose to wear to the ice rink, and to last a long time. They’re generally what are described as ‘soft skates’, which means they don’t have an awful lot of support (and are thus not safely usable for any kind of jumps and spins). I also don’t see the skate blades being dried off when rentals are returned, and the results are inevitable:
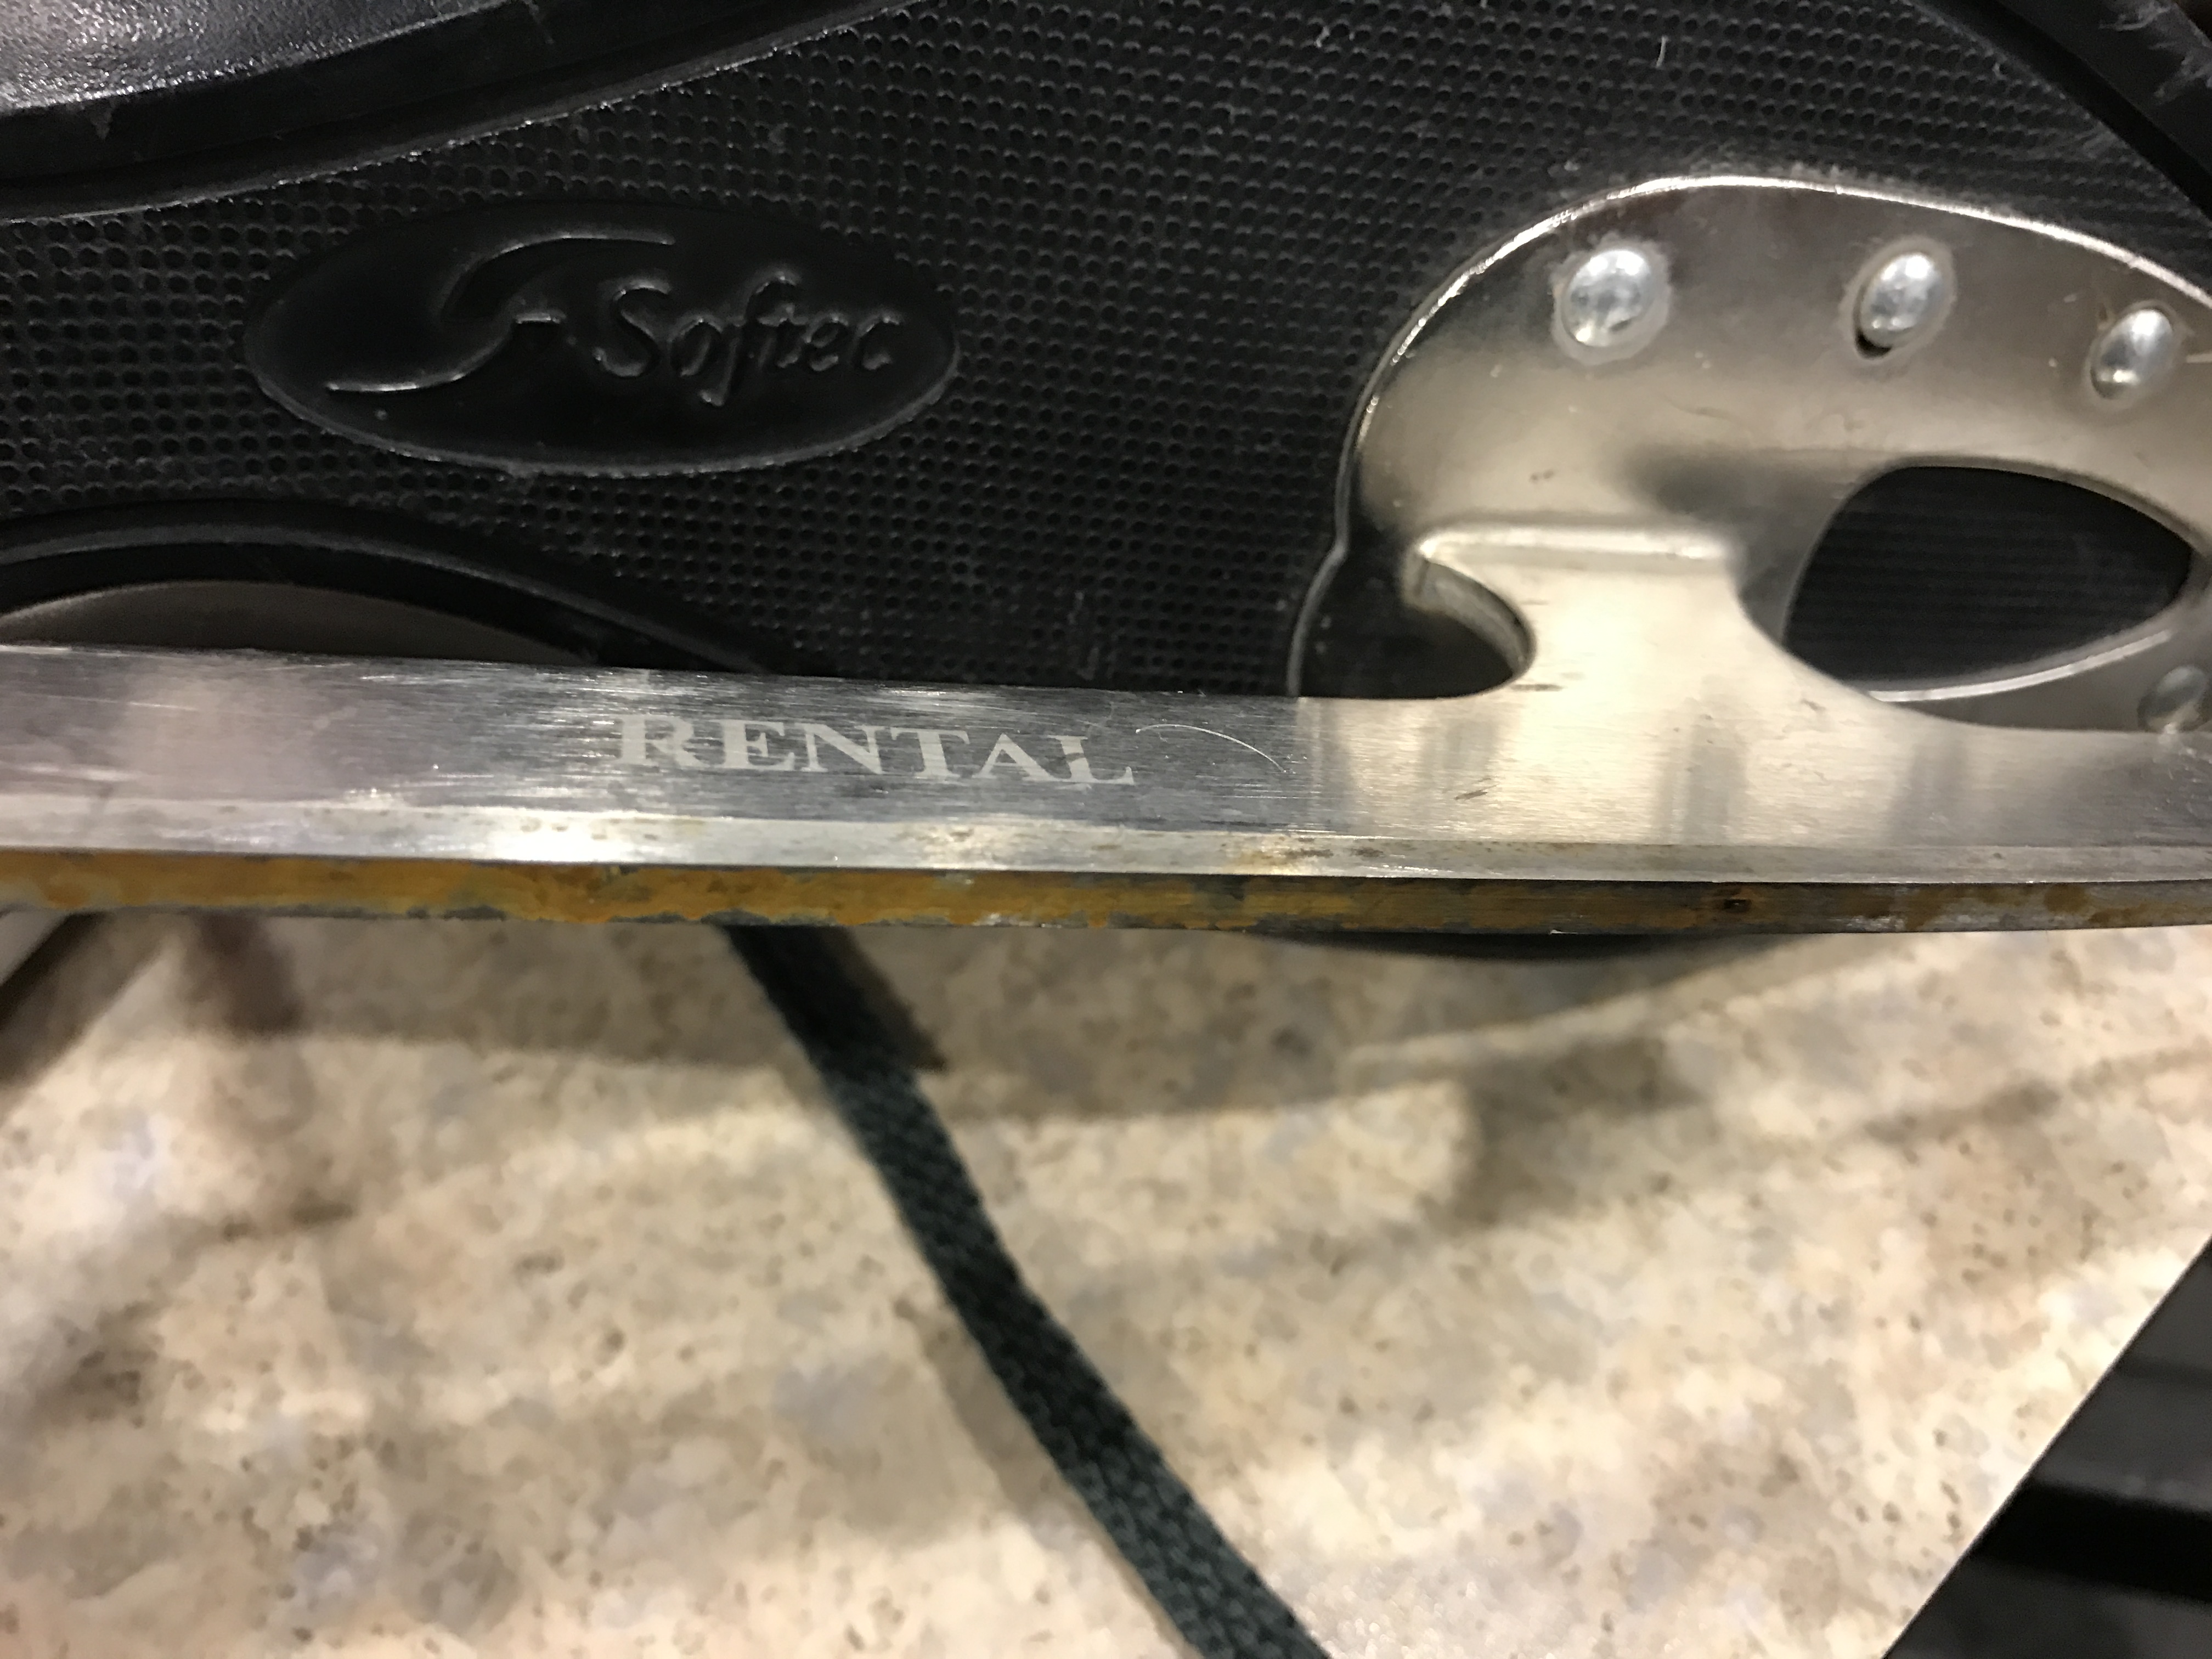
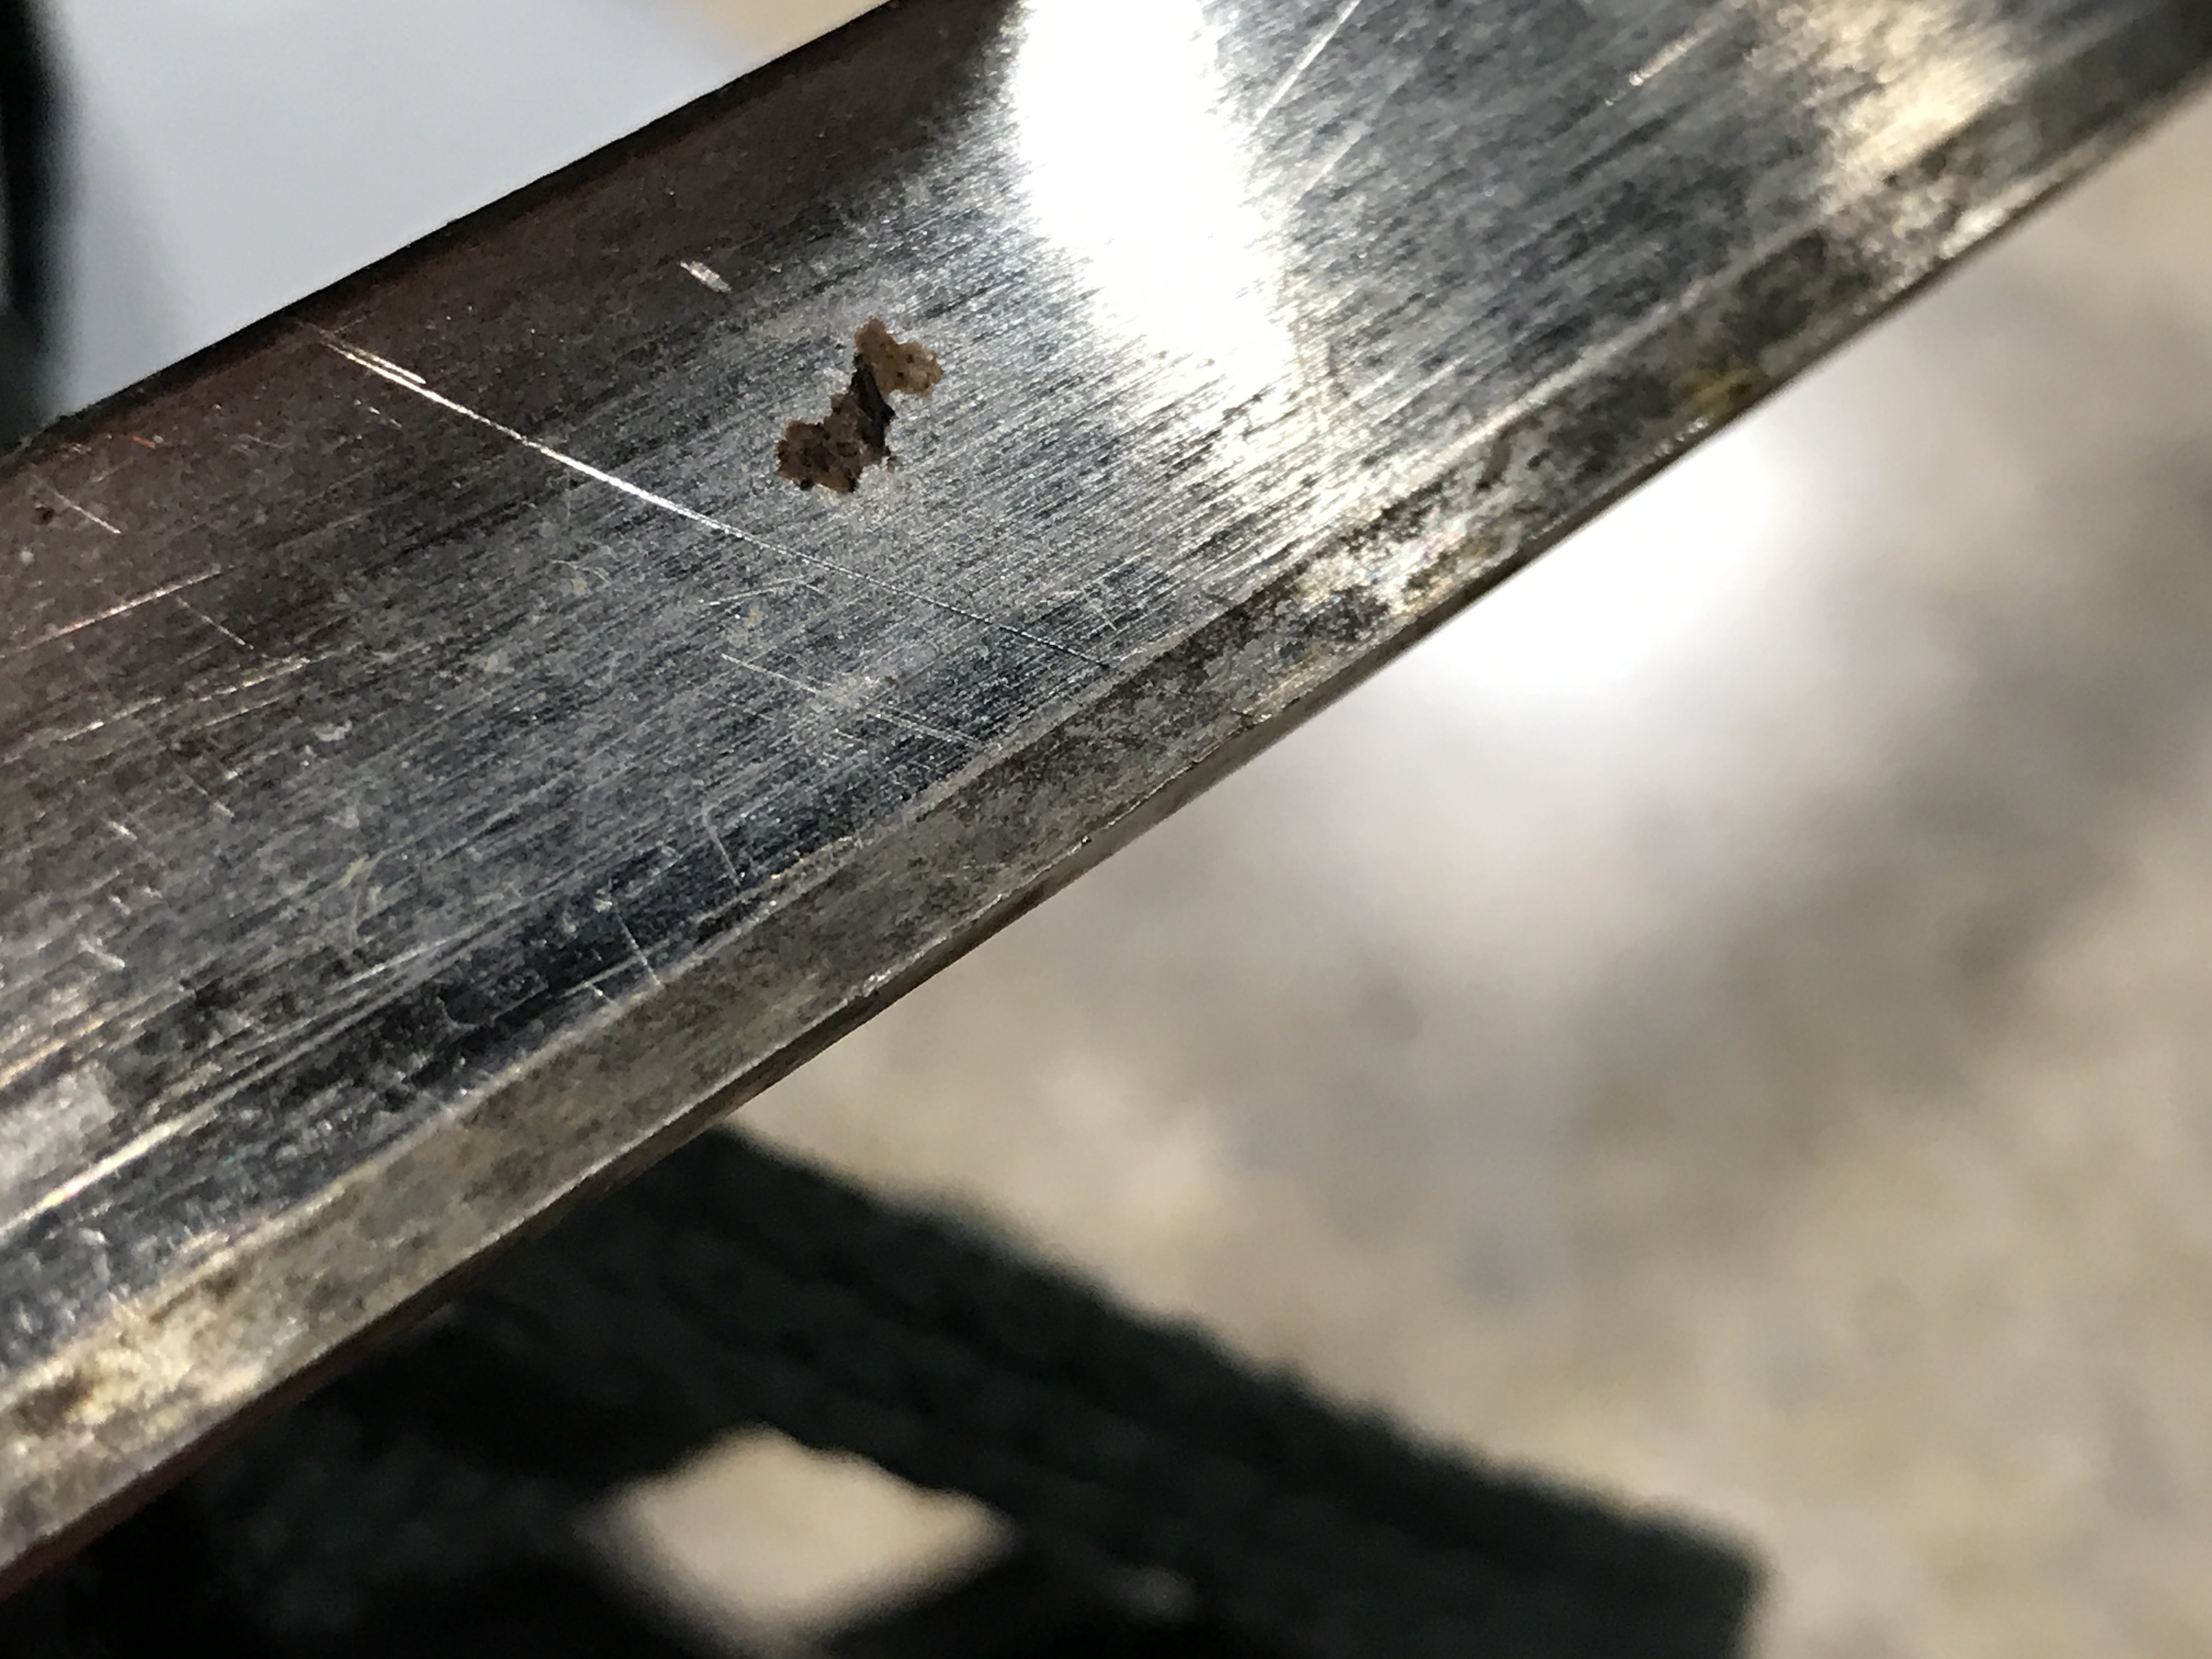
In this case, the state of the blades is less than stellar as well:
None of these attributes make rentals skates great for serious skating. However, when you or your child are starting out with skating, they are perfectly adequate. After all, who wants to drop money on brand new ice skates when there’s a chance that the child may not enjoy ice skating after all and will change their mind?
My policy was that when my children started following the Learn To Skate USA Basic 1-6 courses, I would not buy them skates at first. They started somewhere around February this year, and I spoke to their coaches to as them to advise me as to when they thought it would be helpful for my children to have their own skates. I also reckoned that this would give me maybe 3-6 months to find out whether they were engaged and enthusiastic before I made an investment. The kids did well using rental skates, and they were in good company; most of the other children in the lower Basic levels were also skating in rentals.
Buying Your Own Skates
Around the time where my oldest skater at the time (12 years old) got to somewhere around Basic 4, their teacher approached me as promised and said that this would be a good time (if possible) to consider getting them skates. Being reasonably well built and getting heavier and taller by the day, it was particularly important to find skates that would have reasonably firm ankle support.
The subject of which skates to buy is such a huge one that I wouldn’t even dare to start advising to go for one brand over another because it’s a very personal choice both in terms of budget, features and options. I will comment that most of the skaters I see at this level end up with Jackson or Riedell skates, but that may be a regional thing as much as anything else.
For the purposes of transparency, I am happy to share that I ended up selecting Jackson Ultima Freestyle/Aspire figure skates for my son.
While I was emptying out my wallet for one child it seemed rude not to finish the job and also get younger sister (aged 9) her own skates as well, as she was in Basic 3 and learning quickly. She ended up with the slightly cheaper Jackson Ultimate Classique figure skates which are in many ways similar to the Freestyle.
There is nothing quite like seeing the pride with which my children look after their skates. They are keen to restore the beautiful high-shine finish on the blades after they finish skating, which is just great. More importantly, after a lesson of tripping (during which they discovered what it is like to have skates whose blades actually cut into the ice!), they found their ice feet again, so to speak, and started improving rapidly from there. The teachers immediately commented on the difference in their performance with the new skates, which was also reassuring.
To summarize, if the skaters are serious and plan to keep taking lessons, budget for their own skates sooner rather than later.
How Much Should I Spend?
This is the impossible question. The common wisdom appears to be as much as you are comfortable spending.
With ice skates, you really do get what you pay for to a large extent. Cheaper (e.g. sub-$100) skates of the kind often found in large sporting goods retailers and department stores are usually considered to be a false economy; the skate will be functional for sure, but often lacks support and does not have a blade capable of handling the jumps and spins that will be asked of it down the line. No problem to use these for recreational skating, but I hear over and over again that they won’t cut it for a developing skater.
Are Used Skates Ok?
In theory, yes of course! Like buying a used car, it’s just a question of knowing what you’re buying, what to look out for, how much sharpening life is left in the blades, and whether the price is fair. It’s also worth considering though that when skates are purchased new, over time they stretch and shape themselves to the owner’s feet. When buying second hand, the skates are already shaped to somebody else’s feet; whether that’s a problem may depend how different your feet are to that person, and how much stretching took place. It might not matter, but it’s something to consider. Overall, I am not in a position to advise on these matters, so I would always use somebody who does know about buying used skates as your ally. Coaches at your local ice rink will likely know of people selling skates (perhaps their own students) and can often advise on what will work.
Why Buy?
Have you even been ten-pin bowling before? The house balls are generally pretty chipped, the finger holes never quite fit the fingers properly and are a bit more slippery than is helpful, and the weight is always too heavy or too light. Basically, they’re effective at hitting the pins and it’s possible to do well with them if you can work with their compromises, yet league bowlers typically do not use the house balls; they buy their own. Why? Because then they can get a ball with a more reactive surface; the finger holes are custom drilled to fit the hand size perfectly; finger inserts can be added to add more grip and improve comfort to the holes; the weight can be much more closely aligned with your needs.
It’s the same with ice skates. You can use the rental skates for a while without major issues, but eventually you’ll get to the point where they are holding back your progress on the ice. Eventually, you will have to buy skates or your child will be repeatedly frustrated with their inability to perform the moves requested of them by their coaches.
To coin a phrase, buying your child their own skates will—quite literally—give them the edge they need to keep getting better.
The post Renting Skates versus Buying Skates appeared first on SkaterDad.com.
]]>